Not joined yet? Register for free and enjoy features such as alerts, private messaging and viewing latest posts and topics.
1967 Ford Mustang
-
buzyg
- Legend

- Posts: 26542
- Joined: Fri May 20, 2011 6:11 pm
- Location: Cornwall
-
OnlineMr Tidy
- Legend
- Posts: 23852
- Joined: Wed Jul 02, 2014 12:18 pm
- Location: North West Surrey
1967 Ford Mustang
Your Mustang seems to just be getting better and better OP. 
EFI sounds like a great modification, and your wheels look really good (well the 7J ones do)!
A few forum members in my area use TWG Automotive to look after our BMWs, and Will (the principal) has a lovely Mustang coupe (I think it may be a 66 though).
There must be something about BMWs and Mustangs that appeal to the same people - I'd certainly love a new V8!
Coupes because stunning!
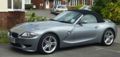
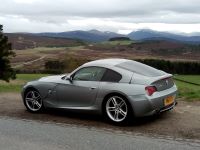
Current - Silver Grey MC, Imola Red heated Nappa & carbon trim. Aeros, H & R Coil-overs, 224s, OE Strut brace, Nav, cup-holders, DSP Hi-Fi, pdc, cruise, MFSW, no CDV! E90 330i daily
Gone - Montego Blue
Gone - Ruby Black
Current - Silver Grey MC, Imola Red heated Nappa & carbon trim. Aeros, H & R Coil-overs, 224s, OE Strut brace, Nav, cup-holders, DSP Hi-Fi, pdc, cruise, MFSW, no CDV! E90 330i daily
Gone - Montego Blue
Gone - Ruby Black
-
Richard!

- Member

- Posts: 209
- Joined: Fri Jul 03, 2009 10:27 pm
1967 Ford Mustang
Yeah 8.5J really did look very silly. I’m trying to keep it looking somewhat classic.
There must be a bmw - mustang synergy... I’m sure it’s not the only one though
There must be a bmw - mustang synergy... I’m sure it’s not the only one though
-
Paulr

- Member

- Posts: 844
- Joined: Sun Nov 06, 2016 3:46 pm
- Location: Tunbridge Wells
1967 Ford Mustang
Those wheels look great! Good mods as well, more reliable modern kit but not affecting the look or spirit of the car. Braver man than me with that carb. Whenever I stripped any carbs they never worked very well again!
If you try and take a cat apart the first thing you have is a non working cat.
-
mcbeee

- Lifer

- Posts: 3309
- Joined: Tue Nov 10, 2009 3:13 pm
- Location: Chestermere, Alberta
1967 Ford Mustang
If you care about the value of the car, don’t change anything from original. Changing things back to original is good, If you just want drive it and not worry then carry on .... 
Sold the Z4 M Roadster and a 911 Carrera S now I have a 2021 Z4 3.0i

-
Richard!
- Member
- Posts: 209
- Joined: Fri Jul 03, 2009 10:27 pm
1967 Ford Mustang
As mentioned before I’m after a car I can use anytime with no fuss, doesn’t overheat in the summer, stops quickly and goes. I don’t want a museum piece or an investment. It should be fun
In the unlikely event I sell the car I am keeping all the old parts, who ever buys it can have an all original car if that’s what they prefer.
In the unlikely event I sell the car I am keeping all the old parts, who ever buys it can have an all original car if that’s what they prefer.
-
Richard!
- Member
- Posts: 209
- Joined: Fri Jul 03, 2009 10:27 pm
1967 Ford Mustang
Holley Dual Sync
More pictures here: www.mustang67.co.uk/holley-dual-sync/
To finish up the EFI install a Holley Dual Sync distributor was added. Its pretty much plug and play with the Holley Sniper.
The wiring had been prepared when installing the sniper EFI. Only had to remove coil input wire from the ignition coil. Then connect coil driver in its place.
In order to align the Dual Sync distributor the crank needed to be rotated to 50 degrees before top dead centre (on compression stroke). My harmonic balancer only had 3,6,9,12 degrees marked out. The balancer is 6. 375″ diameter so to find 50 degrees used a simple equation to mark up some tape with appropriate positions. Also added 6 & 12 degrees to verify the size. ( had marked up for 7″ & 8″ balancers as I didn’t know how big the balancer was )


Once the crank was positioned correctly set the distributor was dropped in. All went smoothly until I tried to connect up the spark plug wire.
A bit of a discovery for me, the spark plug wires from the original setup didn’t fit on the new distributor, doh! I didn’t know there were different types. Original was stock style plug and the new one is HEI (high energy ignition). So had to order new spark plug wires.


New spark plug wires; the set is really nice and has spark plug number on each wire which is handy. Only had to cut the ignition coil wire to length and attach the correct connector. Really like the new colour suits the engine.
I rotated the distributor so the number one spark plug position was at the rear. This lines up better with the spark plug wires lengths.


Final setup was quite simple, set the Holley Sniper to link to the Holley Dual Sync. Then set the timing to a static number. I chose 12 degrees as there is a marker on the balancer at that point. Initially, the timing was checked on the starter with the fuel pump disabled. After that was confirmed to be ok the fuel pump was enabled and the engine started. It started right away.
Next stage was to set the static timing with the engine running and verify the timing position on the balancer. After that, the engine had to be revved up to verify that the timing stays in place at higher RPM. The engine would retard a little with higher RPM. So had to increase the inductive delay in the settings to compensate. With a few iterations got the inductive delay just right and it stayed on the 12 degrees static timing at any RPM.
It’s so much smoother now the new distributor. I’m looking forward to some better weather so I can go out for a drive.
Audio Samples
Took an audio recording before and after the distributor install, click below to hear the difference. Each recording starts with exhaust flaps closed, then open.
Samples: www.mustang67.co.uk/holley-dual-sync/#audio
More pictures here: www.mustang67.co.uk/holley-dual-sync/
To finish up the EFI install a Holley Dual Sync distributor was added. Its pretty much plug and play with the Holley Sniper.
The wiring had been prepared when installing the sniper EFI. Only had to remove coil input wire from the ignition coil. Then connect coil driver in its place.
In order to align the Dual Sync distributor the crank needed to be rotated to 50 degrees before top dead centre (on compression stroke). My harmonic balancer only had 3,6,9,12 degrees marked out. The balancer is 6. 375″ diameter so to find 50 degrees used a simple equation to mark up some tape with appropriate positions. Also added 6 & 12 degrees to verify the size. ( had marked up for 7″ & 8″ balancers as I didn’t know how big the balancer was )
Once the crank was positioned correctly set the distributor was dropped in. All went smoothly until I tried to connect up the spark plug wire.
A bit of a discovery for me, the spark plug wires from the original setup didn’t fit on the new distributor, doh! I didn’t know there were different types. Original was stock style plug and the new one is HEI (high energy ignition). So had to order new spark plug wires.
New spark plug wires; the set is really nice and has spark plug number on each wire which is handy. Only had to cut the ignition coil wire to length and attach the correct connector. Really like the new colour suits the engine.
I rotated the distributor so the number one spark plug position was at the rear. This lines up better with the spark plug wires lengths.
Final setup was quite simple, set the Holley Sniper to link to the Holley Dual Sync. Then set the timing to a static number. I chose 12 degrees as there is a marker on the balancer at that point. Initially, the timing was checked on the starter with the fuel pump disabled. After that was confirmed to be ok the fuel pump was enabled and the engine started. It started right away.
Next stage was to set the static timing with the engine running and verify the timing position on the balancer. After that, the engine had to be revved up to verify that the timing stays in place at higher RPM. The engine would retard a little with higher RPM. So had to increase the inductive delay in the settings to compensate. With a few iterations got the inductive delay just right and it stayed on the 12 degrees static timing at any RPM.
It’s so much smoother now the new distributor. I’m looking forward to some better weather so I can go out for a drive.
Audio Samples
Took an audio recording before and after the distributor install, click below to hear the difference. Each recording starts with exhaust flaps closed, then open.
Samples: www.mustang67.co.uk/holley-dual-sync/#audio
-
Steve84N
- Senior Member

- Posts: 1828
- Joined: Tue Jul 21, 2015 1:00 pm
1967 Ford Mustang
Sounds like it's running so much better and impressive home mechanics!
C63 AMG Estate 6208cc
-
Richard!
- Member
- Posts: 209
- Joined: Fri Jul 03, 2009 10:27 pm
1967 Ford Mustang
Thanks Will get everything sorted in time. Next big thing will be the brakes. Going to be changing the front to disc + servo assistance. Will be nice to have predictable braking.
While its so cold outside made a small start on the audio upgrades.
Head Unit Upgrade
More photos here
The car came with single din Kenwood head unit. It didn’t really suit the car. I really wanted to change back to a classic style radio. The problem was that when the single din head unit was installed the original mounting holes were cut out. The optimal solution would have been to replace the console with a new unit. This wasn’t really feasible and was not able to find second-hand one at the time.

So the solution was to get a radio bezel for a non-console car then ‘shape’ the console to fit. To do this the console was removed and cut to fit under the new bezel. The new head unit is a Custom Autosound USA-630. It looks vintage but has connections for USB/iPod, remote wire for amps etc.


The finished article


That’s the start of the audio upgrades.
While its so cold outside made a small start on the audio upgrades.
Head Unit Upgrade
More photos here
The car came with single din Kenwood head unit. It didn’t really suit the car. I really wanted to change back to a classic style radio. The problem was that when the single din head unit was installed the original mounting holes were cut out. The optimal solution would have been to replace the console with a new unit. This wasn’t really feasible and was not able to find second-hand one at the time.
So the solution was to get a radio bezel for a non-console car then ‘shape’ the console to fit. To do this the console was removed and cut to fit under the new bezel. The new head unit is a Custom Autosound USA-630. It looks vintage but has connections for USB/iPod, remote wire for amps etc.
The finished article
That’s the start of the audio upgrades.
-
Richard!
- Member
- Posts: 209
- Joined: Fri Jul 03, 2009 10:27 pm
1967 Ford Mustang
Brake Upgrade
The time came to upgrade the brakes. Had enough of being on edge while driving anticipating when less cautious drivers plan to pull out in front or cut me up :/
Started by removing the old master cylinder. All of the pipe fittings were so tight it was near impossible to remove without damaging the fittings. The old master cylinder was leaky, so had to clean up the firewall to remove light surface rust and greasy mess.
In order to fit the brake servo had to drill out a few of the existing mounting threads and increase the size of the centre hole to allow the servo to pass through.

The brake pedal was challenging to install. Had to lay upside down under the dash, could have done with extra joints in my arms to get in there. The pedal needed to be modified so it would not foul on the top of the pedal box. Ground a little of the top edge of the pedal. Would have been nice if I’d have spotted that before it was installed for the first time :/
One of the bolts on the back of the booster was a bit long, had to cut it. The boosters valve rod had to be shortened so the brake light would only stay on when the pedal is pressed. I guess these parts are generic and so need to modification to particular cars.

With a new proportioning valve the brake lines need to be adapted to fit. Both front lines were extended, and the rear line needed a larger fitting. The kit came with steel pipes to connect the master cylinder to the proportioning valve. Unfortunately, they did not fit well and would not seal. So had to remake those lines so they would fit and seal.
The fluid warning sensor connector was soldered on to the loom replacing the original connector (which was not compatible with the original distribution block – useful right)
The master cylinder was bench bled and everything fitted.


Next up was installing the brake discs. The drums came off really easily, 4 nuts on the back and the main wheel nut. Had trouble unbolting the brake pipes that connect to the drums, so just cut them. Was able to remove the pipes by clamping a brake line spanner with a mole wrench. Then using a socket with an impact wrench on the other side. After a fair bit of time, they come loose.
The Wilwood kit was fantastic, everything fit together really well. The rotors, hubs, nuts etc all need to be assembled. The brake lines to the callipers were spaced with a bit rubber hose and a zip tie. This will prevent damage when turning the wheels.


All done, what a transformation. So much more control on the brakes, a massive amount of brake force. The car feels so much better to drive.


More photos here: http://www.mustang67.co.uk/brake-upgrade/
Export Brace
When I bought the car it came with an export brace. It was not fitted to the car. The issue was that the front struts were too close together by about 10mm. I guess that's why it wasn't fitted.
By lifting the car at different points + lots of levering I was able to get it to fit!
Its a huge improvement to the feel of the car. When going around a corner it feels far more stable. Much less wobbly

More photos here: http://www.mustang67.co.uk/export-brace/
The time came to upgrade the brakes. Had enough of being on edge while driving anticipating when less cautious drivers plan to pull out in front or cut me up :/
Started by removing the old master cylinder. All of the pipe fittings were so tight it was near impossible to remove without damaging the fittings. The old master cylinder was leaky, so had to clean up the firewall to remove light surface rust and greasy mess.
In order to fit the brake servo had to drill out a few of the existing mounting threads and increase the size of the centre hole to allow the servo to pass through.
The brake pedal was challenging to install. Had to lay upside down under the dash, could have done with extra joints in my arms to get in there. The pedal needed to be modified so it would not foul on the top of the pedal box. Ground a little of the top edge of the pedal. Would have been nice if I’d have spotted that before it was installed for the first time :/
One of the bolts on the back of the booster was a bit long, had to cut it. The boosters valve rod had to be shortened so the brake light would only stay on when the pedal is pressed. I guess these parts are generic and so need to modification to particular cars.
With a new proportioning valve the brake lines need to be adapted to fit. Both front lines were extended, and the rear line needed a larger fitting. The kit came with steel pipes to connect the master cylinder to the proportioning valve. Unfortunately, they did not fit well and would not seal. So had to remake those lines so they would fit and seal.
The fluid warning sensor connector was soldered on to the loom replacing the original connector (which was not compatible with the original distribution block – useful right)
The master cylinder was bench bled and everything fitted.
Next up was installing the brake discs. The drums came off really easily, 4 nuts on the back and the main wheel nut. Had trouble unbolting the brake pipes that connect to the drums, so just cut them. Was able to remove the pipes by clamping a brake line spanner with a mole wrench. Then using a socket with an impact wrench on the other side. After a fair bit of time, they come loose.
The Wilwood kit was fantastic, everything fit together really well. The rotors, hubs, nuts etc all need to be assembled. The brake lines to the callipers were spaced with a bit rubber hose and a zip tie. This will prevent damage when turning the wheels.
All done, what a transformation. So much more control on the brakes, a massive amount of brake force. The car feels so much better to drive.
More photos here: http://www.mustang67.co.uk/brake-upgrade/
Export Brace
When I bought the car it came with an export brace. It was not fitted to the car. The issue was that the front struts were too close together by about 10mm. I guess that's why it wasn't fitted.
By lifting the car at different points + lots of levering I was able to get it to fit!
Its a huge improvement to the feel of the car. When going around a corner it feels far more stable. Much less wobbly
More photos here: http://www.mustang67.co.uk/export-brace/
-
Steve84N
- Senior Member
- Posts: 1828
- Joined: Tue Jul 21, 2015 1:00 pm
1967 Ford Mustang
I'd say both things were well worth the effort, both visually and more importantly functionally.
Well done.
Well done.
C63 AMG Estate 6208cc
-
Richard!
- Member
- Posts: 209
- Joined: Fri Jul 03, 2009 10:27 pm
1967 Ford Mustang
Thanks
It really has transformed the feel of the car. Far more confidence driving it. Before the changes, I was always a bit on edge driving it. Never being quite sure I'd be able to stop quick enough is not fun. Also not knowing if it was going to dive left or right while slowing. Not great for the nerves.
It really has transformed the feel of the car. Far more confidence driving it. Before the changes, I was always a bit on edge driving it. Never being quite sure I'd be able to stop quick enough is not fun. Also not knowing if it was going to dive left or right while slowing. Not great for the nerves.
-
Gazza51
- Member
- Posts: 302
- Joined: Fri Dec 21, 2012 11:03 am
- Location: Romford Essex
1967 Ford Mustang
Welcome to the Mustang fraternity, I’ve got five 

Current - Z4 MC, M3 CSL, S54 Z3MR, Z1.
-
buzyg
- Legend
- Posts: 26542
- Joined: Fri May 20, 2011 6:11 pm
- Location: Cornwall
1967 Ford Mustang
Some serious work gone in since I last caught up on this thread. Looking very cool.