
So I took the plunge and so glad I did !
45 mins from.start to finish
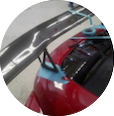
I decided easier to pull out entire surround and the gearstick, allows my ocd a chance to clean around it also
So gently lift it all up, get a small flat screwdriver and use it to lift the back up on connectors
1 on hazards And locking, I unclipped to clean this also 2 push springs and push through to release
1 on knob for light up
Then with not that much effort, simply pull upward on knob
The gator simply tears like rice paper
So cut it off and ensure all old leather off plastic ring
I used a blade to scrape off excess and old glue
Then sand paper the rest off as want a clean surface
Measure the length of old gator to where it meets the top of plastic ring
M5 one simply unclip the staples
I gently pulled the leather off the plastic ring doing so from base so as not to stretch inner leather
Now, the top of the ring will have left a nice line on the m5 leather
I worked this out to be the line that I need to line up with the base of the original ring
But made sure I cut the plastic to allow a small divot to accommodate the seams as face forward now
Then simply pulled the gator to said line and sat in and clothes pegged one side of the front
Then contact adhesived the other side
Pegged glued side
Repeated around the whole ring making sure line was on bottom and excess folded over
Left for 20 mins upside down and in box once made sure by hanging upside down that it's all level and hangs in centre
Then unclipped
Ran a new blade just below bottom edge and removed excess leather to outside edge as won't fit otherwise
Then snapped it into console centre
In car,
Pushed knob down then a gentle bump to set
Connected the 2 clips up
Switch lights on to check
Then snapped the console into position
Job done:)
[IMG]http://i1280.photobucket.com/albums/a49 ... 4opg0d.jpg[/IMG]
[IMG]http://i1280.photobucket.com/albums/a49 ... f9cprs.jpg[/IMG]
[IMG]http://i1280.photobucket.com/albums/a49 ... 1bjap9.jpg[/IMG]
[IMG]http://i1280.photobucket.com/albums/a49 ... pcsgdb.jpg[/IMG]
[IMG]http://i1280.photobucket.com/albums/a49 ... z7a7sz.jpg[/IMG]
[IMG]http://i1280.photobucket.com/albums/a49 ... nlns4g.jpg[/IMG]
[IMG]http://i1280.photobucket.com/albums/a49 ... cclhh3.jpg[/IMG]
[IMG]http://i1280.photobucket.com/albums/a49 ... jkihth.jpg[/IMG]
Outcome : lower, weighted, higher quality leather, shiny and new , feels and looks great:)
Totally forgot to add a before pic to compare
My bad
[IMG]http://i1280.photobucket.com/albums/a49 ... 6wfvxf.jpg[/IMG]
Not joined yet? Register for free and enjoy features such as alerts, private messaging and viewing latest posts and topics.
Ooooooo shiny new gear knob
-
D4dawg
Ooooooo shiny new gear knob
Last edited by D4dawg on Sun Apr 16, 2017 2:10 pm, edited 2 times in total.
-
bmwaddict

- Senior Member

- Posts: 1148
- Joined: Mon Mar 07, 2016 8:55 pm
- Location: West Herts/East Bucks
Ooooooo shiny new gear knob
Nice job Marc. Cute clothes pegs 
Currently zedless 
'07 Mugello Blue Audi B7 RS4 Saloon with added goodies
'94 Black/Silver/Green Honda CBR400RR
Previous:
'07 Ruby Black Z4MC
'07 Sapphire Black Z4C 3.0si Sport
'07 Mugello Blue Audi B7 RS4 Saloon with added goodies
'94 Black/Silver/Green Honda CBR400RR
Previous:
'07 Ruby Black Z4MC
'07 Sapphire Black Z4C 3.0si Sport
-
D4dawg
Ooooooo shiny new gear knob
Hahah ta buddy
Had a chance to clean the dust around the edge hhah
It's a very very easy job
Scary part is cutting the new leather excess !
Glad done
Just posting old in sale section haha
Had a chance to clean the dust around the edge hhah
It's a very very easy job
Scary part is cutting the new leather excess !
Glad done
Just posting old in sale section haha
-
buzyg

- Legend

- Posts: 26532
- Joined: Fri May 20, 2011 6:11 pm
- Location: Cornwall

![[IMG]http://i1280.photobucket.com/albums/a49 ... 4opg0d.jpg[/IMG]](http://s1280.photobucket.com/user/d4dawg/media/Mobile%20Uploads/20170412_192141_zpsmh4opg0d.jpg.html)
![[IMG]http://i1280.photobucket.com/albums/a49 ... f9cprs.jpg[/IMG]](http://s1280.photobucket.com/user/d4dawg/media/Mobile%20Uploads/20170412_192149_zpsd7f9cprs.jpg.html)
![[IMG]http://i1280.photobucket.com/albums/a49 ... 1bjap9.jpg[/IMG]](http://s1280.photobucket.com/user/d4dawg/media/Mobile%20Uploads/20170412_192155_zps2i1bjap9.jpg.html)
![[IMG]http://i1280.photobucket.com/albums/a49 ... pcsgdb.jpg[/IMG]](http://s1280.photobucket.com/user/d4dawg/media/Mobile%20Uploads/20170412_191344_zpsvkpcsgdb.jpg.html)
![[IMG]http://i1280.photobucket.com/albums/a49 ... z7a7sz.jpg[/IMG]](http://s1280.photobucket.com/user/d4dawg/media/Mobile%20Uploads/20170412_191347_zpsdjz7a7sz.jpg.html)
![[IMG]http://i1280.photobucket.com/albums/a49 ... nlns4g.jpg[/IMG]](http://s1280.photobucket.com/user/d4dawg/media/Mobile%20Uploads/20170412_195529_zpsahnlns4g.jpg.html)
![[IMG]http://i1280.photobucket.com/albums/a49 ... cclhh3.jpg[/IMG]](http://s1280.photobucket.com/user/d4dawg/media/Mobile%20Uploads/20170412_195425_zpsoycclhh3.jpg.html)
![[IMG]http://i1280.photobucket.com/albums/a49 ... jkihth.jpg[/IMG]](http://s1280.photobucket.com/user/d4dawg/media/Mobile%20Uploads/20170412_195244_zpswdjkihth.jpg.html)
![[IMG]http://i1280.photobucket.com/albums/a49 ... 6wfvxf.jpg[/IMG]](http://s1280.photobucket.com/user/d4dawg/media/Mobile%20Uploads/20170408_094605_zpsgg6wfvxf.jpg.html)
-
D4dawg
-
Marlon

- Lifer

- Posts: 10899
- Joined: Mon Jan 05, 2015 11:13 am
- Location: Lancs.
- Contact:
Ooooooo shiny new gear knob
Impressive work - you make it sound so easy. Great result 
Gone: 3.0si 2008 E85
911 997 Carrera S
-
D4dawg
Ooooooo shiny new gear knob
Thank you buddy
It really is that easy buddy
My as said, only worry was the too short too long issue and the cutting new leather
But, internal of knob measured and old gator too
Works out to be 1cm longer
So that s the height of the m5 ring
So used the mark from top of the ring on the leather as a very simple guide
Cutting our ring with the blade was the finger loss bit as the seams are inverted so need to allow space for them by hollowing out ring at set point
Then glue
Love it
-
Rally
- Member

- Posts: 580
- Joined: Mon Aug 31, 2015 1:03 am
- Location: Hampshire
Ooooooo shiny new gear knob
Love it
Imola z4mr, carbon graphite ispiri FFR-6, mpss, gruppem, kw v3, oe strutbrace, aero skirts, schmiedmann carbon splitter, bcs exhaust, dice media, gaptech, F10 zhp & smiles every journey.
-
D4dawg
-
firebobby
- Lifer
- Posts: 9538
- Joined: Sat Jun 13, 2015 9:09 am
- Location: South west Buckinghamshire
Ooooooo shiny new gear knob
OCD my ar8e, I bet you left all that muck underneath the cover
Looks very nice Marc
Looks very nice Marc
BMW Z4 30i 2003 auto 107's Whippy Toledo Blue
Beige M sport seats, wood dash
Toyota MR2 NA 1995
Triumph GT6 1972 (project)
Land Rover Discovery 1994 TDI (Tow car)
Mini 1000 1981
Beige M sport seats, wood dash
Toyota MR2 NA 1995
Triumph GT6 1972 (project)
Land Rover Discovery 1994 TDI (Tow car)
Mini 1000 1981
-
ZAR4MC
- Member

- Posts: 64
- Joined: Mon Jul 25, 2016 12:58 pm
Ooooooo shiny new gear knob
man that looks great!! nicely done! 
07 Z4 M Coupe - Sapphire Black/Imola Red
-
D4dawg
-
D4dawg
-
Vanne
- Senior Member
- Posts: 1579
- Joined: Sun Jul 07, 2013 12:55 pm
- Location: Dubai
- Contact:
Ooooooo shiny new gear knob
Well that looks super mate sad thing is, your F'ed now. Thats how it started for me.
Nice job
Nice job
2007 EuroSpec Z4///MC Building/Developing Z4 GT3
Powered by Severn Tuning

Powered by Severn Tuning
-
D4dawg
Ooooooo shiny new gear knob
Ta buddy
Only things left are custom carbon splitter
Vibra engine mounts
As just had full detail and full paint protection self healing film over entire car haha
Maybe just maybe in a few years supercharge or engine swap
But that's it for a while hahah
Seen your list of bits done as sure seen mine
Ill.put Pics up later of how car looks now
Oh bugger forget haha
6/4 pot brembos and all new discs and ds2500 and lines haha
Arrive next Friday in custom spray job;)