Make your own Windblocker
Posted: Sat Jul 25, 2009 8:58 am
Heres how I made mine.

I started with a piece of 1/4 inch LEXAN 14x24, a 1/4 inch piece of foam board and a strip of 1/4 inch aluminum edge trim.

I cut the edge trim to six inch strips with a metal saw blade and notched them at 2 inch spacing. This allows it to form to the curve of the roll bar.
I attached it with 3M automotive moulding tape. Then I took measurements and rough cut a piece of the foam board.

Used a Sharpie pen to trace the contour of the roll bars and back deck.

And through trial and retrails, I cut and sanded the foam board with a sanding wheel drill attachment.


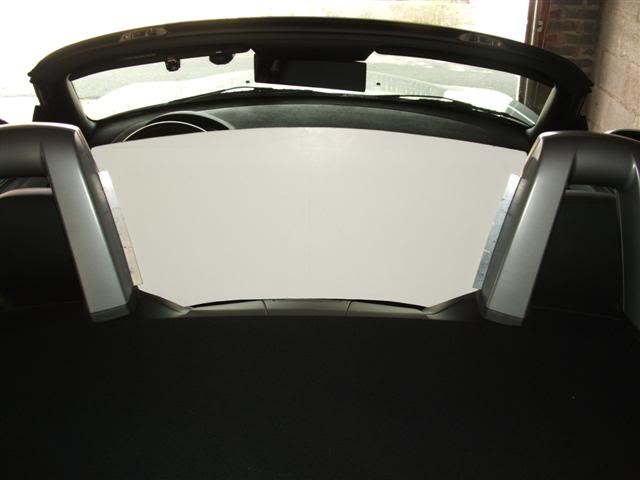
Until I got the best shape possible and fit it in to place.
This is my template for the LEXAN which I only want to cut once.
I then traced it onto the lexan leaving the clear protection film on and lined it with masking tape to trace on and cut through.


Then used the same sanding wheel to shape, then smooth and polish the edges with smaller grit wheels.

Now slide it into place. To make a tight fit I took a super thin laptop mouse pad that I had lying around, fabrick backed with foam and only about an 8th inch thick. It pads and hold the lexan nice and tight with the foam side to the LEXAN

For the etched logo I printed out a Z4 logo from the internet. This one -
http://www.cartype.com/pics/1618/full/bmw_z4_logo.jpg
Then traced it onto a piece of Clear shelf lining contact paper, centered it and stuck it down.

Then added a bottom edge trim to keep it from flexing and trimed the aluminum edging with self adhesive chrome auto trim.

Although I have since changed out the chrome trim for black.
The best part is the way headlights light up the Z4 logo at night.

All for around 25 dollars U.S.
I started with a piece of 1/4 inch LEXAN 14x24, a 1/4 inch piece of foam board and a strip of 1/4 inch aluminum edge trim.
I cut the edge trim to six inch strips with a metal saw blade and notched them at 2 inch spacing. This allows it to form to the curve of the roll bar.
I attached it with 3M automotive moulding tape. Then I took measurements and rough cut a piece of the foam board.
Used a Sharpie pen to trace the contour of the roll bars and back deck.
And through trial and retrails, I cut and sanded the foam board with a sanding wheel drill attachment.
Until I got the best shape possible and fit it in to place.
This is my template for the LEXAN which I only want to cut once.
I then traced it onto the lexan leaving the clear protection film on and lined it with masking tape to trace on and cut through.
Then used the same sanding wheel to shape, then smooth and polish the edges with smaller grit wheels.
Now slide it into place. To make a tight fit I took a super thin laptop mouse pad that I had lying around, fabrick backed with foam and only about an 8th inch thick. It pads and hold the lexan nice and tight with the foam side to the LEXAN
For the etched logo I printed out a Z4 logo from the internet. This one -
http://www.cartype.com/pics/1618/full/bmw_z4_logo.jpg
Then traced it onto a piece of Clear shelf lining contact paper, centered it and stuck it down.
Then added a bottom edge trim to keep it from flexing and trimed the aluminum edging with self adhesive chrome auto trim.
Although I have since changed out the chrome trim for black.
The best part is the way headlights light up the Z4 logo at night.
All for around 25 dollars U.S.
