Installing LED Side Light Bulbs
Posted: Sun Apr 03, 2011 12:15 pm
I had an idle moment at work the other day and when an idle bloke is equipped with an Iphone and the Ebay app all sorts of things can happen. I found myself browsing through the thousands of LED bulb replacement options when I thought, "damn the consequences, I'm having a set of those".
Here is a link to the bulbs that caught my eye,
http://cgi.ebay.co.uk/ws/eBayISAPI.dll? ... K:MEWNX:IT
Copy the above line and paste it into a new tab. Other bulbs are available!!!
Anyway, they came 24 hours after clicking "Buy it now" and I fitted them. I am so pleased with the result that I thought I would contribute my £9.99 upgrade to this forum along with some pictures to help anyone who, like me, ain't changed a car bulb from under the wheel arch before!
Right then, the picture below is of a typical 501 W5W sidelight bulb. What a waste of time! Put one of these next to the beauty of HID and the picture is ruined! Anyway, the picture shows my Vivaro van but the 1 candle power is the same as our Z4's.
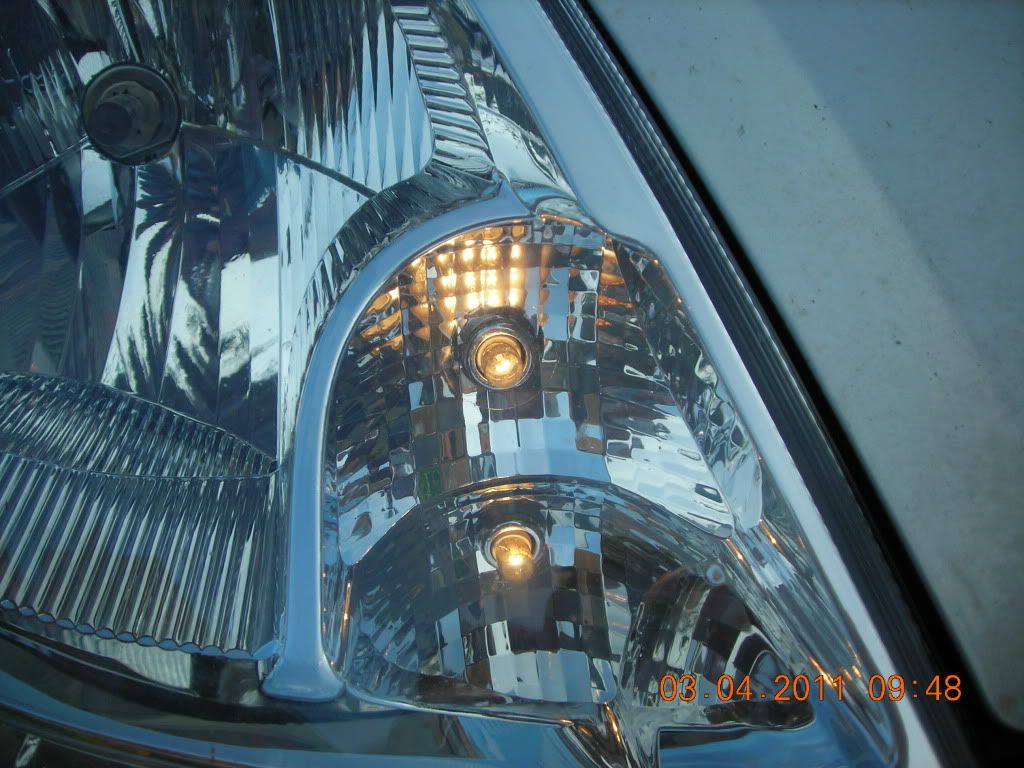
So, you've got your new LED bulbs with the CANBUS ERROR resistor built in. This is important as the £1.99 version of these 501 W5W LED replacement bulbs will leave your Z4 thinking a light has gone out and mithering you with the dash warning light. The problem is that a conventional 1 candle power resistive filament bulb will draw much more power than a state-of-the-art LED replacement so those clever chinese people build in a resistor with mimics the current draw of the victorian bulb. Still with it? I hope so. Right then, first thing is point the wheels in the direction of the bulb change, off side, as my pic illustrates, right hand full lock.
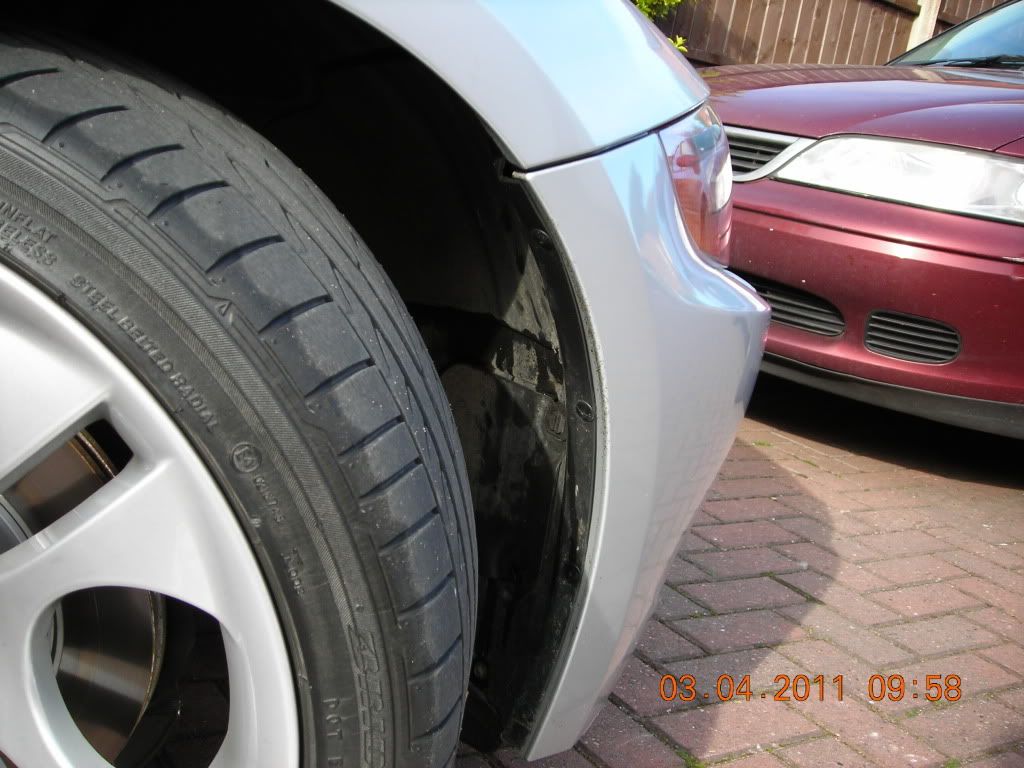
Inside the wheel arch you will find a large panel with 2 fasteners positioned adjacent to the outside of the car.
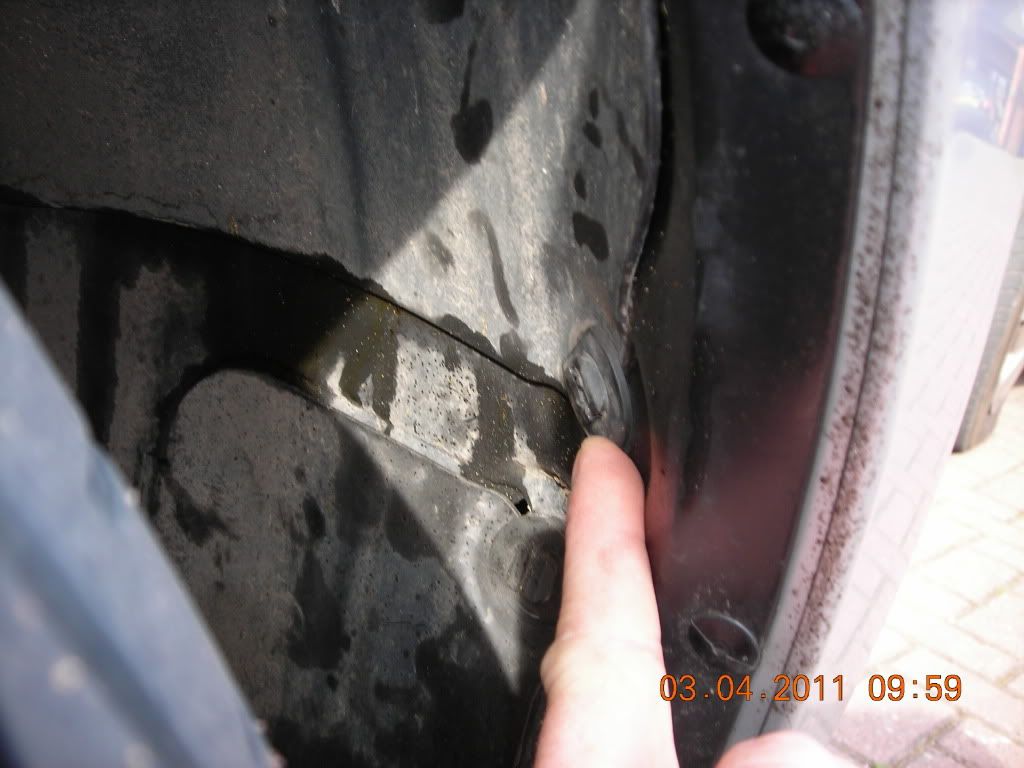
Turn these fasteners CLOCKWISE to undo them using a coin of the realm like my 2p.
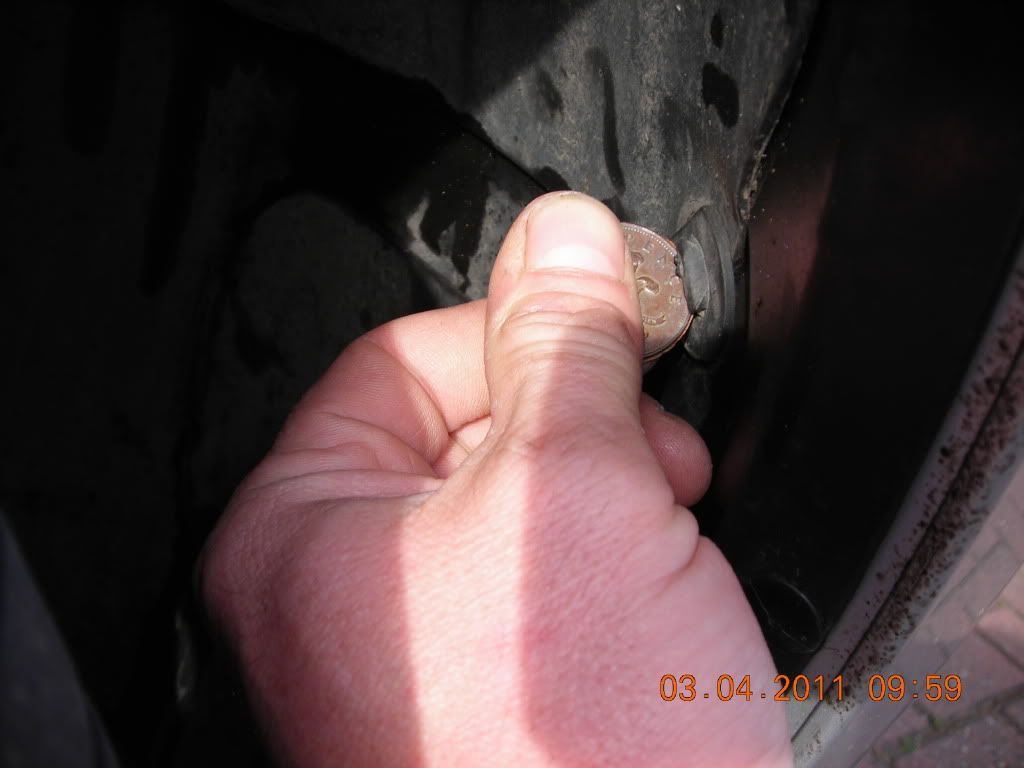
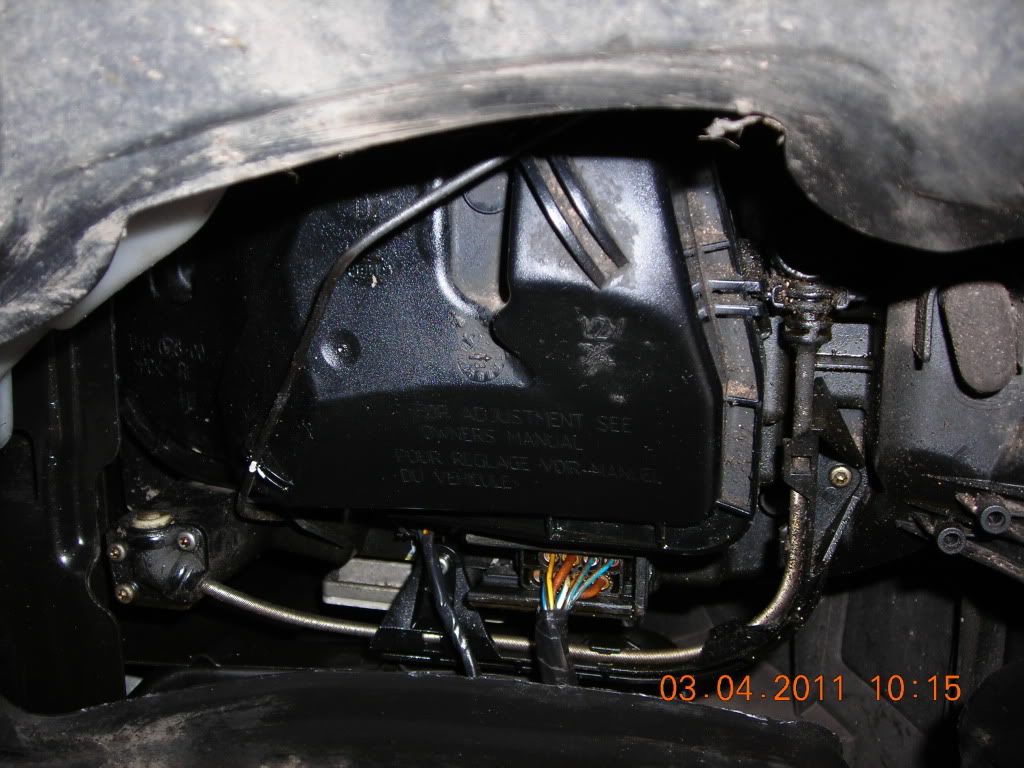
That done you can now open the flap to reveal the back cover of the headlight unit usually found under the bonnet of conventional, but lesser cars.
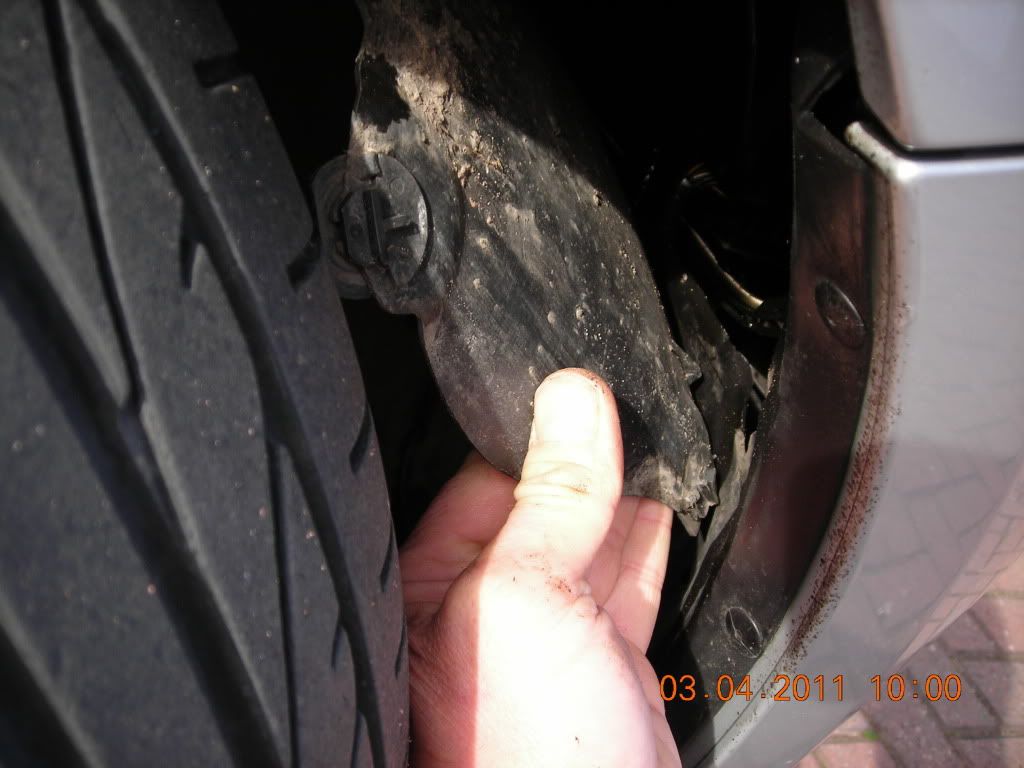
Stick your finger around the headlight unit back cover retaining clip and pull it downwards to unlatch it from to 2 catch points. The pictures are a bit vauge but you'll get the jist when you see it.
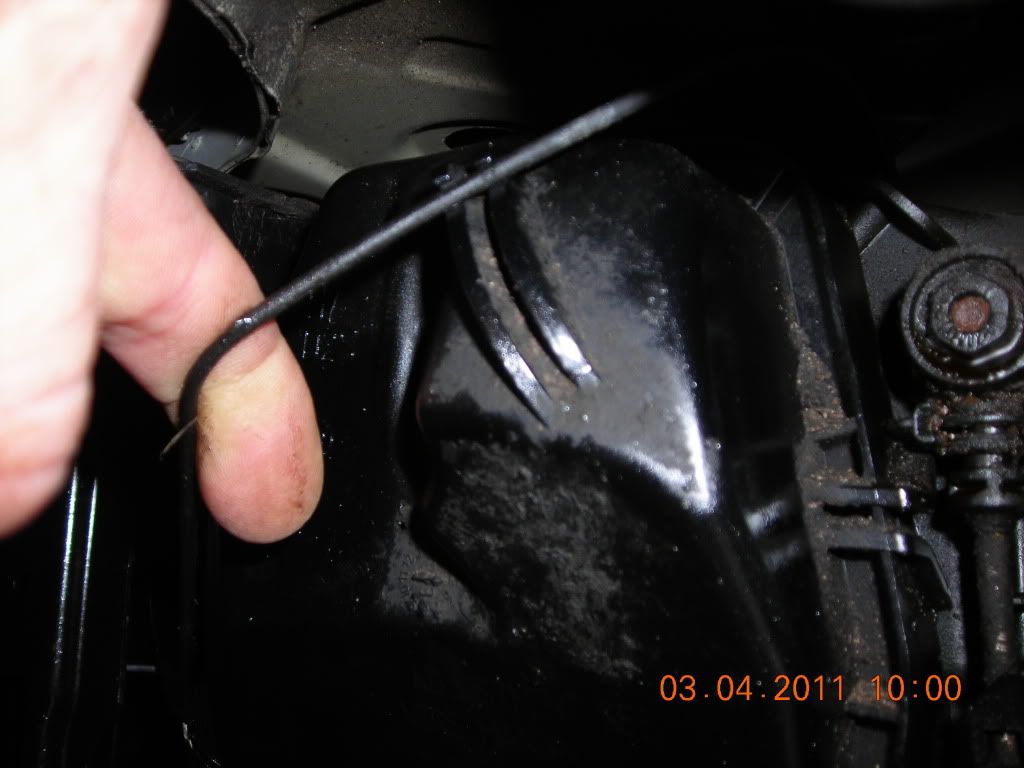
Remove the cover by pulling it towards you. It may seem a bit fiddly but I have no patience and I managed to remove and replace it without ruining anything!
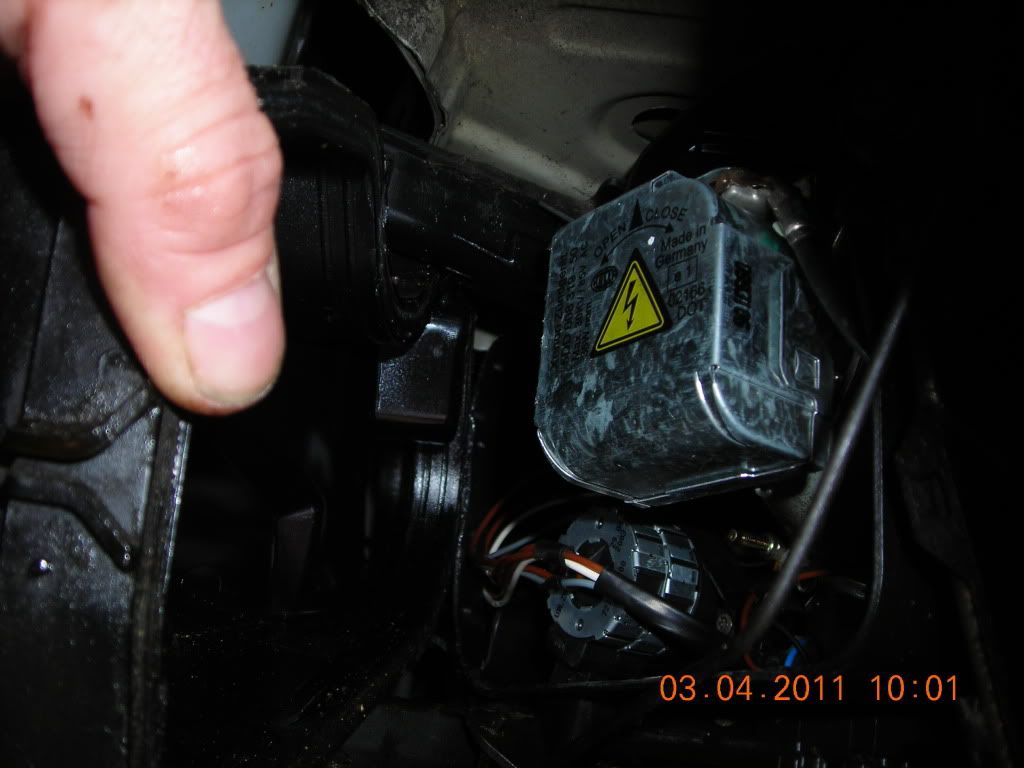
With the cover off its time for some excitement. You can see nothing that will enable you to locate the sidelight bulb holder so this part of the operation is done with closed eyes and a sensitive touch. If you stick your hand in the vicinity of where you think the back of the bulb should be, then you will find what feels like a 1mm thick piece of plastic about 10mm wide. BMW have designed this in to aid the removal of this bulb. Study the picture below.
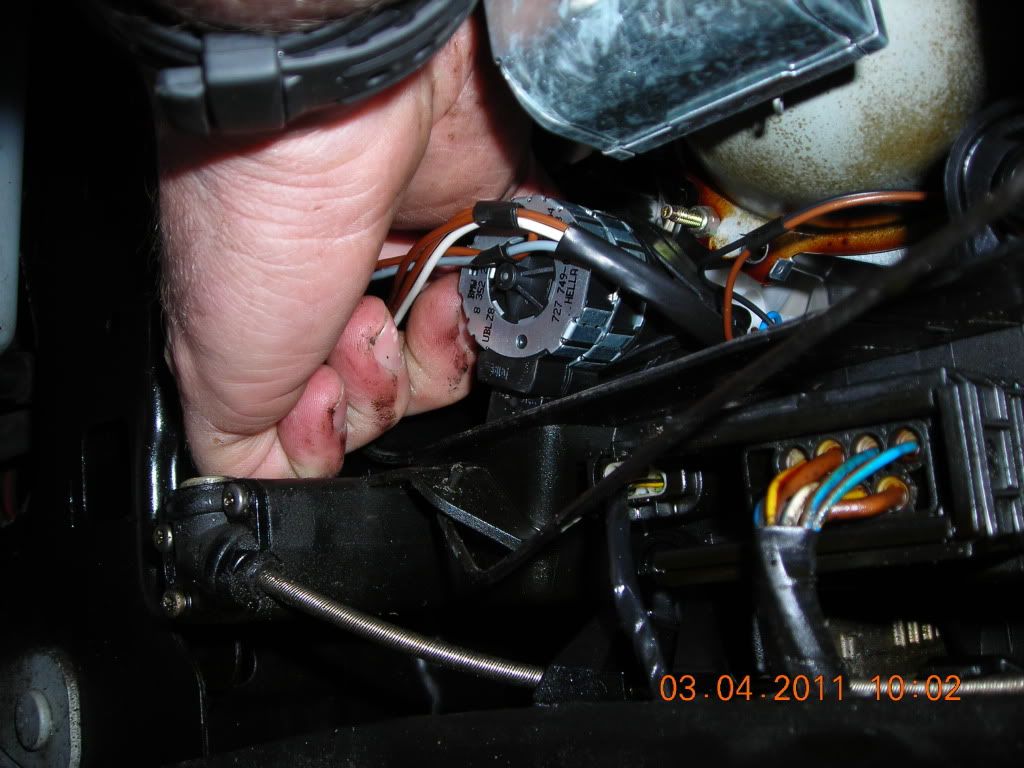
When you have found it, give it a gentle pull and if you are tall enough, you can peep around and watch the bulb disappear as you look through the headlight perspex. What you should now be holding is as the pic below.
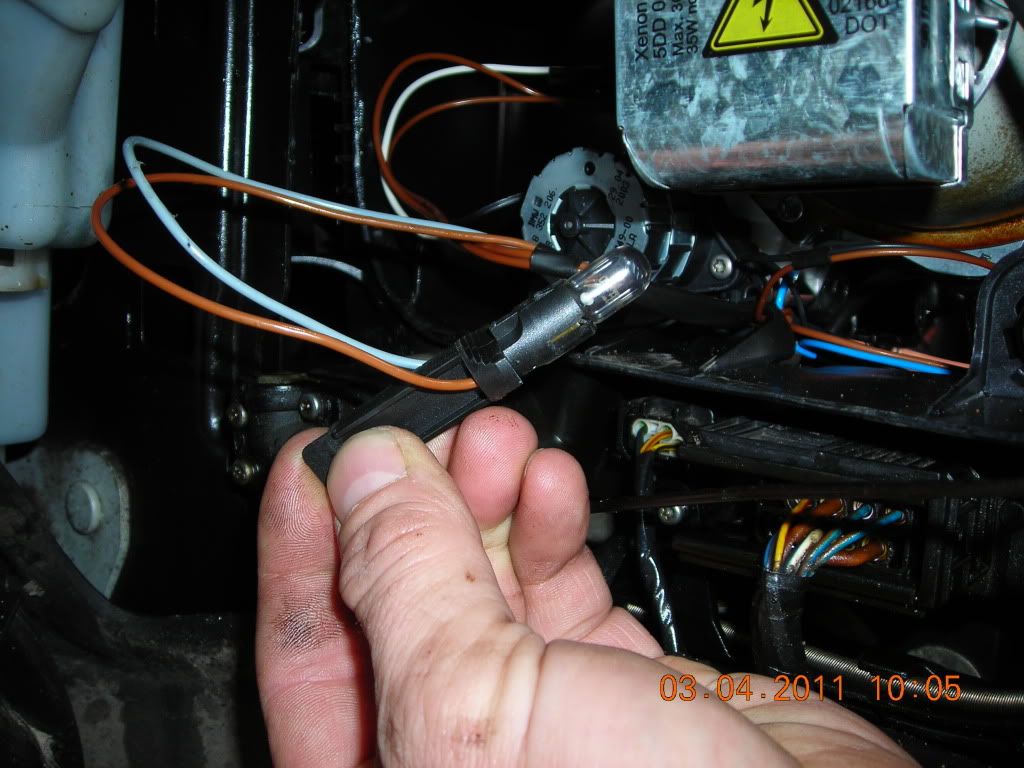
Remove the bulb as normal by simply pulling it out of the holder and put it safe as it can be used for many other places within the car. Right, get your new led bulb and after gazing at it with childlike wonder prepare yourself to insert it into the holder.
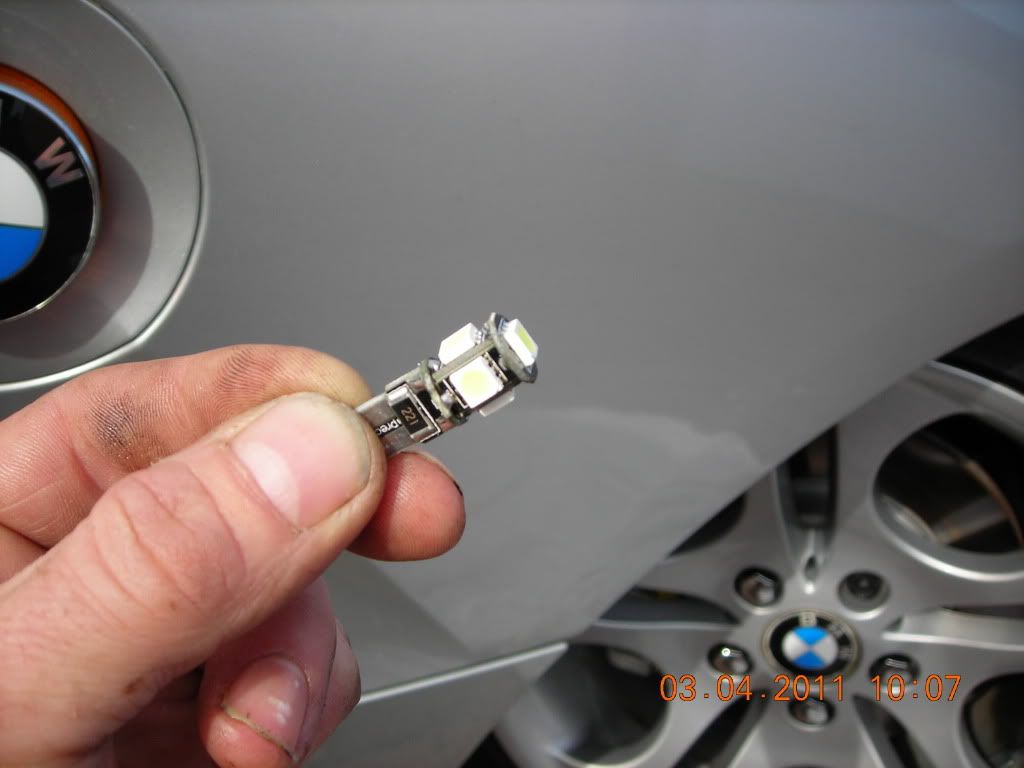
Onwards and upwards, the original bulb will work which ever way its inserted but this ain't the case with the LED jobs. What i did was turned on the sidelights to enable me to correctly insert the new bulb. DON'T PUT THE HEADLIGHTS ON AS THE VOLTAGES WITHIN THE HID SYSTEM WILL HURT YOU. Only the sidelights folks. When you have correctly aligned the bulb, what you should see is what the pic below shows.
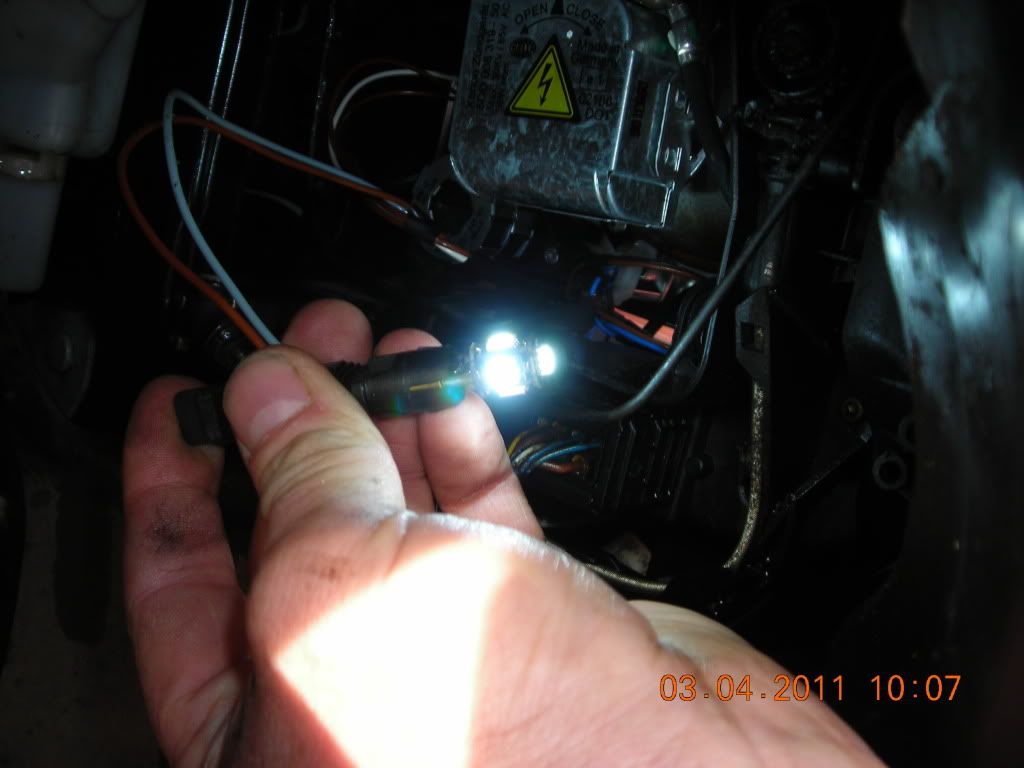
The same thing applies when re inserting the sidelight bulb into the headlight unit. You can't see nothing, but, I developed the following technique. wave the bulb around within the headlight unit whilst looking in the front of the headlight. Use the light to guide the bulb holder home. See my contortions in the pic below.
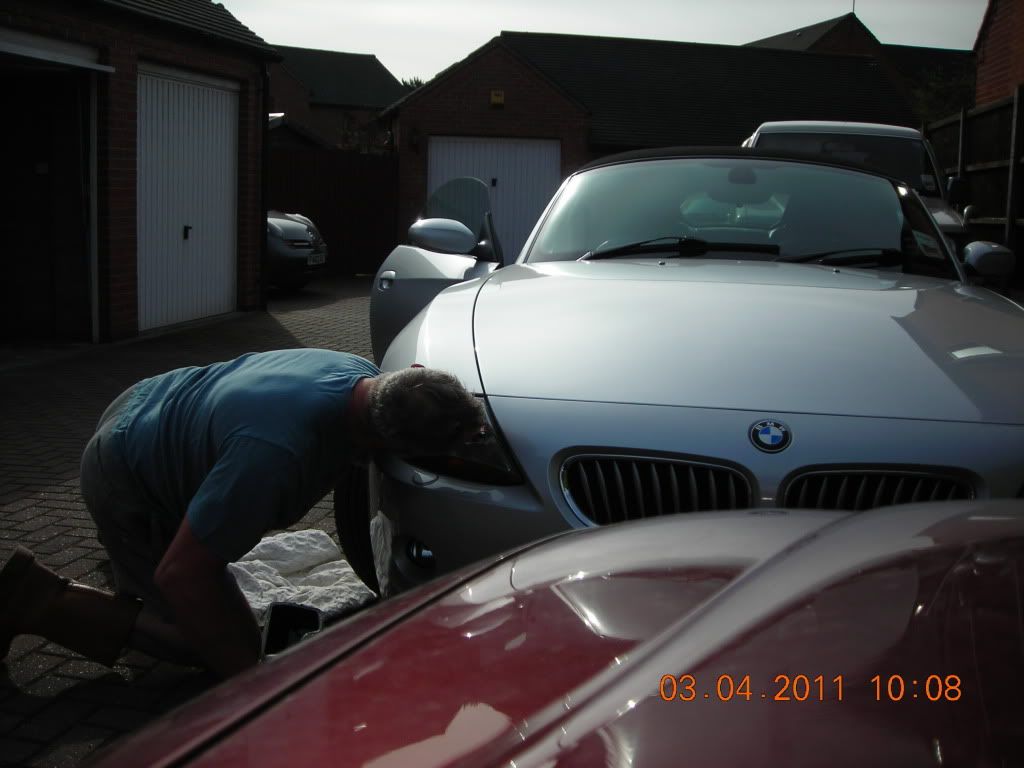
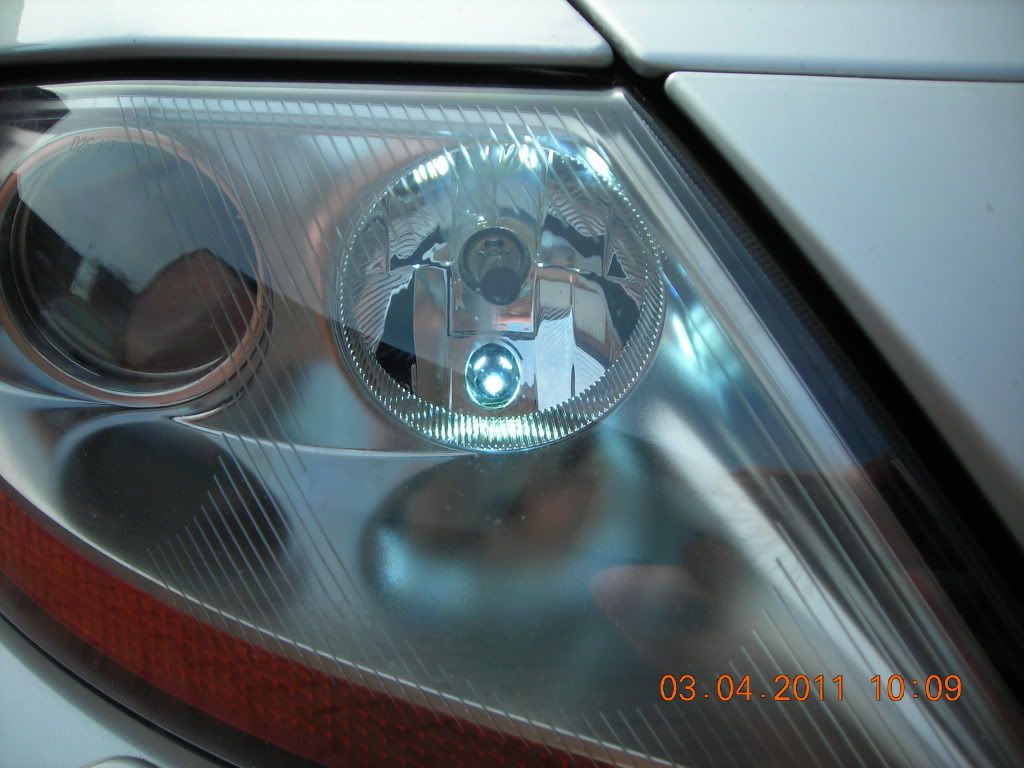
OK, Are you ready? this is what you will see and remember, the white light is lovely and visible on a bright spring morning so I guarantee the effect at night is stunning.
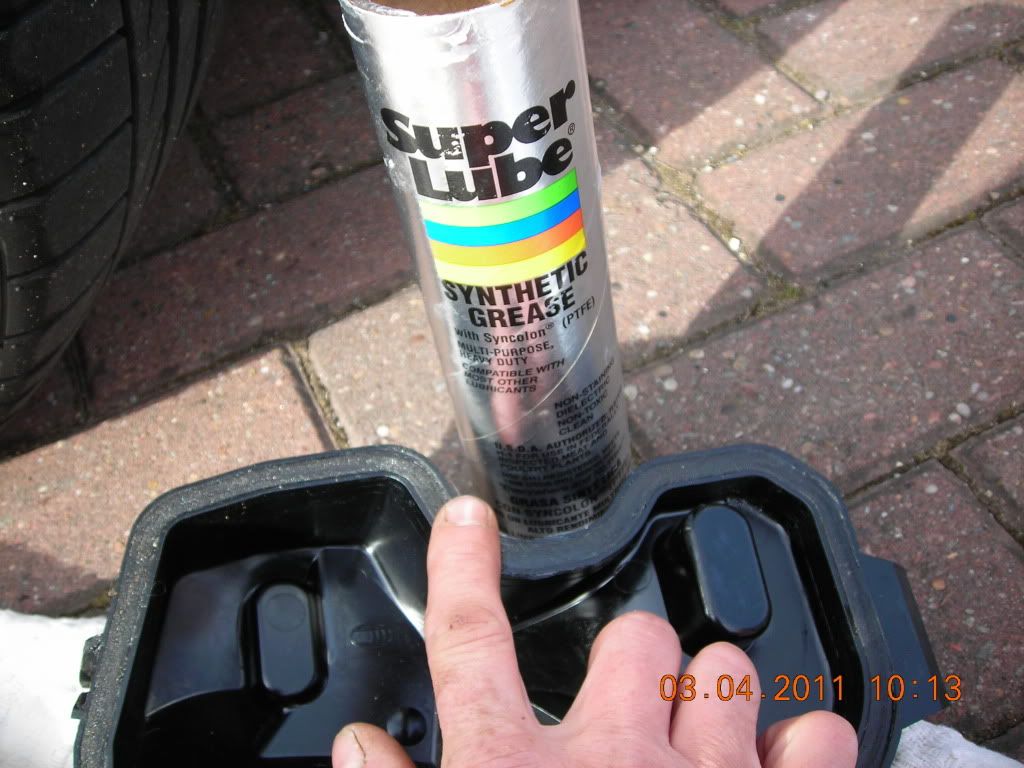
I took the precaution of cleaning the headlight back cover and smearing the seal with some silicon based grease to help it remain waterproof. It had showed signs of leaking slightly at the top edge.
And finally, refit the back cover and slide the retaining clip back up. Now start the other side. It took me longer to write this guide than to do the job and I think its a really worthwhile mod. Hope this helped. Andy G
Here is a link to the bulbs that caught my eye,
http://cgi.ebay.co.uk/ws/eBayISAPI.dll? ... K:MEWNX:IT
Copy the above line and paste it into a new tab. Other bulbs are available!!!
Anyway, they came 24 hours after clicking "Buy it now" and I fitted them. I am so pleased with the result that I thought I would contribute my £9.99 upgrade to this forum along with some pictures to help anyone who, like me, ain't changed a car bulb from under the wheel arch before!
Right then, the picture below is of a typical 501 W5W sidelight bulb. What a waste of time! Put one of these next to the beauty of HID and the picture is ruined! Anyway, the picture shows my Vivaro van but the 1 candle power is the same as our Z4's.

So, you've got your new LED bulbs with the CANBUS ERROR resistor built in. This is important as the £1.99 version of these 501 W5W LED replacement bulbs will leave your Z4 thinking a light has gone out and mithering you with the dash warning light. The problem is that a conventional 1 candle power resistive filament bulb will draw much more power than a state-of-the-art LED replacement so those clever chinese people build in a resistor with mimics the current draw of the victorian bulb. Still with it? I hope so. Right then, first thing is point the wheels in the direction of the bulb change, off side, as my pic illustrates, right hand full lock.

Inside the wheel arch you will find a large panel with 2 fasteners positioned adjacent to the outside of the car.

Turn these fasteners CLOCKWISE to undo them using a coin of the realm like my 2p.

That done you can now open the flap to reveal the back cover of the headlight unit usually found under the bonnet of conventional, but lesser cars.

Stick your finger around the headlight unit back cover retaining clip and pull it downwards to unlatch it from to 2 catch points. The pictures are a bit vauge but you'll get the jist when you see it.

Remove the cover by pulling it towards you. It may seem a bit fiddly but I have no patience and I managed to remove and replace it without ruining anything!

With the cover off its time for some excitement. You can see nothing that will enable you to locate the sidelight bulb holder so this part of the operation is done with closed eyes and a sensitive touch. If you stick your hand in the vicinity of where you think the back of the bulb should be, then you will find what feels like a 1mm thick piece of plastic about 10mm wide. BMW have designed this in to aid the removal of this bulb. Study the picture below.

When you have found it, give it a gentle pull and if you are tall enough, you can peep around and watch the bulb disappear as you look through the headlight perspex. What you should now be holding is as the pic below.

Remove the bulb as normal by simply pulling it out of the holder and put it safe as it can be used for many other places within the car. Right, get your new led bulb and after gazing at it with childlike wonder prepare yourself to insert it into the holder.

Onwards and upwards, the original bulb will work which ever way its inserted but this ain't the case with the LED jobs. What i did was turned on the sidelights to enable me to correctly insert the new bulb. DON'T PUT THE HEADLIGHTS ON AS THE VOLTAGES WITHIN THE HID SYSTEM WILL HURT YOU. Only the sidelights folks. When you have correctly aligned the bulb, what you should see is what the pic below shows.

The same thing applies when re inserting the sidelight bulb into the headlight unit. You can't see nothing, but, I developed the following technique. wave the bulb around within the headlight unit whilst looking in the front of the headlight. Use the light to guide the bulb holder home. See my contortions in the pic below.

OK, Are you ready? this is what you will see and remember, the white light is lovely and visible on a bright spring morning so I guarantee the effect at night is stunning.

I took the precaution of cleaning the headlight back cover and smearing the seal with some silicon based grease to help it remain waterproof. It had showed signs of leaking slightly at the top edge.

And finally, refit the back cover and slide the retaining clip back up. Now start the other side. It took me longer to write this guide than to do the job and I think its a really worthwhile mod. Hope this helped. Andy G

