DIY Alloy Wheel Refurb
Posted: Thu Nov 17, 2011 6:02 pm
Why spend £200+ when it's a pretty simple DIY job. I did mine the other day, here is all you need to know.
1. Preparation is key with all paint jobs. Your local paint shop will have everything you need. I spent £77 and I've got loads left for the next time I do it. Below is a picture of all you need.
1. A roll of masking tape
2. Wet and dry sandpaper. I used 180, and 400 grade.
3. Metal Etch Primer (Normal primers won't stick to bare metal).
4. Paint! I took my car to the paint shop and used their swatches to get the closest match. They made a spray can up then and there. My wheels are a satin finish, but if you have a gloss finish you will need clear lacquer as well.
5. A good mask. Paint fumes are toxic, this 3M mask is re-usable for 20 hours paint time.
6. Masking tape / film. The paint shop will sell this on a roll so you can easily protect your bodywork from overspray.
7. Chemical metal. For particularly bad scrapes you will need to build the surface of the wheel up with this. It is applied just like normal car body filler.

STEP 1
Clean your wheels. Get rid of all excess grime and dirt. Some people recommend a de-greaser but I didn't bother.
STEP 2
Do one side of your car at time. Take the 180 grit wet and dry and sand back the scuffs until you cannot feel them with your finger. If you have some bad chips in the alloy use the chemical metal to fill them at this stage. Better to build up the wheel than sand back so far that the wheel is mis-shaped. When you are happy the worst of the scuff has been removed by the 180 grit, switch to the 400 to get a smooth finish. Use wet and dry so you get a smooth contact between the paper and the wheel for the best finish. Here is a picture of my wheel at this stage. I hadn't masked the wheel at this point, I just took the photo later on in the process...
STEP 3
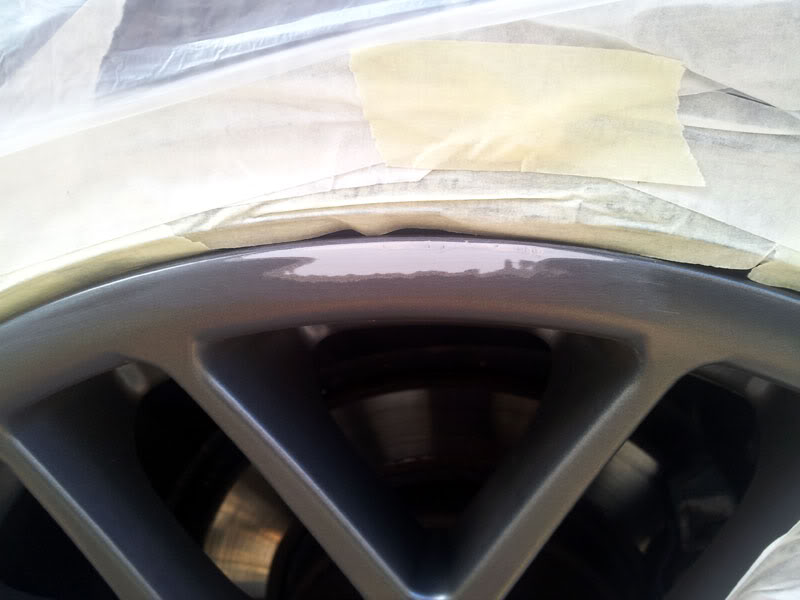
Masking. Use the masking tape to mask the edge of the wheel so that you don't over-spray onto the tyre. Mask all the way around, then switch to the film/tape so that you cover the bodywork around the wheel also. Don't forget to mask the wheel badges!

STEP 4
Etch primer. Spray etch primer around the edge of the wheel. I did 2 coats. Once dry, knock back with 400 grit VERY LIGHTLY so your final coat will have a smooth finish.

STEP 5
Top coat. Spray the top coat, a couple of coats and you are done. If your wheel is gloss then you need to spray clear lacquer after.

I spent a full day to do all four wheels. Good luck!
1. Preparation is key with all paint jobs. Your local paint shop will have everything you need. I spent £77 and I've got loads left for the next time I do it. Below is a picture of all you need.
1. A roll of masking tape
2. Wet and dry sandpaper. I used 180, and 400 grade.
3. Metal Etch Primer (Normal primers won't stick to bare metal).
4. Paint! I took my car to the paint shop and used their swatches to get the closest match. They made a spray can up then and there. My wheels are a satin finish, but if you have a gloss finish you will need clear lacquer as well.
5. A good mask. Paint fumes are toxic, this 3M mask is re-usable for 20 hours paint time.
6. Masking tape / film. The paint shop will sell this on a roll so you can easily protect your bodywork from overspray.
7. Chemical metal. For particularly bad scrapes you will need to build the surface of the wheel up with this. It is applied just like normal car body filler.
STEP 1
Clean your wheels. Get rid of all excess grime and dirt. Some people recommend a de-greaser but I didn't bother.
STEP 2
Do one side of your car at time. Take the 180 grit wet and dry and sand back the scuffs until you cannot feel them with your finger. If you have some bad chips in the alloy use the chemical metal to fill them at this stage. Better to build up the wheel than sand back so far that the wheel is mis-shaped. When you are happy the worst of the scuff has been removed by the 180 grit, switch to the 400 to get a smooth finish. Use wet and dry so you get a smooth contact between the paper and the wheel for the best finish. Here is a picture of my wheel at this stage. I hadn't masked the wheel at this point, I just took the photo later on in the process...
STEP 3
Masking. Use the masking tape to mask the edge of the wheel so that you don't over-spray onto the tyre. Mask all the way around, then switch to the film/tape so that you cover the bodywork around the wheel also. Don't forget to mask the wheel badges!
STEP 4
Etch primer. Spray etch primer around the edge of the wheel. I did 2 coats. Once dry, knock back with 400 grit VERY LIGHTLY so your final coat will have a smooth finish.
STEP 5
Top coat. Spray the top coat, a couple of coats and you are done. If your wheel is gloss then you need to spray clear lacquer after.
I spent a full day to do all four wheels. Good luck!