OEM custom LED wind deflector
Posted: Thu Apr 05, 2012 10:36 pm
its project time again and after seeing these http://www.kingpennindustries.com/WindR ... px?wrid=10 it got me thinking that would look cool on my ZED on those warm summer nights but at $600 with the cool extras it was a bit out my league so after seeing some attempts at making wind deflectors on the competition website "zpost" i thought i would have a go.
i wanted mine to work as a brake light and also hopefully cop friendly so went with red. ebay was my friend for this one and i managed to get everything for around £60 thanks to kind forum members
OEM wind deflector thanks to 'marchantsuk'
1 15cm LED strip 12v (red)
1 LED 12v dimmer switch
1 wind deflector fitting kit
1 600x300 plexiglass 6mm thick (could have gone smaller but dont like taking risks)
2 2.5mm DC power plug 1 male 1 female for easy connecting
1 length of 2 core wire to run from the brake light to the centre console
tools
dremel 300 with
565 multipurpose cutting kit with bit 561
107
409 (0.6mm cut off wheels)
407
step 1:
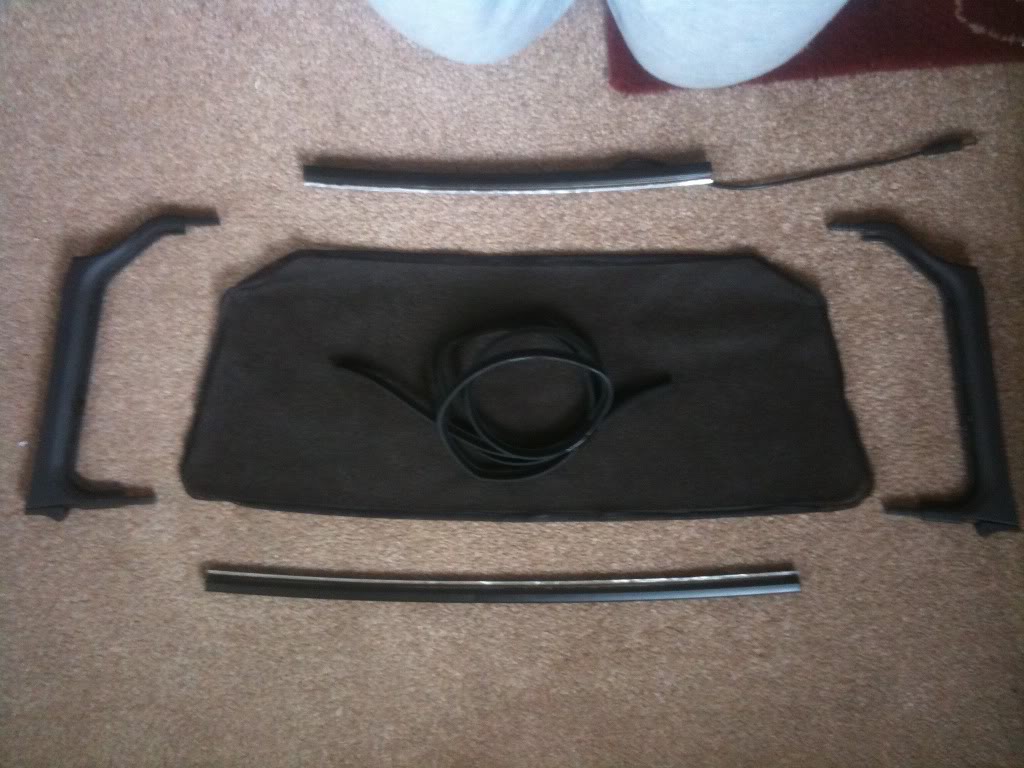
take the wind deflector and remove the rubber seal and cloth mesh. the rubber is glued in but comes out fairly easy when you get started. pull the 4 parts of the frame apart, they are fairly tight but its just a push fit.
step 2:
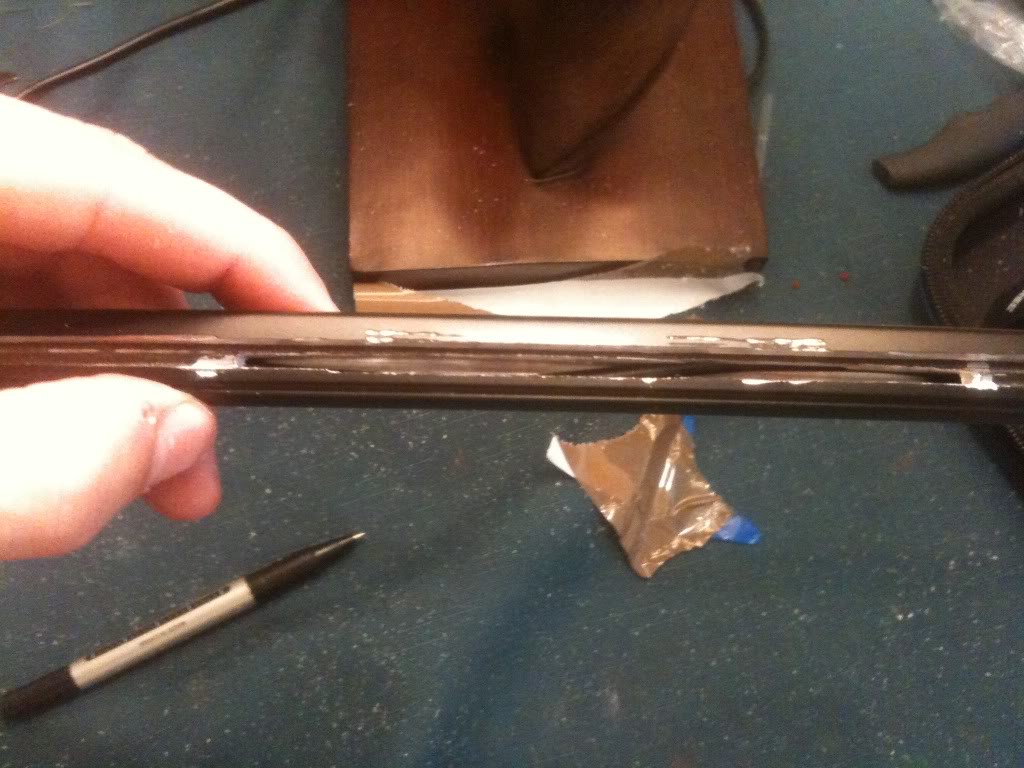
take the plastic end parts and mark 6mm on the side wall. these will then be cut off using part 409 at low speed. the plastic melts fairly easy making a mess. there will be a piece of metal in the groove on each side holding the spring in so i cut around this.

step 3:
take the two metal bar sections and do the same procedure as before using the 409 cut off wheels again. i went through at least 10 of them in this part so was glad i bought 36 of them. with the lip removed from the smaller bottom bar i marked a 15cm section on the tube and cut it out to allow the LED's to shine into the plexiglass. i also drilled a hole through the bottom near the drivers side to take the wire.


step 4:
put the frame back together then made a template from cardboard. then used the template to mark out the shape onto the plexiglass. i used the 561 piece with the multipurpose cutting tool to cut out the plexiglass which only took a few minutes.


step 5:
sanding took me hours as i left a bit too much 'room for error' but you can never put material back as i found when cutting one of the grooves to fit around the spring holder.

step 6:
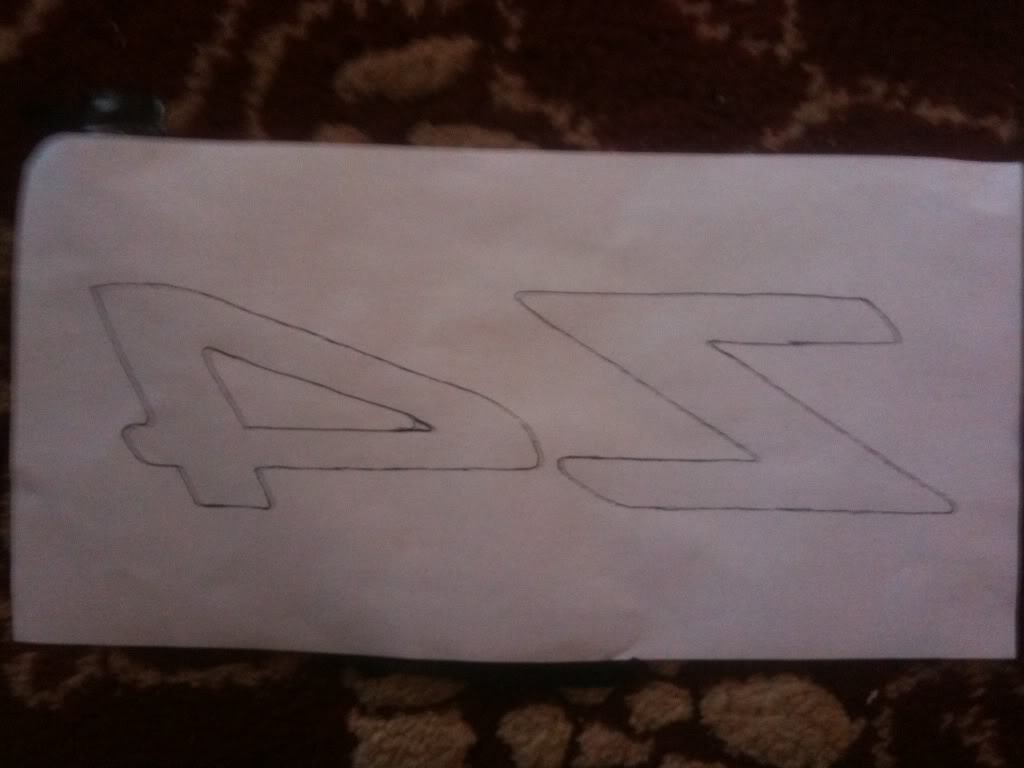
i got the Z4 logo off of the internet and printed it off at 6cm high which i thought was enough. i then turned the paper over and drew the outline to get a negative to transfer to the pexiglass. etch on the side that will be facing the front of the car as the light looks better for the people behind this way. i stuck it onto the back then went around the design with a pen then used the dremel to etch the outline using 107, i then went ahead and shaded the entire thing in which only took 10 minutes. best to have some practice with this tool first though. ( i wanted to have it sand blasted but its hard work finding somewhere with the right equipment but the results i got where great)


step 7:
i pushed the wire all the way through the bottom bar then soldered on the LED strip. it can then be pulled back into position. next i put the thing together... i am still deciding the best way to secure it in as of right now its secured with electrical tape ( neat border if you ask) it looks good so i might get some wrap and do the frame while im at it


step 8:
wiring the car was fairly simple. pull the plug from the brake light (i used drivers side) and connect the positive blue cable in position 1 and the negative brown in position 2 to a two core wire. i then ran this behind the carpet until i reached the gap behind the seats. this was the place i decided to fit the dimmer.. so 2 wires in and 2 wired out (just get the positive and negative correct) the wires out will have a female adaptor on the end. with the roof up, run the cable through the gap at the pack of the boot into the storage area behind the seats then pull it over the top of the centre console. them with the roof down this can be secured in place.. i used bent metal and double sided stick tape. but would be possible to drill a hole and fit it into the console.
step 9:
put the wind deflector in place and plug it in then play with the dimmer to get the right level!!!

i would at some point like to put a multi colour LED strip in so have a green glow then when i press the brakes a bright red glow but this is past my skill level when it comes to electronics. if anyone has an idea how to do this i would love the advice.
i will get some better pictures when i find a better camera. all of these were taken on the phone
i wanted mine to work as a brake light and also hopefully cop friendly so went with red. ebay was my friend for this one and i managed to get everything for around £60 thanks to kind forum members
OEM wind deflector thanks to 'marchantsuk'
1 15cm LED strip 12v (red)
1 LED 12v dimmer switch
1 wind deflector fitting kit
1 600x300 plexiglass 6mm thick (could have gone smaller but dont like taking risks)
2 2.5mm DC power plug 1 male 1 female for easy connecting
1 length of 2 core wire to run from the brake light to the centre console
tools
dremel 300 with
565 multipurpose cutting kit with bit 561
107
409 (0.6mm cut off wheels)
407
step 1:
take the wind deflector and remove the rubber seal and cloth mesh. the rubber is glued in but comes out fairly easy when you get started. pull the 4 parts of the frame apart, they are fairly tight but its just a push fit.
step 2:
take the plastic end parts and mark 6mm on the side wall. these will then be cut off using part 409 at low speed. the plastic melts fairly easy making a mess. there will be a piece of metal in the groove on each side holding the spring in so i cut around this.
step 3:
take the two metal bar sections and do the same procedure as before using the 409 cut off wheels again. i went through at least 10 of them in this part so was glad i bought 36 of them. with the lip removed from the smaller bottom bar i marked a 15cm section on the tube and cut it out to allow the LED's to shine into the plexiglass. i also drilled a hole through the bottom near the drivers side to take the wire.
step 4:
put the frame back together then made a template from cardboard. then used the template to mark out the shape onto the plexiglass. i used the 561 piece with the multipurpose cutting tool to cut out the plexiglass which only took a few minutes.
step 5:
sanding took me hours as i left a bit too much 'room for error' but you can never put material back as i found when cutting one of the grooves to fit around the spring holder.
step 6:
i got the Z4 logo off of the internet and printed it off at 6cm high which i thought was enough. i then turned the paper over and drew the outline to get a negative to transfer to the pexiglass. etch on the side that will be facing the front of the car as the light looks better for the people behind this way. i stuck it onto the back then went around the design with a pen then used the dremel to etch the outline using 107, i then went ahead and shaded the entire thing in which only took 10 minutes. best to have some practice with this tool first though. ( i wanted to have it sand blasted but its hard work finding somewhere with the right equipment but the results i got where great)
step 7:
i pushed the wire all the way through the bottom bar then soldered on the LED strip. it can then be pulled back into position. next i put the thing together... i am still deciding the best way to secure it in as of right now its secured with electrical tape ( neat border if you ask) it looks good so i might get some wrap and do the frame while im at it
step 8:
wiring the car was fairly simple. pull the plug from the brake light (i used drivers side) and connect the positive blue cable in position 1 and the negative brown in position 2 to a two core wire. i then ran this behind the carpet until i reached the gap behind the seats. this was the place i decided to fit the dimmer.. so 2 wires in and 2 wired out (just get the positive and negative correct) the wires out will have a female adaptor on the end. with the roof up, run the cable through the gap at the pack of the boot into the storage area behind the seats then pull it over the top of the centre console. them with the roof down this can be secured in place.. i used bent metal and double sided stick tape. but would be possible to drill a hole and fit it into the console.
step 9:
put the wind deflector in place and plug it in then play with the dimmer to get the right level!!!
i would at some point like to put a multi colour LED strip in so have a green glow then when i press the brakes a bright red glow but this is past my skill level when it comes to electronics. if anyone has an idea how to do this i would love the advice.
i will get some better pictures when i find a better camera. all of these were taken on the phone