Repeat of initial post with pictures now hosted by the forum - had to split it into two posts due to limit on number of attachments per post
---
I originally posted this information in
another thread but I thought I should reproduce it here as it's a more logical place if anyone is looking for the info
I wasn't very happy with the 'tinny' sound of the E85 doors when opening/closing, I heard all the arguments about 'It's a sports car, so it's to make
it lighter' but felt that an extra 4 or 5 pound in each door would hardly impact the performance, and the quality of the door sound was out-of-place with an upmarket car
So I decided that I'd add some sound deadening sheets to the inside of the outer door skin to make the doors feel more solid and, as I only have the basic 6-speaker stereo, and seeing as the door was going to be apart, I also decided that I'd add the 'missing' door speakers
I'll provide links to items similar to those that I used, and where possible I'll link to items on Amazon, you can probably find them cheaper on eBay etc. but the Amazon links are likely to be longer-lived. If I can't find it on Amazon, I'll try to provide an alternative
Parts list
- Panel tools
http://www.amazon.co.uk/Yellow-No-Scrat ... B009YDZ3TM
- Butyl rubber sealing strip
http://www.amazon.co.uk/TREMSHIELD-BUTY ... B008452SWQ
- Silent Coat Extra (4mm)
http://www.caraudiodirect.co.uk/silent- ... -door.html
- Silent Coat (2mm)
http://www.caraudiodirect.co.uk/silent- ... r-kit.html
- Seam roller
http://www.amazon.co.uk/Faithfull-Soft- ... B000Y8OUAE
- 4" Speakers
http://www.caraudiodirect.co.uk/hertz-dieci-dcx-100-3
- Soldering iron, speaker cable, crimp connectors, sharp utility knife etc.
NB This is how I did things, but please see the notes at the end of the post as I've listed things that, in hindsight, I would have done differently
I'm not going to discuss removing & replacing the door card and tweeter triangle as this is covered brilliantly in the BSW videos
http://www.youtube.com/watch?v=Djgcv-VpCW8 and
http://www.youtube.com/watch?v=Yq1uKzpxnAU
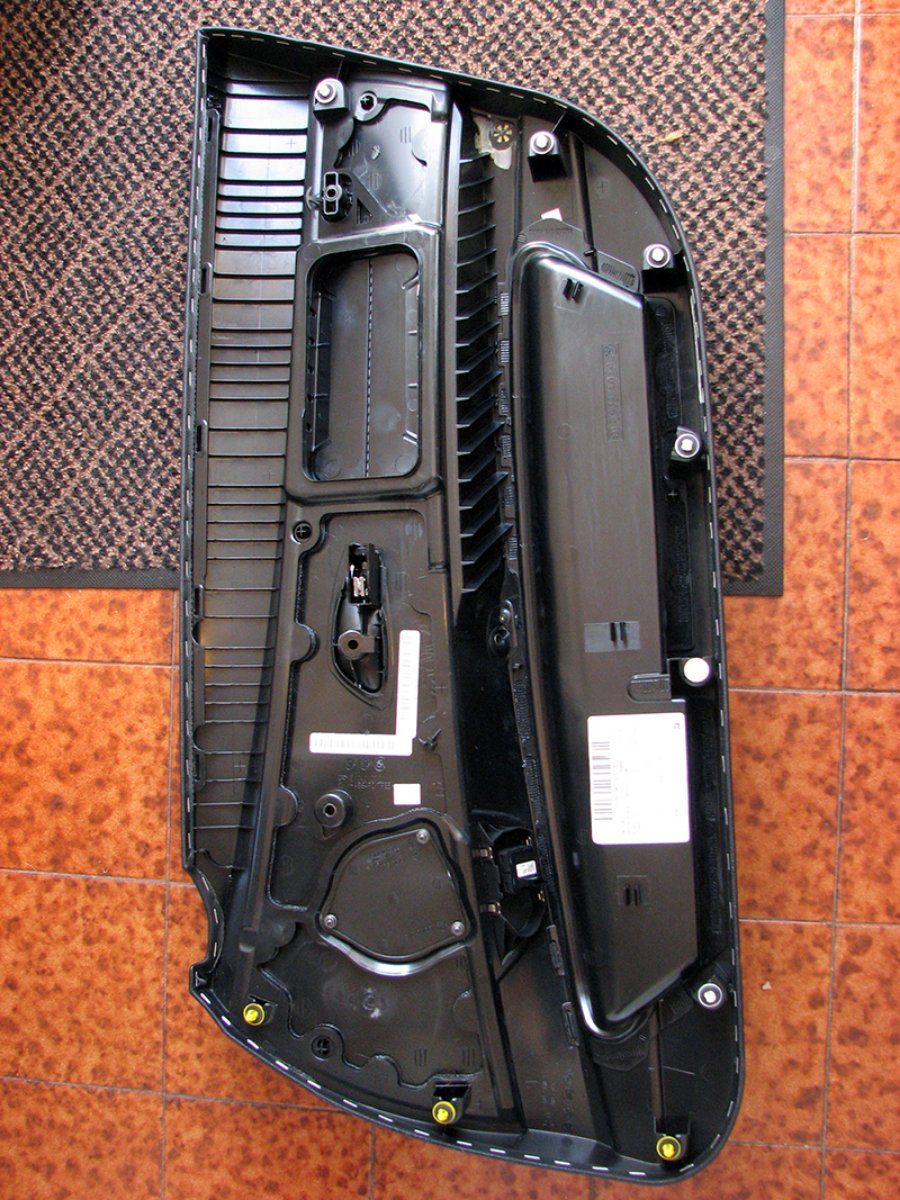
Once you have the door card and triangle removed, you'll be presented with this

- Deadening_01_zpsaee1c661.jpg (236.57 KiB) Viewed 12259 times
The only tip I have over and above the BSW videos is that you need to have your window down to remove the door card but once the card is off, and before you disconnect the window switches etc., raise the window again or you'll have trouble fitting the deadening sheets
The inside of the door card looks like this
- Deadening_02_zpsc591be09.jpg (262.62 KiB) Viewed 12259 times
and you'll see the blanking plate for the door speaker, this is held in place with 3 x 8mm bolts. Remove the blanking plates and, with any luck you will find that two of the mounting holes for the new speaker will fit over the two bottom posts. Don't bolt them in place yet
You then need to bend the top speaker mounts to conform to the shape of the door card - not too difficult as the metal isn't particularly thick. Once you are happy with this, use a 'pointy thing' to mark where you need to drill small pilot holes. Remove the speaker and drill a couple of pilot holes with a 1 or 2mm drill bit - be very careful as you don't want to go through your leather. Replace the speaker and secure with the two bolts and a couple of 10mm self-tapping screws (technically self-tappers don't need a pilot hole, but I prefer to give them some guidance if possible)
You should end up with something similar to

- Deadening_03_zpsc926d753.jpg (181.41 KiB) Viewed 12259 times
Next, using a suitibly sharp utilty knife cut some of the 2mm Silent Coat to shape and stick to the rear of the door card - use the roller wherever possible to ensure it is stuck down firmly. If you put deadening in the airbag 'pocket' ensure that you slice the deadening lengthways down the centre (see the perforated line in the first doorcard picture) so that the airbag can deploy correctly when needed - I put the Silent Coat in as a single piece and then slit it down the centre before replacing the doorcard, this picture was taken before I made the cuts
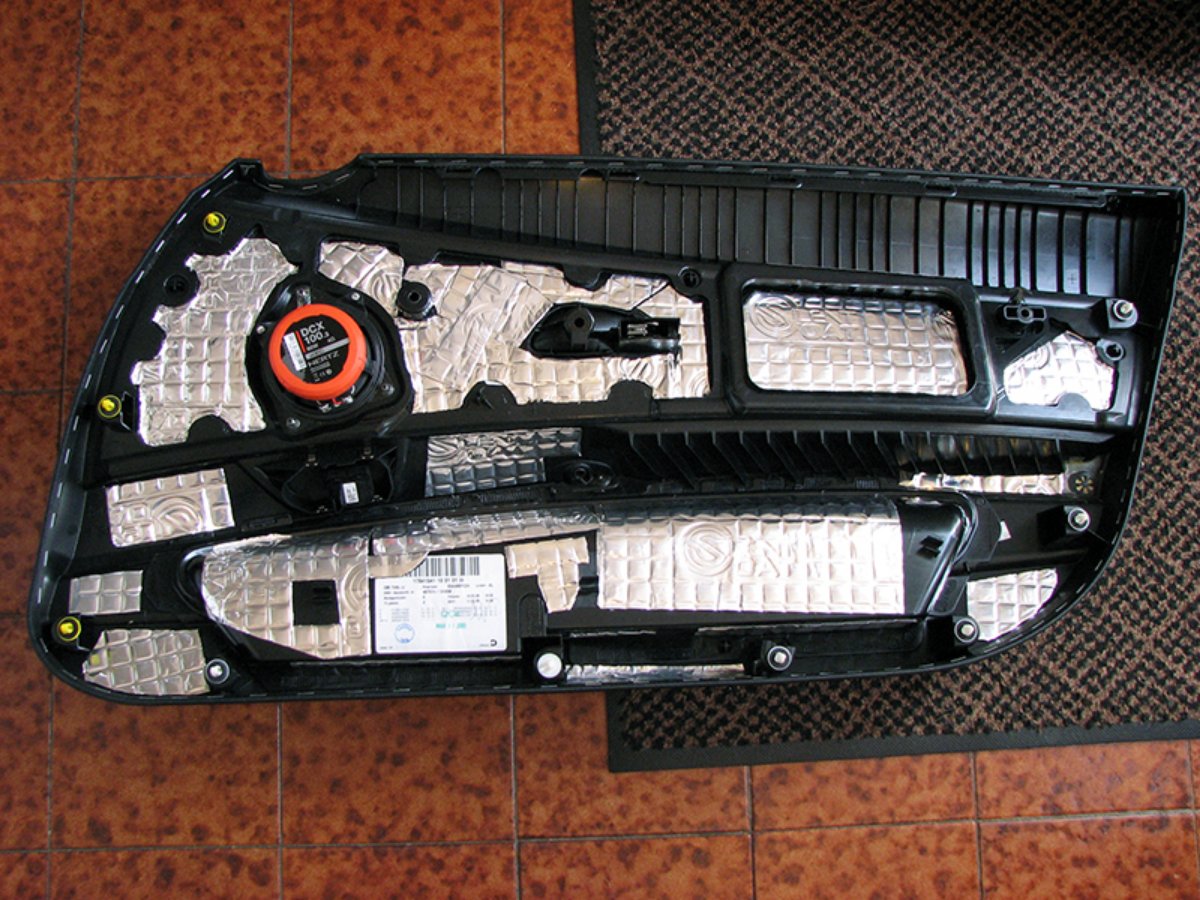
- Deadening_04_zps2443034d.jpg (242.53 KiB) Viewed 12259 times
In the 6-speaker stereo, the tweeter in the triangle above the door receives a full range signal and there is an in-line capacitor close to the tweeter to create a high pass filter - this is the black heatshrink-wrapped blob to the left of the tweeter in this photo. The tweeter cable is routed through a couple of strain-relief grooves at the bottom of the housing and held in place with something like rubber cement - I removed the glue (it just prises out) so that I had more cable to work with. When I replaced the cable in the grooves I used a hot glue gun rather than rubber cement.

- Deadening_05_zpse82284c1.jpg (102.96 KiB) Viewed 12259 times
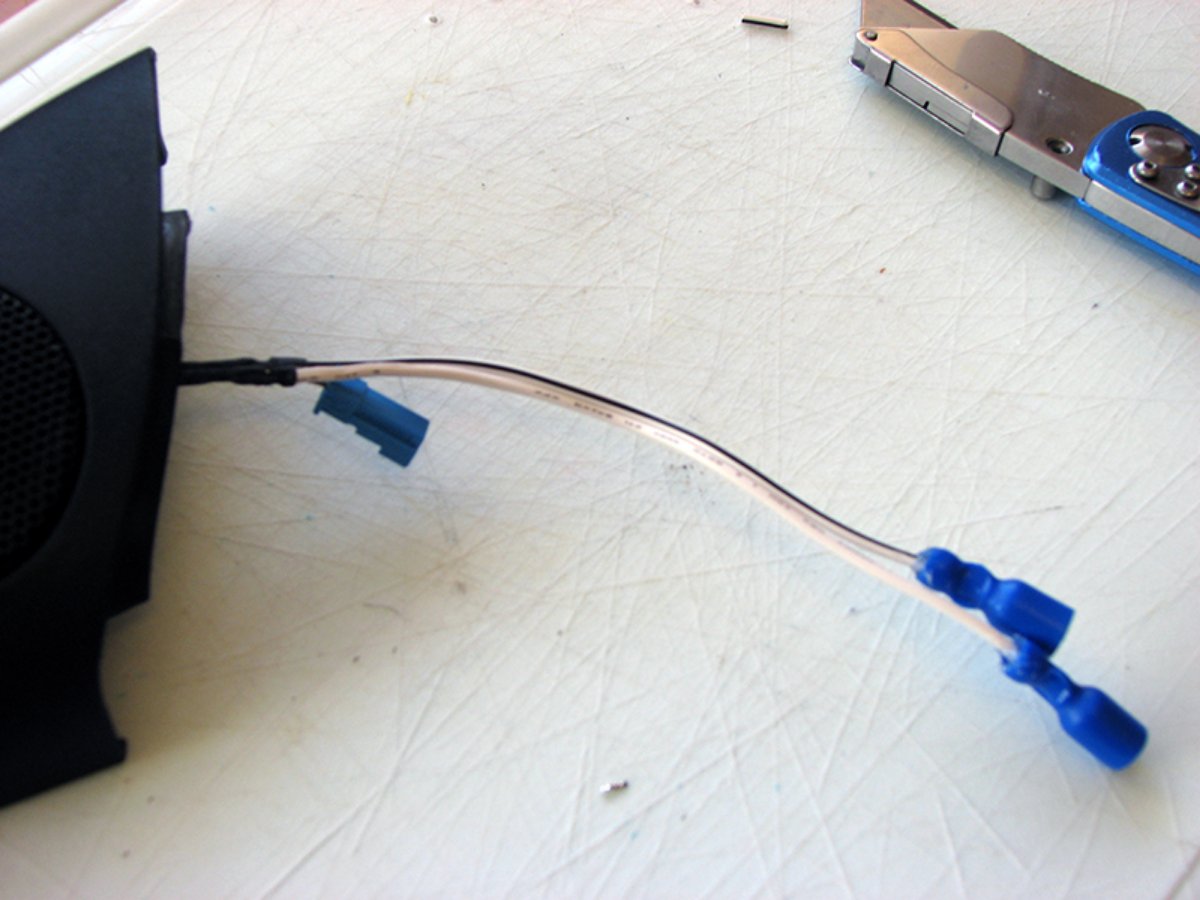
I made up some leads, the left-hand lead below was about 80cm long and has crimped female spade connectors on one end and male bullet connectors on the other, the right-hand lead is abut 15cm and has female bullet connectors and bare wire. After crimping, I also fill the wire end of the crimp connectors with a squirt from a hot glue gun as it acts a bit of additional strain relief

- Deadening_06_zpsa0a63d64.jpg (129.6 KiB) Viewed 12259 times
Cut the tweeter connector wire about 5cm from the end, strip and solder back together along with the bare ends of the bullet connector wires - don't forget to place some heatshrink tubing on the tweeter wires before soldering or you'll have to go back and redo it (ask me how I know). The Tweeter cables have a black stripe on the +ve wire so ensure that you match this up with your speaker wire.
- Deadening_07_zpsb7d63666.jpg (112.87 KiB) Viewed 12259 times
