
... with a difference 
Just over 18 months ago I had my steering wheel refurbed by Jack @ Royals - a brilliant job. However, due to the previous owner being a bit too fond of the bling, the steering wheel trims also needed a bit of TLC. On the Alpina's, the trims are covered in leather, but unfortunately Jack didn't have a thin enough leather to use, so I had to settle for a strip and respray (or rather, my trims did - i'm not that "Essex" :wink: )
Jump forward to last weekend, and I had finally got around to sourcing some suitable leather - yes, I know that's almost qualifying for srhutch levels of procrastination - and started the process. Having been in Japan I sourced some skiving knives (used for thinning leather), bought the leather (0.7mm thick) from a US stockist, and set about the process of recovering the trims:
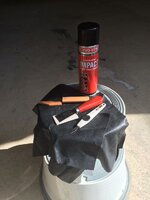
The kit - some leather, skiving knives, a scalpel and contact adhesive:
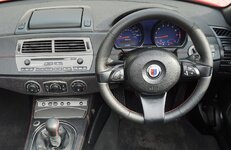
The before view (not too bad, but trims are a bit plasticky looking):
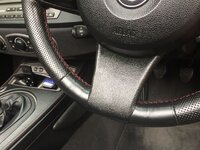
The after views:
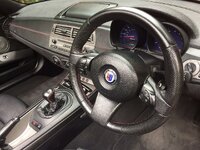
And yes, I also retrimmed the backs, not just the faces. Apologies, but i became engrossed in getting the trimming completed, and forgot to take pictures during the process - there are a number of leather skiving videos out there that show the method, but its basically shaving the backing off the leather to thin the edges. The scalpel was used to trim, rather than using scissors, to get better edges, and also to remove any excess after glueing.
Very happy with the results - although I am now looking at attempting to get the leather rhombus design on the bottom spoke, although that will probably take another 18 months to complete
Edited: to put the right thickness in
Just over 18 months ago I had my steering wheel refurbed by Jack @ Royals - a brilliant job. However, due to the previous owner being a bit too fond of the bling, the steering wheel trims also needed a bit of TLC. On the Alpina's, the trims are covered in leather, but unfortunately Jack didn't have a thin enough leather to use, so I had to settle for a strip and respray (or rather, my trims did - i'm not that "Essex" :wink: )
Jump forward to last weekend, and I had finally got around to sourcing some suitable leather - yes, I know that's almost qualifying for srhutch levels of procrastination - and started the process. Having been in Japan I sourced some skiving knives (used for thinning leather), bought the leather (0.7mm thick) from a US stockist, and set about the process of recovering the trims:
The kit - some leather, skiving knives, a scalpel and contact adhesive:
The before view (not too bad, but trims are a bit plasticky looking):
The after views:
And yes, I also retrimmed the backs, not just the faces. Apologies, but i became engrossed in getting the trimming completed, and forgot to take pictures during the process - there are a number of leather skiving videos out there that show the method, but its basically shaving the backing off the leather to thin the edges. The scalpel was used to trim, rather than using scissors, to get better edges, and also to remove any excess after glueing.
Very happy with the results - although I am now looking at attempting to get the leather rhombus design on the bottom spoke, although that will probably take another 18 months to complete
Edited: to put the right thickness in


