
So, your water pump failed? Can you fix this yourself? Yes... if you have the tools and the time. Everything is essentially accessible, and you will need more willpower and patience if this is your first time taking this on. The Z4 isn't my only car, so I could let it sit in pieces while I lived life. If this is your only ride, and you absolutely need this completed in a day -- it's possible, but it's going to be a long day. In honesty, it took me about 1 day of work if I put it all together in actual time spent on this aspect. But that assumes the removal of the time I spent drinking, swearing, and staring at an impasse until I figured it out.
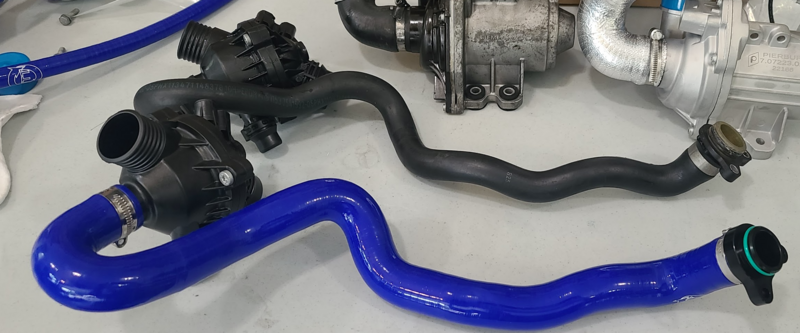
I also replaced a lot of the coolant loop since my car has 90k miles on it and a few other things -- because of the "While you're down there" aspect. I chose metal parts whenever possible.
Parts I used
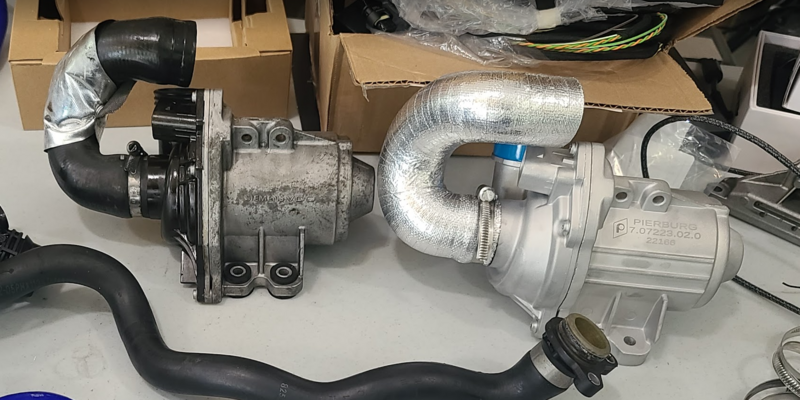
Water Pump - Pierburg 11515A05704 - Full metal (including bolts)
Engine Coolant Thermostat - Wahler 11537549476
ECS Tuning Aluminized Silicone Water Pump Hose V2.0 008286LA01 (U-hose)
VTT Full Billet/Silicone hose kit - VTT-N54-COOLANT-FULL-BLUE - (everything except u-hose)
CSF High-Performance Aluminum Radiator - 7046 (DCT Automatic)
Cooling O-Rings (2) - 17111711987
2 gallons - BMW Coolant - 82141467704 (mixed 50:50 with distilled water) Z4 takes 2.2 Gallons of coolant, so 1 wont cut it
And a stainless worm drive German hose clamp set
Tools required:
Jack(s), Jack Stands, Lift, Cribs... something to get the car up safely for the work. I used cribs.
Metric ETorx, Torx, & Hex socket set, extensions, socket wrenches (1/4", 3/8", 1/2" drive)
Torque wrenches for high and low Newton Meter measurements
Stubby 6mm ratcheting wrench or flex-head.
Mechanics pick set/pry bars
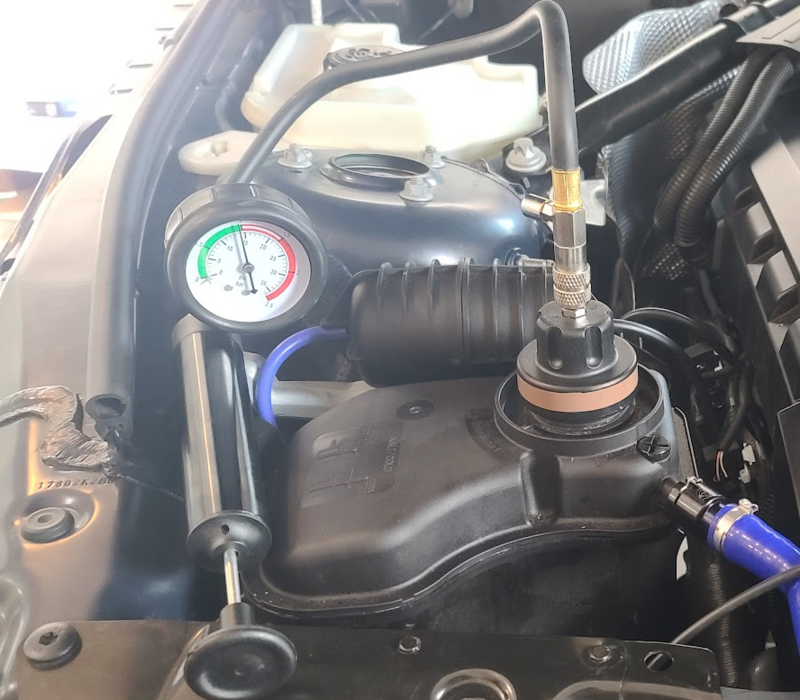
Coolant pressure test kit
Coolant catch basin for responsible disposal
Safety glasses - antifog
rags to clean up the mess
Flat, level space to work
Something to hold and organize the fifty million screws you will be removing.
Extra 8mm trim screws since I noticed a few missing - 07147129160 (most ubiquitous screw in the car)
Nitrile gloves.
Get a good understanding of where things are first... It really helps when reassembling:
https://www.realoem.com/bmw/enUS/showpa ... Id=11_3972
https://www.realoem.com/bmw/enUS/showpa ... Id=11_3754
https://www.realoem.com/bmw/enUS/showpa ... Id=17_0377
First!
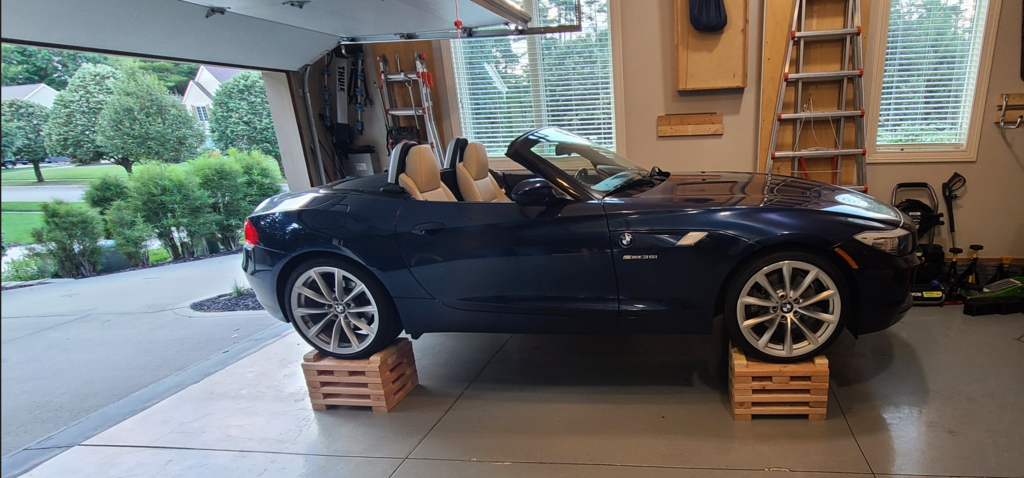
Park your car, apply the e-brake, and get it up on your jack stands, lift, or cribs. You only have to get the front up, but I put the whole car up to get more space underneath. Let the engine cool down for an hour before getting into it.
Steps in order: (ill go into the details of each)
Remove intake duct on intake silencer housing
Remove cross connection.
Remove front underbody protection
Release anti-roll bar on front axle
Release transmission oil cooler from the fan cowl; do not remove.
Remove fan cowl
Remove intercooler (charge air cooler)
Drain coolant, Disconnect hoses, and remove radiator
Remove coolant expansion tank
Remove front right cross-member
Remove coolant thermostat
Remove coolant pump
Reinstall everything in exact reverse order.
Pressure test coolant system
Lower the Z4 off of the stands/cribs/lift back onto the level floor
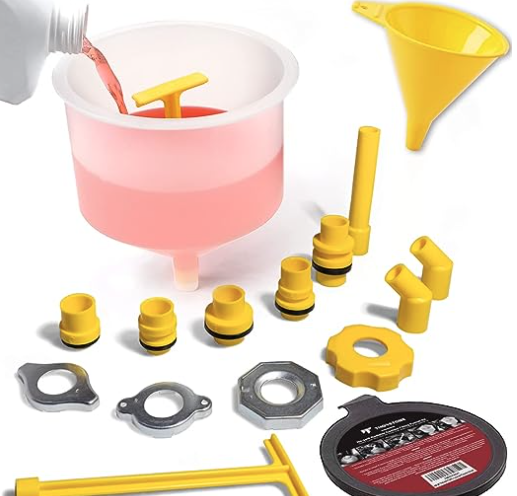
Fill coolant system and purge the air.
Clear the previous error codes with an ODBC2 tool.
Enjoy your hard work with a test drive
----------------------------------------------------------------------------------------------------------------------------------
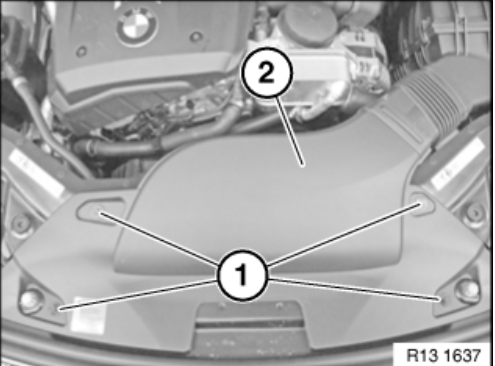
Remove intake duct on intake silencer housing (2)
Remove four 8mm trim screws - torqued 8 Nm
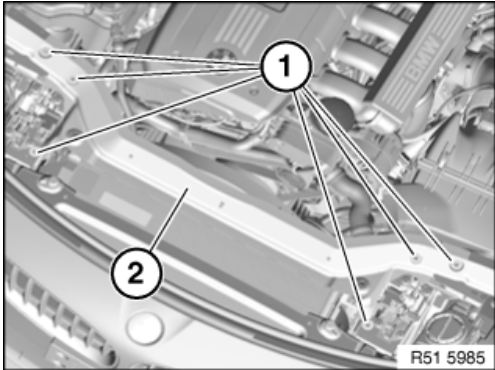
Remove cross connection.(2)
Remove six Torx bolts - torqued 7.6 Nm
The hood release line a coolant return to resevoir hose are clipped in, but are easily released.
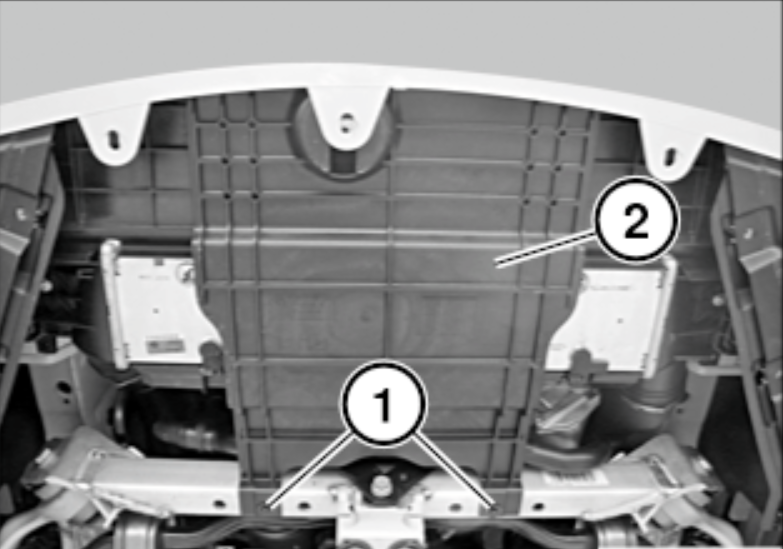
Remove front underbody protection
Remove several 8mm trim screws - torqued 8 Nm. You'll know when you get them all when the underbody protection drops on your head.

There's another lower cover under the fan and intercooler held on by two more trim screws... remove... same torque
Release anti-roll bar on front axle
Remove the 4 self-locking nuts from the stabilizer bar supports -- recommended to replace them (07119905374) - torque 22 Nm
Once the bar is released it swings a bit out of the way to give access to the water pump clamps and screws.

As a side note: Take a look at your bushings and see if they look cracked - mine were. replacing was difficult since mine were bonded to the bar, but not impossible... just hard enough to scrape off that you wish you never started. OEM repair part is 31356765574, I replaced with Powerflex PFF5-4602-26. not really a part of the pump fix, but a while you're down there, look around thing.
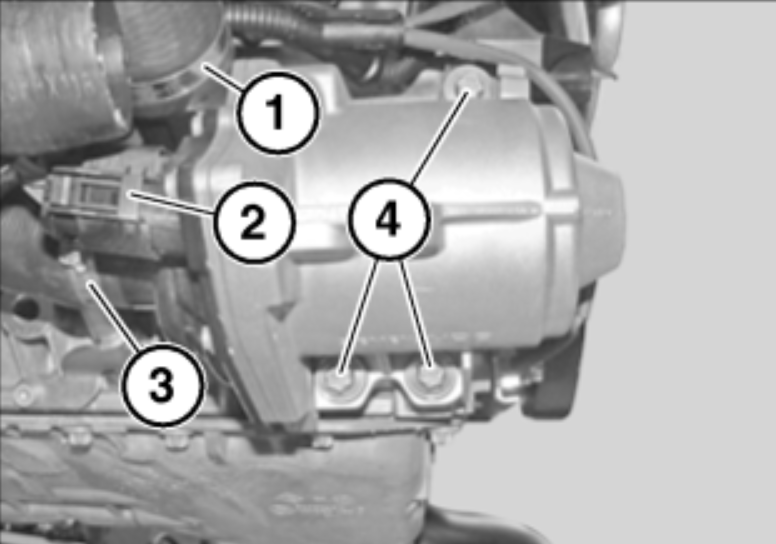
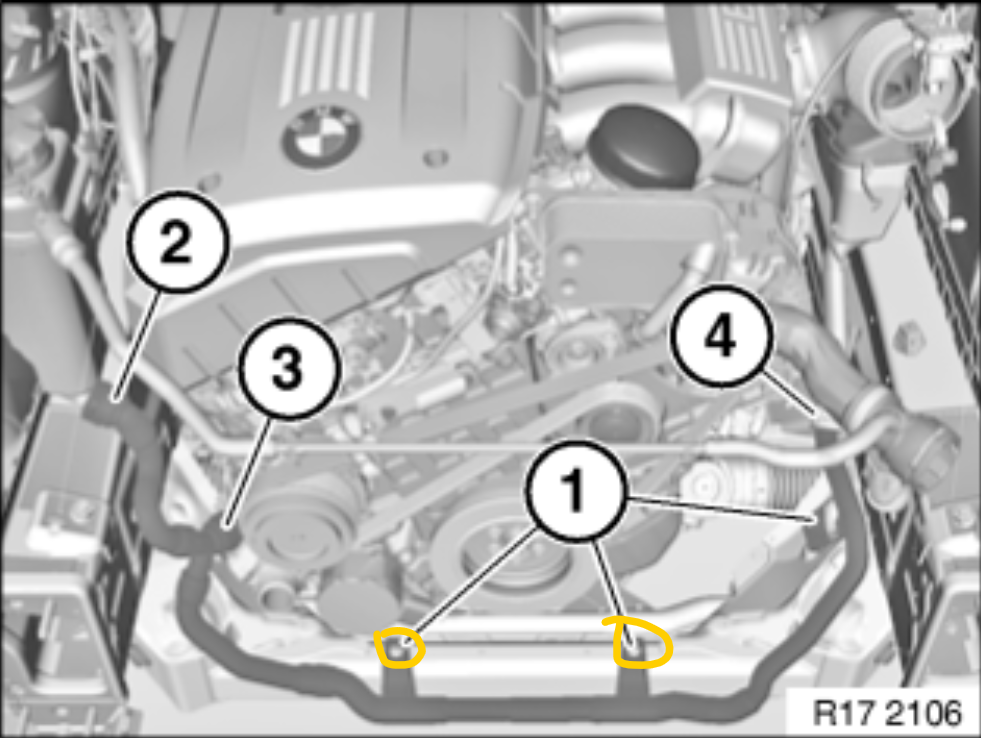
Release transmission oil cooler from the fan cowl
To pull the fan cowling up, it must be detached from the oil cooler.
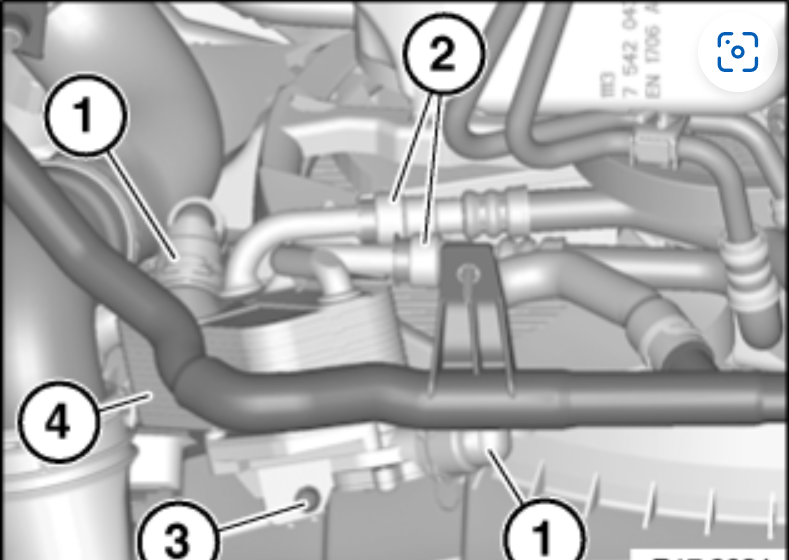
From the bottom of the fan cowl, remove the screw shown as #3 in this picture. torque 7.3 Nm
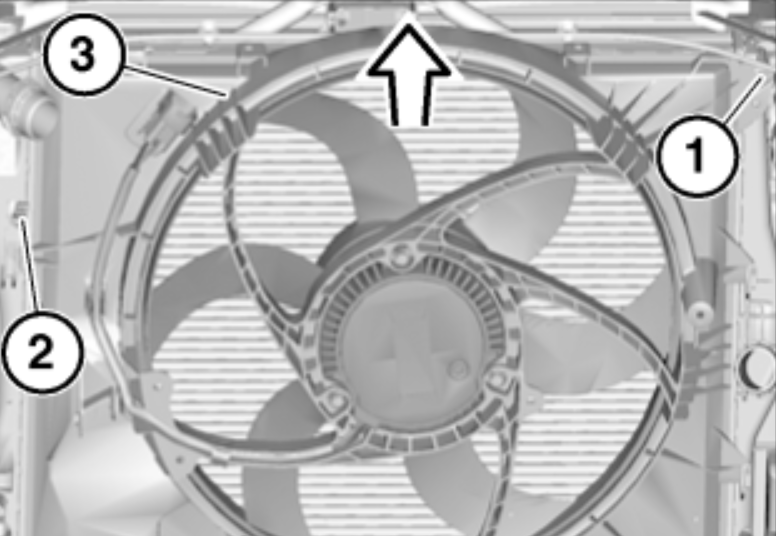
Remove fan cowl
Unclip the coolant line (1) and disconnect the electrical (2)
Remove screw (1) on fan cowl. torque 4.5Nm.
There's a press lock at (2) that needs to be depressed while you pull up on the fan cowl to remove it.
Remove intercooler (charge air cooler)
Disconnect the air hoses (1) and the screws (2) torque 4.5Nm
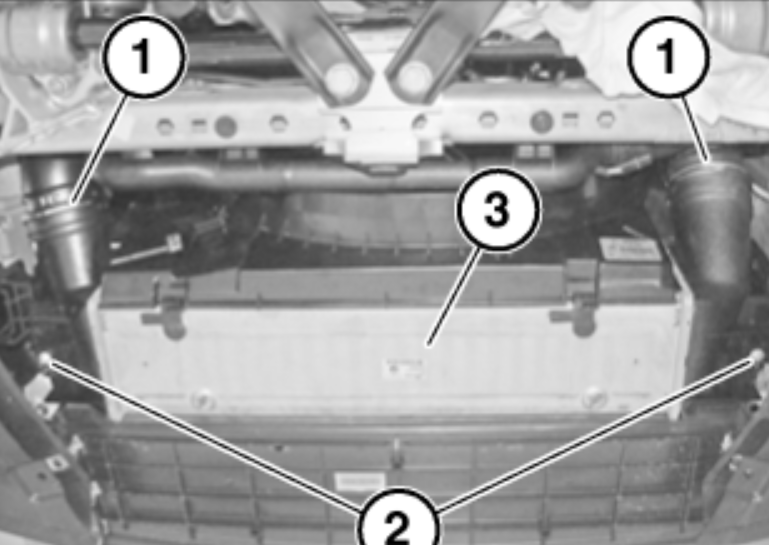
Drain coolant, disconnect hoses, and remove radiator
You can drain your coolant from the blue drain plug on the left-side bottom of the radiator if you are replacing the plug or the radiator.
If you're not replacing the radiator or plug, then just drain it from one of the hose connections to the radiator that you will remove. This avoids opening the drain plug and risking any damage to it.
Remove the cap from the coolant reservoir to fully drain.
Please collect the coolant in a capture basin throughout this work. Put it in a sealed container to dispose of properly. In the USA, your county will have a posted schedule and location for toxic fluids collection. This stuff shouldn't be put down a drain or dumped -- big environmental impact. Keeping it closed and cleaning up spills will prevent your pets or other wildlife from consuming this sweet fluid fatally.
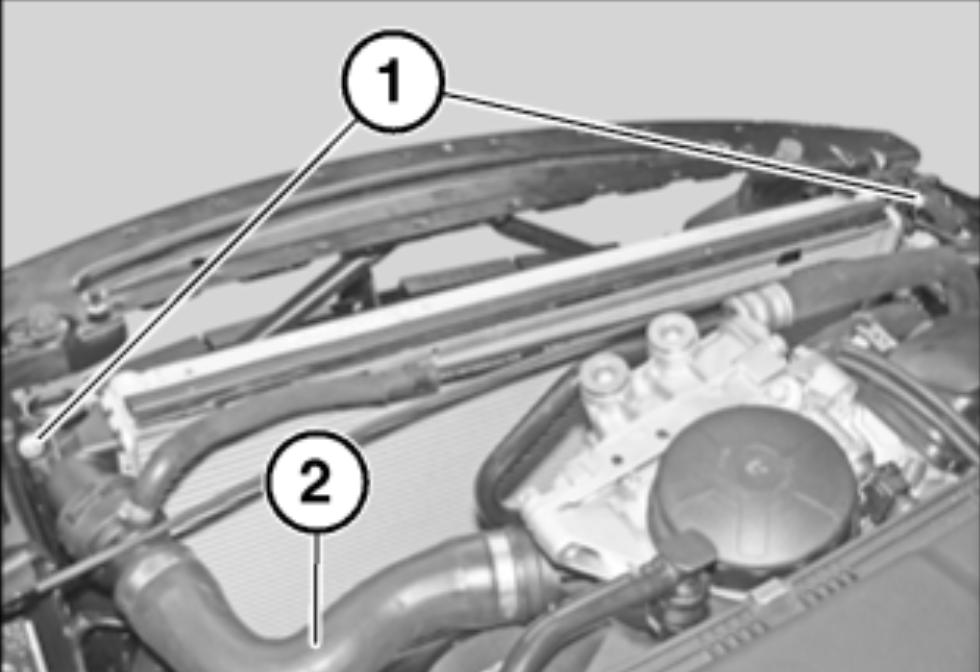
https://www.youtube.com/watch?v=6RddnO9p8a8 YouTube of a 335i radiator replacement, which shows draining, disconnecting hoses, and removing the two T25 bolts at the top corners of the rad (1). 4.5Nm torque
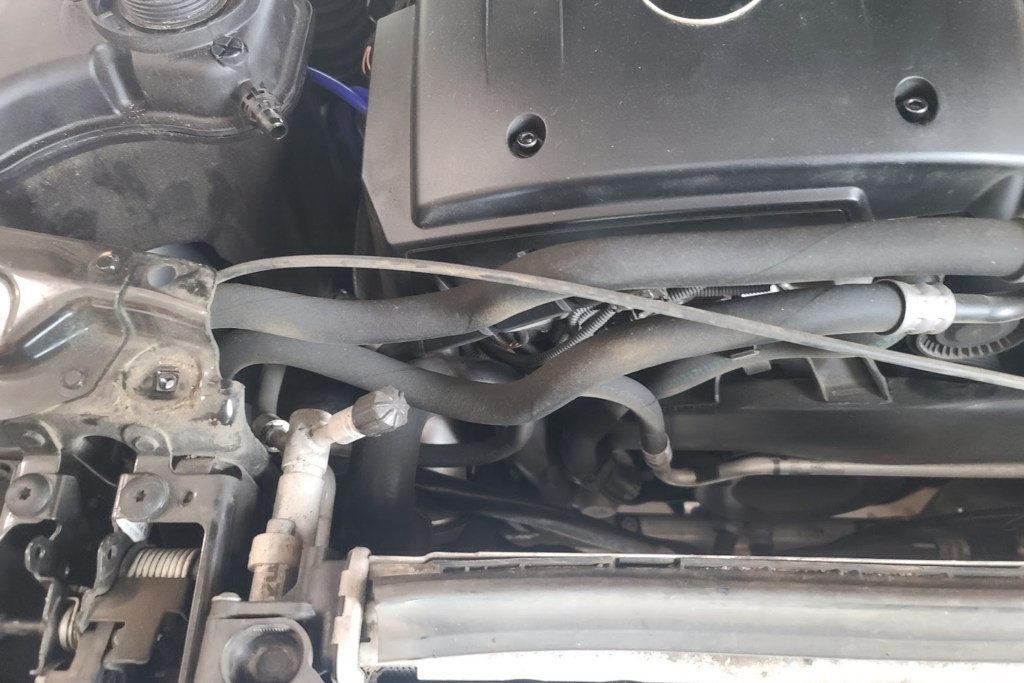
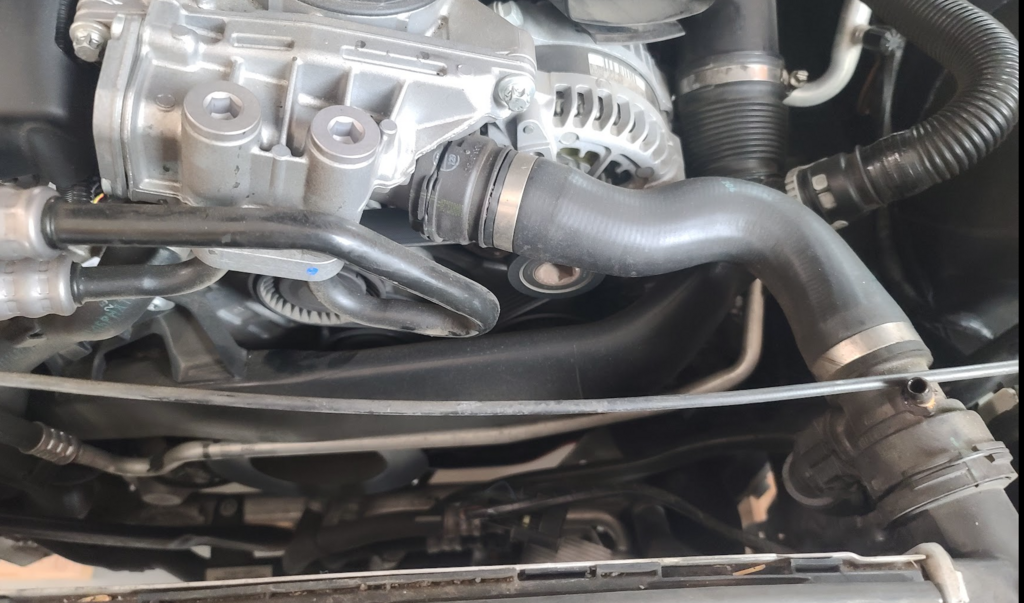
Removing the hoses was significantly easier with picks and a pry tool. Keep in mind not to pry against the rad fins - they bend easily. Take a picture of the way the hoses look as they are attached. It's quite an intricate puzzle if you don't. In hindsight, I wish I took more pictures of it! Take a look at your hoses as you disconnect them. If they are swelling, they need replaced. If you have a 100k mile car, just replace your hoses. For the hoses you don't replace in reinstall, replace your O-rings.
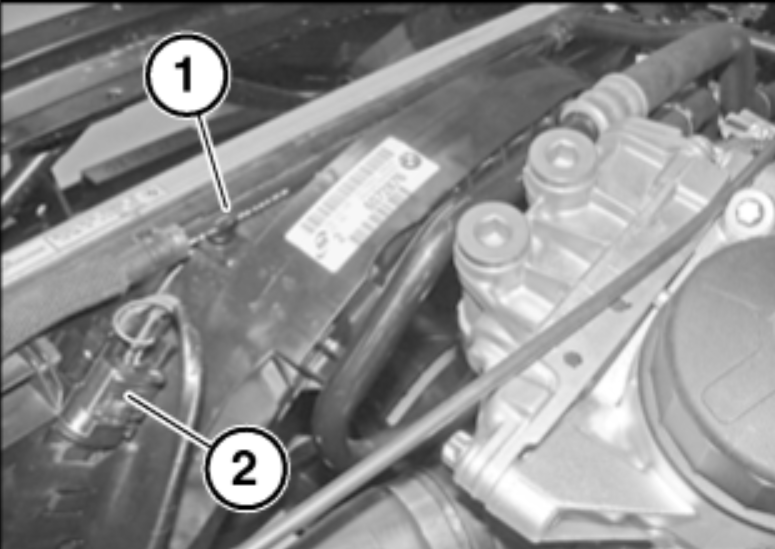
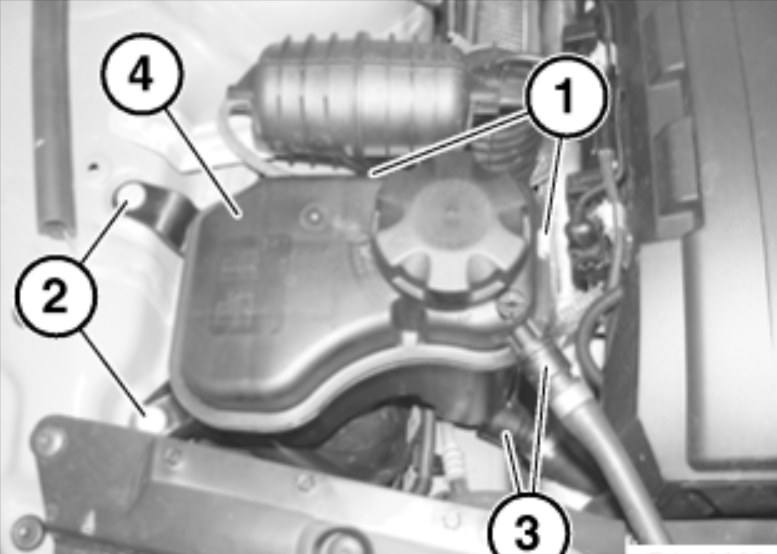
Remove coolant expansion tank
The coolant reservoir needs to be removed to gain access and remove the diagonal strut. Inspect the plastic for cracks or degradation. It may be a good plan to replace it if you have a 100k mile car -- plastic doesn't age well in heat. I have an aluminum version on order:https://www.ecstuning.com/b-turner-moto ... 378la02~a/
Remove the two screws (2) 8Nm torque
Remove the two hose connections - pick/pry work well here too -- don't lose the metal clips
Pop the reservoir out of the rubber post -- requires a little force but be careful not to pull it away until disconnecting the sensor on the bottom. I believe it was a press and quarter anticlockwise turn to release.
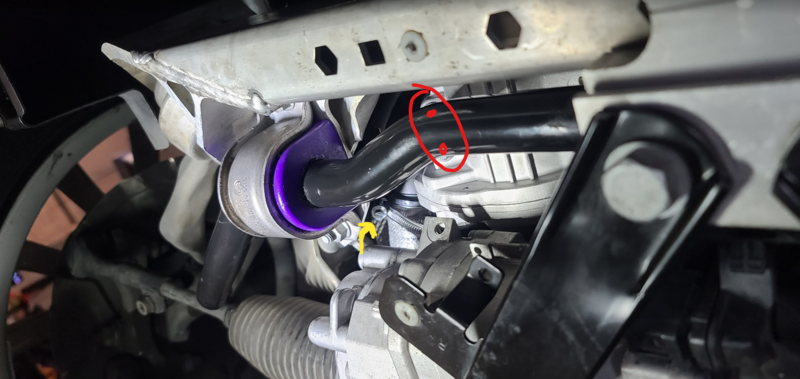
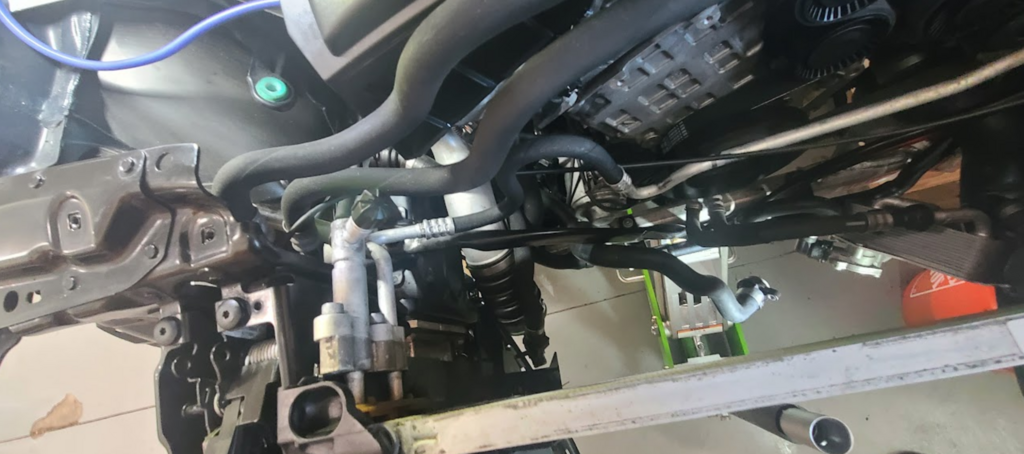
Remove front right cross-member
As you can see in the picture, the "diagonal strut" is in the way of removing the thermostat and coolant pump.
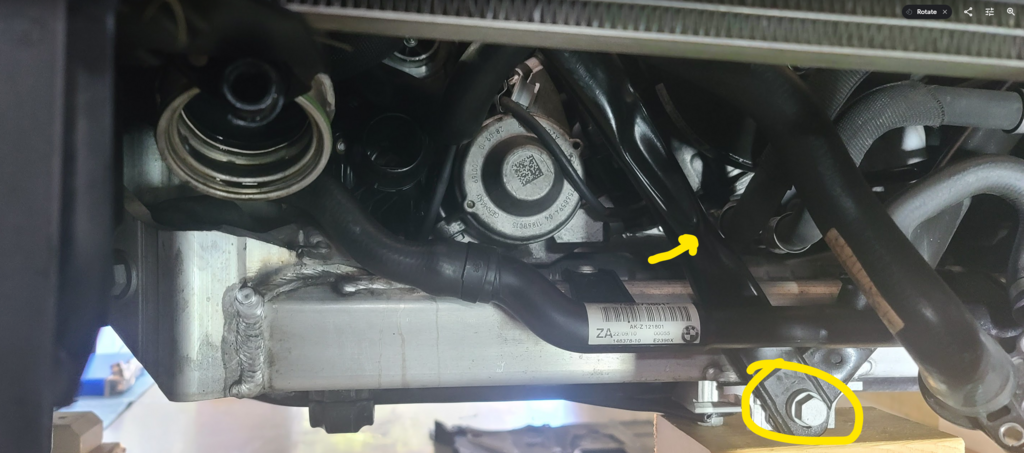
Remove the 3 circled nuts/bolts - torque 56 Nm
Then thread the metal arm out of the car to get it out of your way. This part isn't carrying load.
Also remove the (2) bolts (7.3 Nm torque) on the front axel support (circled yellow)
This is the end of getting everything else out of the way to actually work on the Thermostat and Coolant Pump..
Take a minute to drink at least a pint. You are a solid representative of DIY mechanics to get this far.
Continued in next post.....