Phase one was completed today, getting the subs installed and temporary mount the sub amp. Words by my brother Patrick:
_______________________________________________
Objective: Improve SQ while retaining stock look
Headunit: Stock
Components: Unknown right now, but maybe Genesis A16
Front Amp: Genesis Profile 4 bridged
Subs: 2 Genesis 6x9 subs 4ohm
Sub Amp: Genesis Profile Sub
Processing:
AudioControl LC6i (line level converter)
Audio System PM/4 (5 chan analogue parametric EQ + sub level / 1 chan eq)
The stock system seems to be typically boomy at the bottom end and mid / top end sounds like it has a blanket over it.
Part 1: The bottom end:
The subs from Genesis:
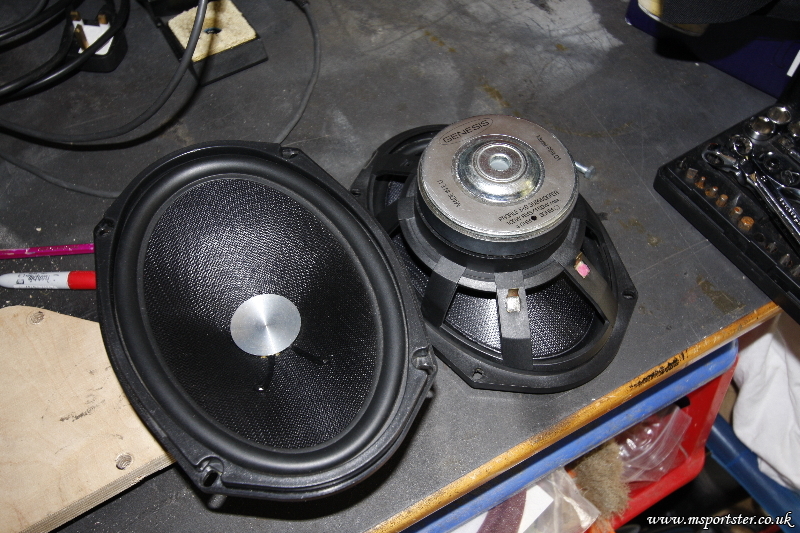
Installation of the Genesis 6x9 subs and setup one temporary install of an amp and the LC6i
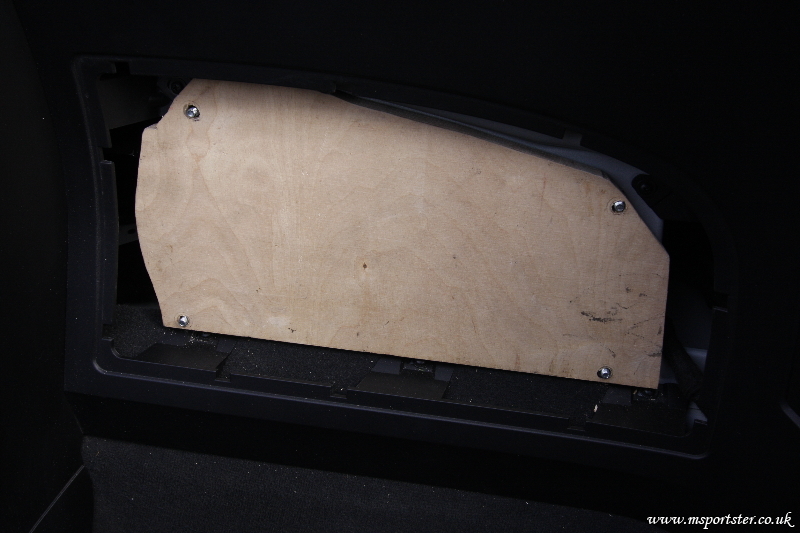
Step 1: Pull the two storage trays out from behind the seats, measure up and cut some baffles out of 18mm birch ply
Step 2: Repeat on side B:

Step 3: Eye up the speaker fit:

Step 4: Make a baffle for the other side, you can see here some trailing to fit Image Dynamics ID8's but they would have stuck out pretty far and the mounting bolts would have gotten in the way. A shallower 8 might have worked:

Step 5: Test fit sub after cutting a hole and routing a lip for it to sit into - this lets the speaker sit as far in a possible to allow more room for covers:

Step 6: Sound deaden the metal and close up any obvious holes the cabin. Add 4 bolts with nuts to hold them in.

Step 7: Spray paint the ply black so there's nothing too light to shine out from behind the seat. Strip some speaker cable and add push fit connectors:

Step 8: Slap a speaker in for a test fit:

Step 9: Repeat on side B:

Step 10: Take the plastic trays and chop down until they clear the speakers with a good amount of gap - speaker cloth will go over the hole:

Step 11: Cut and shut a quick power system together with the Genesis Profile sub and LC6i. The source signal is taken from the rear speakers - the wires are right behind the carpet of the bulkhead so it's easy to get at. The LC6 auto turns on when it senses a signal and has a remote out to power on the profile sub:

Step 12: Find a good location for a fuse (40A will do for now):

Step 13: Connect the earth:

Step 14: Positive connected:

Step 15: Drop the carpet on top and you'd never know anything happened underneath (now go for a cup-o-tea)