
Not joined yet? Register for free and enjoy features such as alerts, private messaging and viewing latest posts and topics.
Dash and centre console trim REPLACED - GUIDE inside
-
slick
- Senior Member

- Posts: 2216
- Joined: Wed Jun 13, 2012 9:30 pm
Re: Dash and centre console trim REPLACED
I like the wood trim........How much ? 
E85 2.5 sterling grey
E89 3.0 se
Porsche 987 Boxster 3.4S
E89 3.5i
TVR Chimerea 4 litres of rolling thunder
Corvette C6 a moment of insanity
E89 3.0i
E89 3.0 se
Porsche 987 Boxster 3.4S
E89 3.5i
TVR Chimerea 4 litres of rolling thunder
Corvette C6 a moment of insanity
E89 3.0i
-
shawna
- Senior Member
- Posts: 1242
- Joined: Tue Oct 23, 2012 7:22 am
- Location: Cambridgeshire
Re: Dash and centre console trim REPLACED
Write up: (pictures added shortly depending what I find and plagiarizing from another write up in Italian - THESE PICTURES ARE NOT ALL MINE but they serve the purpose)
3 Stages
1. Removing rear part of centre console.
Remove coin holder.
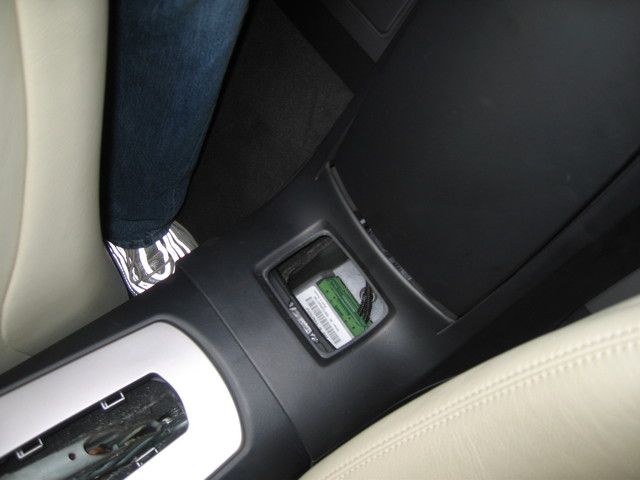
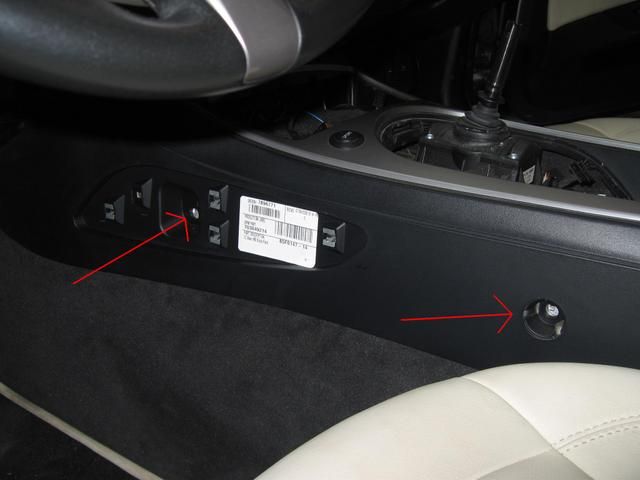
Remove screws sn each side of the console below and abeam the ashtray hidden by a circular piece of trim covering.
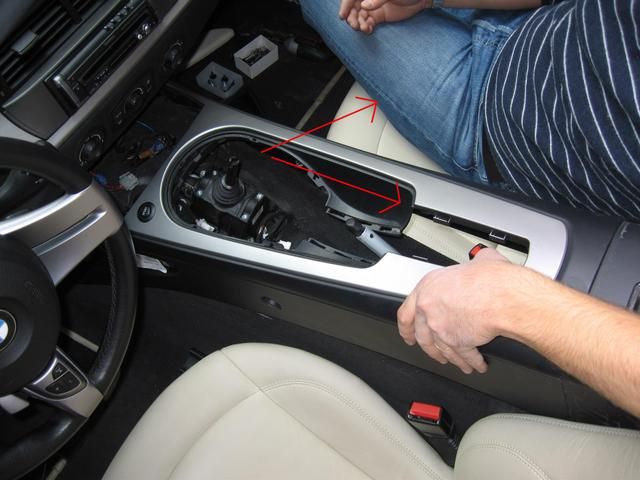
Move the hood (half open half closed position and pull the plastic trim very gently. The trim will still be attached at the bottom. To remove it completely use a flat head screw driver and gently unscrew the plastic lugs. <<<will try to add a pic for this.
Once its removed, untie the loop of the hood and remove 2 torx screws at the top. These are marked in RED.
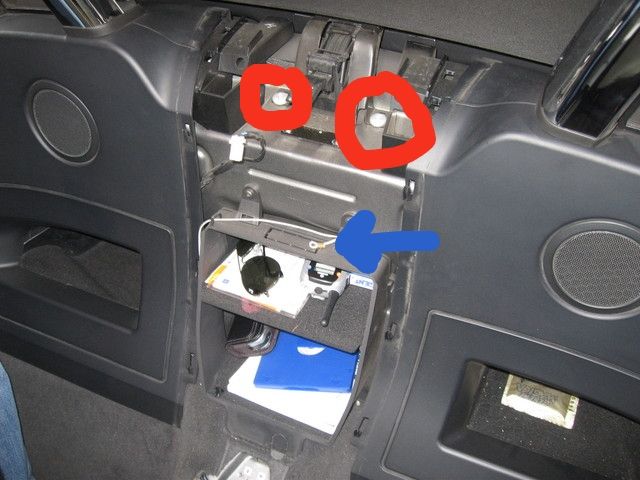
Open the lower door half way exposing 2 screws(torx) and remove them.
This should bring the rear console free.
Now pull up gently.
2. Removing Centre Console.
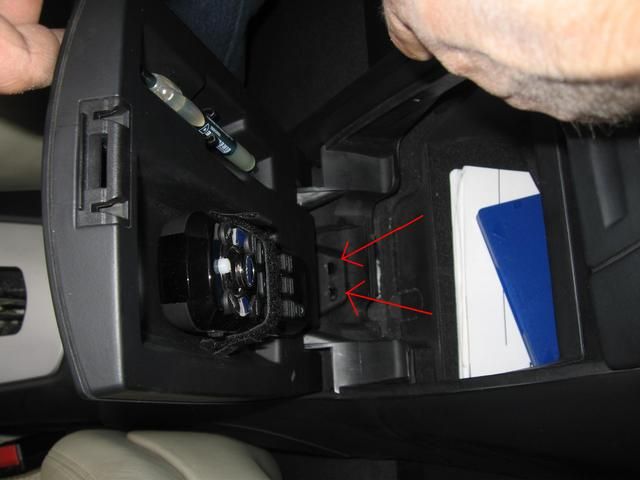
Take off the ashtray by removing the metal part exposing a screw behind it. The assembly will have to be gently lifted off at an angle. Undo the electrical harnesses (,Soft Top lowering, DSC pin and cigarette lighter - 3 in all).
Remove gear knob - put it in second and tug minding your face/eyes/glasses.
Remove gaiter/gear knob surround - a soft tug will undo.
Remove the hand brake gaiter by initially pulling the leather trim surrounding the handbrake then actually removing the handbrake leather by pulling VERY HARD towards the dashboard. It should come out.
Remove the plastic trim beneath the hand brake by sliding it towards dashboard.
On each side of the centre console are 2 screws, one on each side behind the knee pads and one on each side abeam the handbrake by pulling the circular clips that cover them.
At this stage the console should move backwards and outwards.
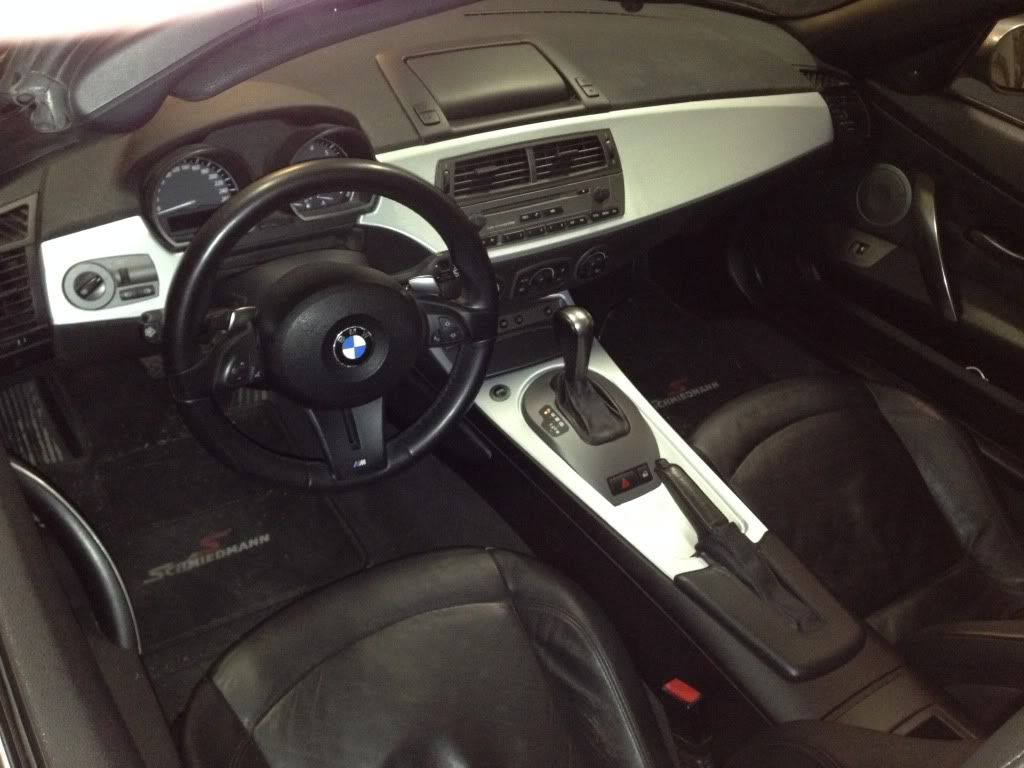
3. Remove Dash Trim
Undo the airvents by gently inserting a flat head screw driver and pulling outwards. There are 4 sliders you have to tackle. An extra pair of hands is desireable here. Note: this is easier said than done but its doable.
Remove the stereo.
Remove the screws holding the trim together. You can see the screws to remove in this picture:
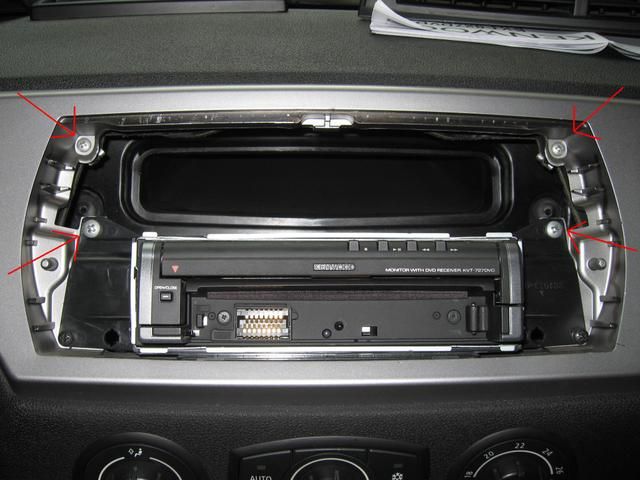
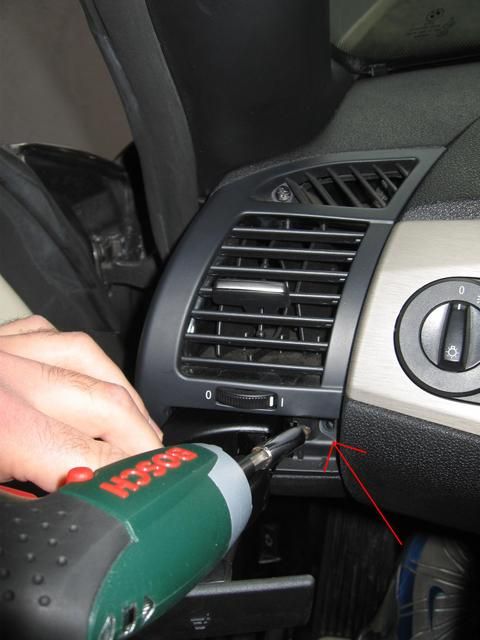
Remove both left and right airvents. Very easy, there are 2 screws, one is behind the cup holder the other at the top behind a plastic trim covering, marked with the RED arrow.

Now the FUN part.
UNDO THE GLOVE COMPARTMENT. <<<<this step is crucial. Otherwise you will waste an hour.
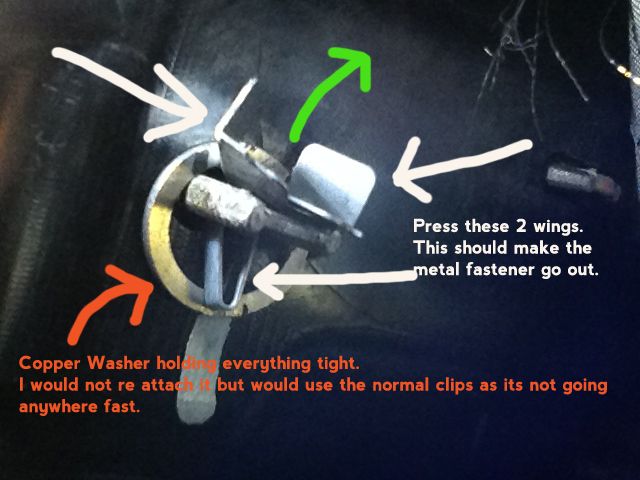
This will expose the blessed, trim fastener lug or wahtever its called. Whoever invented this did it on purpose. Its sole aim is not to be removed.
Basically it consists of a copper washer and a pin. Undoing the glove compartment gives you super access to it and you can immediately see what to do to remove it. Use a long neck pliers and gnetly press the tabs and pulling upwards.
This is the infamous clip:
Once that is done its very easy. Pull the dash trim and it will come off.
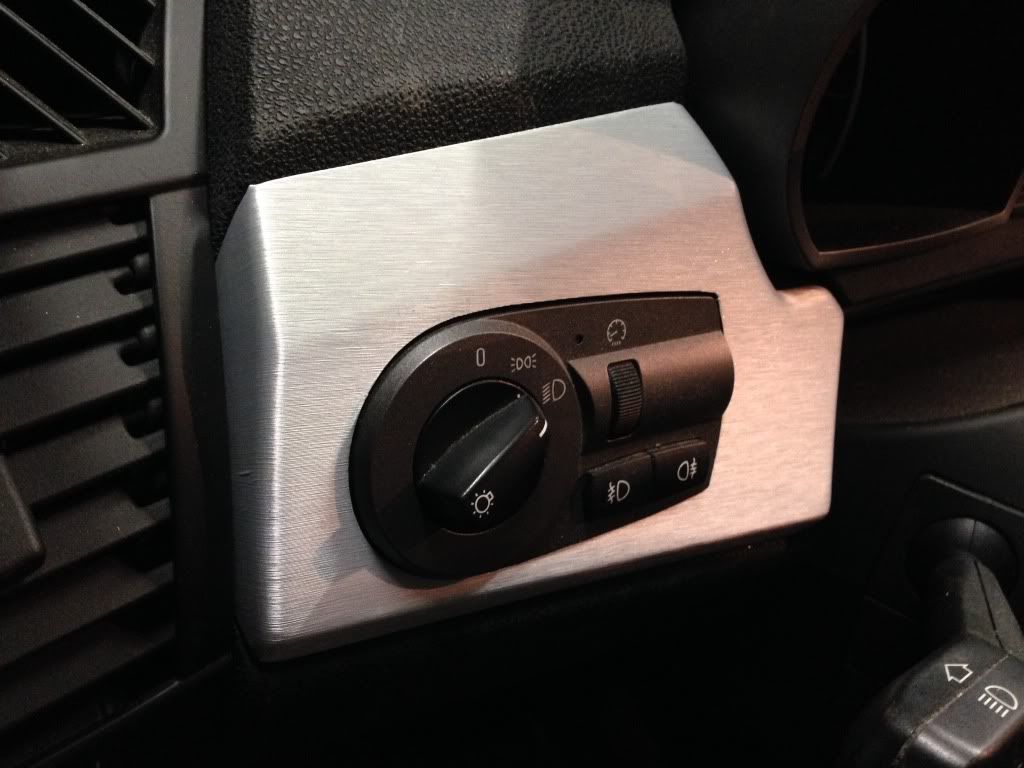
Same for the trim around the light switch.
Re fit everything back.
DOnt do the trim fastener clip again, its not needed just use another clip.
Take care and have fun.
Questions answered as soon as possible.
3 Stages
1. Removing rear part of centre console.
Remove coin holder.
Remove screws sn each side of the console below and abeam the ashtray hidden by a circular piece of trim covering.
Move the hood (half open half closed position and pull the plastic trim very gently. The trim will still be attached at the bottom. To remove it completely use a flat head screw driver and gently unscrew the plastic lugs. <<<will try to add a pic for this.
Once its removed, untie the loop of the hood and remove 2 torx screws at the top. These are marked in RED.
Open the lower door half way exposing 2 screws(torx) and remove them.
This should bring the rear console free.
Now pull up gently.
2. Removing Centre Console.
Take off the ashtray by removing the metal part exposing a screw behind it. The assembly will have to be gently lifted off at an angle. Undo the electrical harnesses (,Soft Top lowering, DSC pin and cigarette lighter - 3 in all).
Remove gear knob - put it in second and tug minding your face/eyes/glasses.
Remove gaiter/gear knob surround - a soft tug will undo.
Remove the hand brake gaiter by initially pulling the leather trim surrounding the handbrake then actually removing the handbrake leather by pulling VERY HARD towards the dashboard. It should come out.
Remove the plastic trim beneath the hand brake by sliding it towards dashboard.
On each side of the centre console are 2 screws, one on each side behind the knee pads and one on each side abeam the handbrake by pulling the circular clips that cover them.
At this stage the console should move backwards and outwards.
3. Remove Dash Trim
Undo the airvents by gently inserting a flat head screw driver and pulling outwards. There are 4 sliders you have to tackle. An extra pair of hands is desireable here. Note: this is easier said than done but its doable.
Remove the stereo.
Remove the screws holding the trim together. You can see the screws to remove in this picture:
Remove both left and right airvents. Very easy, there are 2 screws, one is behind the cup holder the other at the top behind a plastic trim covering, marked with the RED arrow.
Now the FUN part.
UNDO THE GLOVE COMPARTMENT. <<<<this step is crucial. Otherwise you will waste an hour.
This will expose the blessed, trim fastener lug or wahtever its called. Whoever invented this did it on purpose. Its sole aim is not to be removed.
Basically it consists of a copper washer and a pin. Undoing the glove compartment gives you super access to it and you can immediately see what to do to remove it. Use a long neck pliers and gnetly press the tabs and pulling upwards.
This is the infamous clip:
Once that is done its very easy. Pull the dash trim and it will come off.
Same for the trim around the light switch.
Re fit everything back.
DOnt do the trim fastener clip again, its not needed just use another clip.
Take care and have fun.
Questions answered as soon as possible.
-
andysat
- Lifer

- Posts: 16731
- Joined: Sun Jun 28, 2009 6:52 pm
Re: Dash and centre console trim REPLACED - GUIDE inside
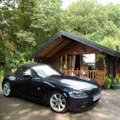
Great write up!  -is that a pic of the inside of your garage?

Gone but not forgotten.
New ride silver e93.
-
shawna
- Senior Member
- Posts: 1242
- Joined: Tue Oct 23, 2012 7:22 am
- Location: Cambridgeshire
Re: Dash and centre console trim REPLACED - GUIDE inside
Yes!andysat wrote:Great write up!
its more of a showroom really
-
P_Davey
- Newbie

- Posts: 32
- Joined: Thu Feb 03, 2011 4:40 pm
Re: Dash and centre console trim REPLACED - GUIDE inside
shawna,
Hello
Are your trim pieces still for sale?
What price are you looking for?
Many thanks
Patrick
Hello
Are your trim pieces still for sale?
What price are you looking for?
Many thanks
Patrick
-
Swiftly

- Lifer
- Posts: 8817
- Joined: Wed Dec 28, 2011 10:43 pm
- Location: Edinburgh
Re: Dash and centre console trim REPLACED - GUIDE inside
Nice write up
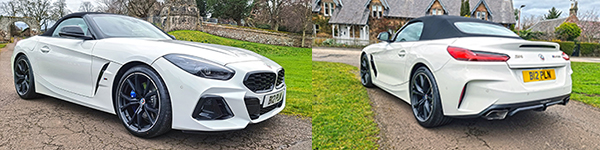
Replacement, G29 Z4 M40i Lci in Alpine White
Gone G29 Z4 M40i in San Francisco Red
Gone F22 M240i auto coupe in Estoril Blue
Gone 2007 E85 3.0si Sport in Silver Grey,
-
shawna
- Senior Member
- Posts: 1242
- Joined: Tue Oct 23, 2012 7:22 am
- Location: Cambridgeshire
Re: Dash and centre console trim REPLACED - GUIDE inside
ThanksSwiftly wrote:Nice write up
-
Bing

- Legend

- Posts: 26514
- Joined: Sun Oct 02, 2011 7:19 pm
- Location: Exiled Scot in Maidstone
Re: Dash and centre console trim REPLACED - GUIDE inside
Great write up
I have heard though that the knee pads on the side of the transmission tunnel are the hardest bit to get off - how the hell did you do it so easily (assuming it was easy because you didn't mention it...)
I have heard though that the knee pads on the side of the transmission tunnel are the hardest bit to get off - how the hell did you do it so easily (assuming it was easy because you didn't mention it...)
Current... Silver Grey ///M Roadster, non-flimper spec, Imola Red nappa, permanent ear-to-ear grin
Previous... 3.0Si Sport Roadster, Black Sapphire, Dream Red leather with lots of toys and lots of mods...
Previous... 3.0Si Sport Roadster, Black Sapphire, Dream Red leather with lots of toys and lots of mods...
-
shawna
- Senior Member
- Posts: 1242
- Joined: Tue Oct 23, 2012 7:22 am
- Location: Cambridgeshire
Re: Dash and centre console trim REPLACED - GUIDE inside
Hey Bing!Bing wrote:Great write up
I have heard though that the knee pads on the side of the transmission tunnel are the hardest bit to get off - how the hell did you do it so easily (assuming it was easy because you didn't mention it...)
no they were not difficult at all same difficulty level as most of the others.
Whats hard in them? Just put a plastic bit in and pull, making sure that you dont tear the leather.
Elbow grease and perspiration is the name of the game.
-
2dogs

- Lifer
- Posts: 5624
- Joined: Thu May 29, 2008 9:12 pm
- Location: Somerset
Re: Dash and centre console trim REPLACED - GUIDE inside
Did mine last year didn't find it to bad to do, the hardest part for me was getting
The radio out
The radio out
Blue Z4MC - now gone
-
Zmachine
Re: Dash and centre console trim REPLACED - GUIDE inside
Excellent guide, thanks for posting. Looking to do mine once the hard tops comes off for summer.
Maybe this post should be added to the how to section..?
Maybe this post should be added to the how to section..?
-
ben g

- Lifer
- Posts: 7858
- Joined: Thu Mar 29, 2012 5:20 pm
- Location: Essex
Re: Dash and centre console trim REPLACED - GUIDE inside
at last! a decent how to!
i took my centre console out last year using an italian guide and a few pictures. it was rather difficult to say the least.
now i can get it all out in 30 minutes
glad you done a how to for the dash trim as that's what i will be removing next. thankyou.
i took my centre console out last year using an italian guide and a few pictures. it was rather difficult to say the least.
now i can get it all out in 30 minutes
glad you done a how to for the dash trim as that's what i will be removing next. thankyou.
Red Soft-top Sterling grey 3.0i - Z4M Front, Eibachs, Polybushed, Clear headlights, Triple clear spot rear lights, Shadow Chrome 107's, Sport MFSW, ZHP.
-
Hosse

- Member

- Posts: 56
- Joined: Fri Mar 05, 2010 10:24 pm
Re: Dash and centre console trim REPLACED - GUIDE inside
Thanks for this description!
I just wanted to say that it was a lot easier on my 2003 3.0IA Convertible. I didnt need to take out the airvents, not the clove department, not the complex clip on the dash trim and not the little "coin cup" in the back.
This resulted in 1,5 hours of getting the parts out, 1,5 hours in wrapping it in brushed aluminium plastic (not 3M) an 1 hour to get the parts back in to place. Love the result. Just a couple of bubbles, thats it.


Best regards
Hosse
"Norway - Z4 2.5IA E89 - 320D F31"
Hosse
"Norway - Z4 2.5IA E89 - 320D F31"
-
teeboz
- Newbie
- Posts: 11
- Joined: Sat Aug 16, 2014 6:48 pm
Re: Dash and centre console trim REPLACED - GUIDE inside
I need help with glove box removal to complete this mod. Anyone have write up or directions?
-
Yorkie Z

- Senior Member
- Posts: 2594
- Joined: Thu Nov 28, 2013 9:19 pm
- Location: Plymouth
Re: Dash and centre console trim REPLACED - GUIDE inside
Hi can you tell me what's the best way to remove the Knee Pads.? Can't seem to get them out without fear of damaging them.!!!
A Dirty M///