Not joined yet? Register for free and enjoy features such as alerts, private messaging and viewing latest posts and topics.
108 refurb project - How i did it
- VENDAR
- Member

- Posts: 299
- Joined: Wed Sep 05, 2012 11:05 am
Re: 108 refurb project - How i did it
Well then we are back to zero  I don't want to risk breaking the rims. Since the only reason for splitting is to paint the star and not the bolts i will might as well get the bolts off, paint it and then putt them back on. Will see thought...I will let you know of my actions as soon as i decide!
- deka
- Senior Member

- Posts: 2020
- Joined: Thu Dec 27, 2007 12:59 pm
Re: 108 refurb project - How i did it
the stars wil only go on one way as the valve hole need to line up.... as far as removing the bolts, us wd40 take it easy,,, if they are not shift or one is tight soak for a couple of days in wd40 or some other releasing solution and you should have no problems
http://www.z4-forum.com/forum/viewtopic ... 2A#p529756
http://www.z4-forum.com/forum/viewtopic ... 2A#p529756
E89 2.5I Blue rubbish wheels
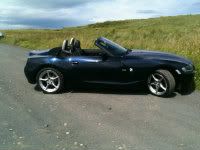
Gone But not forgotton. Z4 06 roadster 2.5 Midnight blue Hardtop black heated leather, stubby, phone kit, 108's PDC. ZHP

Gone But not forgotton. Z4 06 roadster 2.5 Midnight blue Hardtop black heated leather, stubby, phone kit, 108's PDC. ZHP

- VENDAR
- Member

- Posts: 299
- Joined: Wed Sep 05, 2012 11:05 am
Re: 108 refurb project - How i did it
how did you all of you remove the wheel from the rims? all of you have second set of wheels? 
- deka
- Senior Member

- Posts: 2020
- Joined: Thu Dec 27, 2007 12:59 pm
Re: 108 refurb project - How i did it
i bought the 108 as a second set, so i could take my time to do it, if you just want to paint the stars then you could do one at a time if you wanted
E89 2.5I Blue rubbish wheels
Gone But not forgotton. Z4 06 roadster 2.5 Midnight blue Hardtop black heated leather, stubby, phone kit, 108's PDC. ZHP

Gone But not forgotton. Z4 06 roadster 2.5 Midnight blue Hardtop black heated leather, stubby, phone kit, 108's PDC. ZHP

- Machine monkey
- Lifer

- Posts: 11310
- Joined: Thu Oct 04, 2012 12:49 pm
- Location: In the shire Oxfordshire
Re: 108 refurb project - How i did it
I can drill and tap them out for you. Long drive mind!!!RJS-Z4 wrote:It's not having a spare, it's being able to get the snapped on out, trust me.
Where did you buy 20 bolts from? Or did you buy a wheel and remove them?
- andicole0
- Member

- Posts: 697
- Joined: Thu Jun 21, 2012 2:03 pm
- Location: Tunbridge Wells
Re: 108 refurb project - How i did it
As a matter of interest what sort of drill and bit do you use?Machine monkey wrote:I can drill and tap them out for you. Long drive mind!!!RJS-Z4 wrote:It's not having a spare, it's being able to get the snapped on out, trust me.
Where did you buy 20 bolts from? Or did you buy a wheel and remove them?
Andi.
-
Luigi_S
- Newbie

- Posts: 33
- Joined: Sat Jan 03, 2015 4:37 pm
Re: 108 refurb project - How i did it
Has anyone had a refurb without splitting? Been quoted £120 for all 4- our garage removes the tyres off there wheels so I've seen a lot of there work and on the most part it's great, but they dont get involved in splitting wheels, am I better off spending more and getting the split?
- AnttiO
- Member

- Posts: 292
- Joined: Mon Dec 15, 2014 11:09 am
Re: 108 refurb project - How i did it
Hi
I just bought set of 108, needs reconditioning. Project wheels as we say.
Here is couple of pictures about set
http://aor.kuvat.fi/kuvat/Z4+E85+Roadster/108/
I have been thinking this kind of process, please correct me if something is wrong or stupid. Wheels are already in parts, 80 bolts, 4 alloys and 4 stars.
- First through washing
- Then i take wheels to the tyreshop and they check if rims are round and okay.
- I take stars to the professional car paintshop, they estimated about 70-80£ for 4 star repainting (BMW Felgensilber 144 metallic+lacquer)
- If alloys need painting too, i prep those and also take to the paintshop. Same colour + lacquer (only visible side, behind spokes).
- I am still thinking, lips polished or just painted with silver + lacquer.. So basicly, maybe i will get whole wheels painted+stars too with that bmw original colour. It will be not the cheapest option ..
Or.. lips polished + lacquer?
- I assembly wheels using loctite threadlocker.. what is torque for bolts?
What you say or recommend?
-
E46 325i M-Sport II Mysticblau 2003 http://tinyurl.com/qhsjrop
E85 Z4 2.5i Roadster Maledivenblau II 2004 http://tinyurl.com/qyqa7lb
E85 Z4 2.5i Roadster Maledivenblau II 2004 http://tinyurl.com/qyqa7lb
-
Sprint
- Member

- Posts: 104
- Joined: Sun Jun 08, 2014 9:17 am
- Location: Maidstone
Re: 108 refurb project - How i did it
Don't forget centres are different for fronts and rears.as other comments bolts can be a pig to remove be prepared for grief 
2005 2.0 Z4 bright red ZHP 108's,M sport leather,aux in.
- AnttiO
- Member

- Posts: 292
- Joined: Mon Dec 15, 2014 11:09 am
Re: 108 refurb project - How i did it
Hi
Bolts are already removed
Currently i dont have wheels, i am waiting next week those arrive. Photos which i have, those are from seller.
I update next week when have wheels and those are cleaned.
I have some more questions for this thread:
1. If i decide to paint complete wheels , do i have to protect that contact area where star meets the alloy itself , so there should be not any paint?
2. Is there any trick how i can prep those bolt holes for paintwork, get old paint off..
3. Should i put some silicone or sealang between stars and wheels to avoid water corrosion damage in the future?
E46 325i M-Sport II Mysticblau 2003 http://tinyurl.com/qhsjrop
E85 Z4 2.5i Roadster Maledivenblau II 2004 http://tinyurl.com/qyqa7lb
E85 Z4 2.5i Roadster Maledivenblau II 2004 http://tinyurl.com/qyqa7lb


