
Not joined yet? Register for free and enjoy features such as alerts, private messaging and viewing latest posts and topics.
E85 3.0SI - new project thread
-
enuff_zed

- Lifer

- Posts: 14901
- Joined: Wed Oct 26, 2016 11:05 am
- Location: Attleborough, Norfolk
E85 3.0SI - new project thread
Deleted
Last edited by enuff_zed on Sun Apr 21, 2024 11:53 am, edited 1 time in total.
HQ of 'Norfolk Zed Rescue'.
Always happy to help if I can.
If the forum helped you, why not help the forum back. Thats the Z4 way!

Always happy to help if I can.
If the forum helped you, why not help the forum back. Thats the Z4 way!
-
JPB
- Member

- Posts: 154
- Joined: Tue Sep 12, 2017 4:41 pm
- Contact:
E85 3.0SI - new project thread
I'd much prefer him to smash his face on the hard dash...
Jase
Z4 E85 3.0SI 2006, Sapphire Black.
Previously:
Z4 E85 3.0i 2003, Sterling Grey.
Z4 E85 3.0SI 2006, Sapphire Black.
Previously:
Z4 E85 3.0i 2003, Sterling Grey.
-
ryushe

- Member
- Posts: 128
- Joined: Sun Apr 11, 2010 3:57 am
- Location: Rotterdam, NL
E85 3.0SI - new project thread
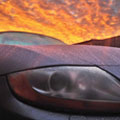
Thanks, never done a headlight restore, but I guess this coming weekend is as good a time as any. Ordered!
'06 E85 Z4 3.0si 6 speed manual - Black metallic w/ champagne interior
Prev BMWs: '04 E85 Z4 Individual 2.5i • '04 E85 Z4 3.0i • '04 E46 M3 • '04 E61 535d • '86 E28 525i • '87 E28 528e
Prev BMWs: '04 E85 Z4 Individual 2.5i • '04 E85 Z4 3.0i • '04 E46 M3 • '04 E61 535d • '86 E28 525i • '87 E28 528e
-
JPB
- Member
- Posts: 154
- Joined: Tue Sep 12, 2017 4:41 pm
- Contact:
E85 3.0SI - new project thread
This morning's upgrade: Original gear knob to ZHP M gear knob. Interestingly, as well as being shorter, the ZHP gear knob (genuine) is 94.3g heavier.
Top tip: It's a pull/push fit. If you're struggling to get it off, open the roof (if you have an E85) and stand above it with a foot on each seat. Much easier to put energy into it.
I love how the ZHP gear knob M badge now matches the M steering wheel (I know the 3.0si is not an M, before you point it out!).
- WhatsApp Image 2024-04-23 at 11.09.55.jpeg (195.64 KiB) Viewed 310 times
- WhatsApp Image 2024-04-23 at 11.10.05 (1).jpeg (109.9 KiB) Viewed 310 times
- WhatsApp Image 2024-04-23 at 11.10.05.jpeg (195.65 KiB) Viewed 310 times
I love how the ZHP gear knob M badge now matches the M steering wheel (I know the 3.0si is not an M, before you point it out!).
Jase
Z4 E85 3.0SI 2006, Sapphire Black.
Previously:
Z4 E85 3.0i 2003, Sterling Grey.
Z4 E85 3.0SI 2006, Sapphire Black.
Previously:
Z4 E85 3.0i 2003, Sterling Grey.
-
pvr

- Legend

- Posts: 26304
- Joined: Fri Jun 15, 2007 12:27 pm
- Location: South East UK
E85 3.0SI - new project thread
Just be careful standing on the seats though as those occupency sensors are not keen on that. I just sit on the centre console and pull it off that way to avoid touching the seats
Current:
911-50 Black - unique spec
X5M - 575 hp of fun in a V8
Abarth 595 Comp.
Golf Clipper - collectors item
Z4 3.0si Black Sapphire
VW ID.3
Previous:
Z4M Silver Grey - non flimper spec (gone to Bing)
Z4 3.0 Toledo
911-50 Black - unique spec
X5M - 575 hp of fun in a V8
Abarth 595 Comp.
Golf Clipper - collectors item
Z4 3.0si Black Sapphire
VW ID.3
Previous:
Z4M Silver Grey - non flimper spec (gone to Bing)
Z4 3.0 Toledo
-
coldel
- Member

- Posts: 660
- Joined: Wed Feb 26, 2020 1:52 pm
E85 3.0SI - new project thread
I remember trying to change mine, I tried all those tricks, I didnt stand on the seats as described to avoid damaging anything. I was also keen to avoid the well documented issue of 'punching yourself in the face with a gear knob' scenario 
I gave up in the end, and when my dad was next over (50 years a car mechanic) he sat in the passenger seat and one handed pulled it off in about 2 seconds. I reckon I loosened it....
I gave up in the end, and when my dad was next over (50 years a car mechanic) he sat in the passenger seat and one handed pulled it off in about 2 seconds. I reckon I loosened it....
Currently BMW Z4 E85 3.0si
Previously
BMW Z4 E86 3.0si
Vauxhall VX220 Turbo
Toyota Celica ST205 GT4
Nissan R33 Skyline GTST
Vauxhall VX220 NA
Nissan 350z
Previously
BMW Z4 E86 3.0si
Vauxhall VX220 Turbo
Toyota Celica ST205 GT4
Nissan R33 Skyline GTST
Vauxhall VX220 NA
Nissan 350z
-
Joycey

- Member
- Posts: 684
- Joined: Wed Feb 24, 2016 4:28 pm
- Location: Basingstoke
E85 3.0SI - new project thread
Keep these updates coming Jase.
What's next on your list......exhaust, what a good idea!

What's next on your list......exhaust, what a good idea!

-
JPB
- Member
- Posts: 154
- Joined: Tue Sep 12, 2017 4:41 pm
- Contact:
E85 3.0SI - new project thread
Good tip, thanks pvr! I didn't have any problems and was only on there for a second or two, but I can imagine others might run into issues based on what you're saying.
Jase
Z4 E85 3.0SI 2006, Sapphire Black.
Previously:
Z4 E85 3.0i 2003, Sterling Grey.
Z4 E85 3.0SI 2006, Sapphire Black.
Previously:
Z4 E85 3.0i 2003, Sterling Grey.
-
JPB
- Member
- Posts: 154
- Joined: Tue Sep 12, 2017 4:41 pm
- Contact:
E85 3.0SI - new project thread
Thanks Lee! Yes exhaust is the next big one. I've been waiting to hear back from a couple of places, one of which is messing me around and the other hasn't replied to me yet. Starting to wonder whether an off-the-shelf install might be better if the exhaust places are going to go awol. I really would like a remote-controlled valve unit in there for sure.
Jase
Z4 E85 3.0SI 2006, Sapphire Black.
Previously:
Z4 E85 3.0i 2003, Sterling Grey.
Z4 E85 3.0SI 2006, Sapphire Black.
Previously:
Z4 E85 3.0i 2003, Sterling Grey.
-
JPB
- Member
- Posts: 154
- Joined: Tue Sep 12, 2017 4:41 pm
- Contact:
E85 3.0SI - new project thread
Today's additional upgrades:
Cupholders (naturally)
Bluetooth adapter with 3.5mm microphone input. I bought this from Amazon UK: https://www.amazon.co.uk/dp/B0BB2D4LRJ? ... ct_details
I recommend covering the gear stick and dashboard housing with towels to avoid scratches. I also noticed that I wasn't getting an 'Aux' option when pressing the mode button initially. I then found it's the white plug that needs to be removed from the original BMW wiring harness and placed directly into the back of the new harness that fits directly into the head unit (there are no through-connections on the adapter).
I then ran the wiring through the dashboard, up the 'A' pillar on the drivers side and into the overhead light housing. Using some 3M VHB tape I secured the microphone, with attached windshield, to the housing, aiming slightly downward to get a good clear pickup position.
To get the light out I used a plastic trim removal tool and released two tabs at the front of the light. Then popped it out, sliding towards the drivers side (there's a ridged lip on the housing to the left, which needs to go back in first - sliding to the passengers side, before pressing into place).
The finished head unit then looks identical to stock when refitted and has the bonus of clear hands free calls plus the automatic volume control which increases when driving at faster speeds and decreases at lower speeds, something that I did not have when experimenting with a non-stock stereo head unit.
When testing it appears the microphone is nice and clear for calls and others can hear me fine. It's good when the top is down, but at speeds higher than 40mph callers report a lot of background noise, making it harder to hear my voice. Therefore, if you really want a good phone conversation when traveling I would recommend either putting the roof up or shouting quite loudly (like you would when driving with someone else in the car with the roof down).
Overall, these are all valuable, inexpensive mods that will make my life my easier but keep the car looking and feeling stock.
Cupholders (naturally)
- Left and right cupholders fixed into the car, (yes, they work!)
- WhatsApp Image 2024-04-23 at 18.36.21.jpeg (154 KiB) Viewed 224 times
- (I've put an image in here because links will go dead over time)
- Screenshot 2024-04-23 at 18.23.06.png (270.88 KiB) Viewed 224 times
- The Business CD headunit out and new bluetooth adapter wiring loom installed. Note the black, rectangular bluetooth transceiver on the left and 3.5mm jack connection in the centre, with wind-shielded microphone on the right.
- 1.jpeg (150.93 KiB) Viewed 224 times
- The white plug, when plugged into the head unit directly will give the Business CD the 'Aux' option when the mode button is pressed repeatedly.
- 5.jpg (129.07 KiB) Viewed 224 times
- The microphone secured into position.
- 2.jpeg (116.33 KiB) Viewed 224 times
- The overhead light back in its original position with microphone in place.
- 3.jpeg (66.26 KiB) Viewed 224 times
- The head unit back in place looks identical to stock.
- 4.jpeg (159.68 KiB) Viewed 224 times
Overall, these are all valuable, inexpensive mods that will make my life my easier but keep the car looking and feeling stock.
Jase
Z4 E85 3.0SI 2006, Sapphire Black.
Previously:
Z4 E85 3.0i 2003, Sterling Grey.
Z4 E85 3.0SI 2006, Sapphire Black.
Previously:
Z4 E85 3.0i 2003, Sterling Grey.
-
Mr Tidy
- Legend
- Posts: 23924
- Joined: Wed Jul 02, 2014 12:18 pm
- Location: North West Surrey
E85 3.0SI - new project thread
The ZHP is a massive improvement over the OE fitting.JPB wrote: ↑Tue Apr 23, 2024 11:12 am This morning's upgrade: Original gear knob to ZHP M gear knob. Interestingly, as well as being shorter, the ZHP gear knob (genuine) is 94.3g heavier.
Top tip: It's a pull/push fit. If you're struggling to get it off, open the roof (if you have an E85) and stand above it with a foot on each seat. Much easier to put energy into it.
I love how the ZHP gear knob M badge now matches the M steering wheel (I know the 3.0si is not an M, before you point it out!).
I've swapped a few times in my Coupe without any problem, but a former Moderator managed to crack the screen on his E85!
If BMW saw fit to put M badges on MV2 wheels and the steering wheels on Sport models why not have one on the gear-knob too? The ZHP was standard fit on E46 3 Series Sport models anyway.
Coupes because stunning!
Current - Silver Grey MC, Imola Red heated Nappa & carbon trim. Aeros, H & R Coil-overs, 224s, OE Strut brace, Nav, cup-holders, DSP Hi-Fi, pdc, cruise, MFSW, no CDV! E90 330i daily
Gone - Montego Blue
Gone - Ruby Black
Current - Silver Grey MC, Imola Red heated Nappa & carbon trim. Aeros, H & R Coil-overs, 224s, OE Strut brace, Nav, cup-holders, DSP Hi-Fi, pdc, cruise, MFSW, no CDV! E90 330i daily
Gone - Montego Blue
Gone - Ruby Black
-
JPB
- Member
- Posts: 154
- Joined: Tue Sep 12, 2017 4:41 pm
- Contact:
E85 3.0SI - new project thread
Today's upgrade: Wind deflectors and a phone mount
The wind deflectors look absolutely brilliant compared to the old OEM leather strap-on style deflector (which was still much better than driving without one at all) because you can see the rolle hoops in all their shiny, galvanised style glory. Plus, if I want to drive with the top up but have a clearer view out the back, all I have to do is take it out and fit it to the deflector holder on the underside of the boot (trunk) lid.
After taking it out for a spin I noticed a significant improvement on wind deflection. My long hair did not spin up from the back as before and I even felt less turbulence around my face. It was noticeably warmer and I was able to hold a conversation at a lower level than before. Overall, I'd say around 30% improvement in wind deflection, which I think is in part due to the fact the centre mesh sits higher up the roll hoops and the triangle deflectors inside the hoops that have a plastic backing to the mesh.
Here's how I did it (without breaking a single clip):
1. Moved the chairs forward as far as possible (including lift up and lean forward). Then used a wide plastic trim tool to carefully and slowly prize open between the two roll hoop covers, easing them all the way around as I went, starting with the forward-facing panel first.
2. Placed the triangle deflector inside the roll hoop by slowly pressing the clipping points into place (move it left to right or up and down as you clip each one in to avoid breaking any, there is some give in the position.
3. Mark up and drill holes on the rear plastic sections for the middle deflector brackets (making them identical on each side, I measured with a digital caliper and double-checked placements with the brackets before drilling).
4. Fit the hoop covers (silver) back onto the hoops, starting by seating them in their rubber grooved feet first, back hoop cover first. Then applying careful but firm pressure all around until the clips 'click' into place.
5. Now attach the brackets with screws because they locate through the hoop covers and into the black plastic interior covers.
6. Place the rubber screw grommets inside to hide the screw heads.
7. Carefully lower the middle deflector into position from the top down, ensuring it's sliding into place on both sides symmetrically. Keep going until you hear a click.
Proof I did not break a single clip using this method:
Phone holder:
I used a phone holder from amazon which had a 3M VHB tape sticker underneath. Upon reading 3M's instructions on applying this kind of tape, I took the route of allowing it 72 hours (3 days) to cure before using it.
3M instructions: After application, the bond strength will increase as the adhesive flows onto the surface. At room temperature, approximately 50% of the ultimate strength will be achieved after 20 minutes, 90% after 24 hours and 100% after 72 hours. In some cases, bond strength can be increased and ultimate bond strength can be achieved more quickly by exposure of the bond to elevated temperatures (e.g. 150°F [66°C] for 1 hour).
I've been testing it at all kinds of speeds for many hours now and while there is slight wobble of the phone (very slight and only due to the holder's design) there is no noticeable sign of movement from the dashboard. As much as I didn't want to place anything on my beautiful clear dashboard it is very helpful for navigation and receiving phone calls and keeps my phone out of the way of vents and does not require drilling in any form. Plus the VHB tape can easily be removed and the dashboard cleaned without any damage (I already had to redo it once because I had weighted the phone holder down overnight thinking this would give better adhesion but it slipped off in the night and caused the mount to lift shortly after it was applied).
The wind deflectors look absolutely brilliant compared to the old OEM leather strap-on style deflector (which was still much better than driving without one at all) because you can see the rolle hoops in all their shiny, galvanised style glory. Plus, if I want to drive with the top up but have a clearer view out the back, all I have to do is take it out and fit it to the deflector holder on the underside of the boot (trunk) lid.
- Wind-1.jpeg (137.9 KiB) Viewed 116 times
- Wind-2a.jpeg (119.73 KiB) Viewed 116 times
- Wind-3.jpeg (130.12 KiB) Viewed 116 times
Here's how I did it (without breaking a single clip):
1. Moved the chairs forward as far as possible (including lift up and lean forward). Then used a wide plastic trim tool to carefully and slowly prize open between the two roll hoop covers, easing them all the way around as I went, starting with the forward-facing panel first.
- Wind-a.jpeg (105.4 KiB) Viewed 116 times
- Wind-b.jpeg (107.67 KiB) Viewed 116 times
- Wind-e.jpeg (152.27 KiB) Viewed 116 times
4. Fit the hoop covers (silver) back onto the hoops, starting by seating them in their rubber grooved feet first, back hoop cover first. Then applying careful but firm pressure all around until the clips 'click' into place.
- Wind-c.jpeg (114.13 KiB) Viewed 116 times
6. Place the rubber screw grommets inside to hide the screw heads.
7. Carefully lower the middle deflector into position from the top down, ensuring it's sliding into place on both sides symmetrically. Keep going until you hear a click.
Proof I did not break a single clip using this method:
- Wind-d.jpeg (168.47 KiB) Viewed 116 times
I used a phone holder from amazon which had a 3M VHB tape sticker underneath. Upon reading 3M's instructions on applying this kind of tape, I took the route of allowing it 72 hours (3 days) to cure before using it.
3M instructions: After application, the bond strength will increase as the adhesive flows onto the surface. At room temperature, approximately 50% of the ultimate strength will be achieved after 20 minutes, 90% after 24 hours and 100% after 72 hours. In some cases, bond strength can be increased and ultimate bond strength can be achieved more quickly by exposure of the bond to elevated temperatures (e.g. 150°F [66°C] for 1 hour).
- Phone-1.jpeg (156.56 KiB) Viewed 116 times
- Phone-2.jpeg (128.8 KiB) Viewed 116 times
Jase
Z4 E85 3.0SI 2006, Sapphire Black.
Previously:
Z4 E85 3.0i 2003, Sterling Grey.
Z4 E85 3.0SI 2006, Sapphire Black.
Previously:
Z4 E85 3.0i 2003, Sterling Grey.
-
coldel
- Member
- Posts: 660
- Joined: Wed Feb 26, 2020 1:52 pm
E85 3.0SI - new project thread
Good effort with the wind deflectors, mine came with those, so glad it did!
And I heard getting those hoops off is a pain, I want to do mine so I can paint them but the idea of breaking everything puts me off.
I bought one of these https://www.amazon.co.uk/gp/product/B08HNBHSQV they mount very solidly into the vent and I have run a wire to it so it always charges. I am sure you could do a better job of hiding the wire. Obviously make sure that vent is closed for airflow so you don't cook the phone
Currently BMW Z4 E85 3.0si
Previously
BMW Z4 E86 3.0si
Vauxhall VX220 Turbo
Toyota Celica ST205 GT4
Nissan R33 Skyline GTST
Vauxhall VX220 NA
Nissan 350z
Previously
BMW Z4 E86 3.0si
Vauxhall VX220 Turbo
Toyota Celica ST205 GT4
Nissan R33 Skyline GTST
Vauxhall VX220 NA
Nissan 350z
-
JPB
- Member
- Posts: 154
- Joined: Tue Sep 12, 2017 4:41 pm
- Contact:
E85 3.0SI - new project thread
Thanks Coldel! Yes so you should be fine if you use a wide trim removal tool and pry them off carefully, going around the hoops bit by bit.coldel wrote: ↑Mon Apr 29, 2024 11:05 am Good effort with the wind deflectors, mine came with those, so glad it did!
And I heard getting those hoops off is a pain, I want to do mine so I can paint them but the idea of breaking everything puts me off.
I bought one of these https://www.amazon.co.uk/gp/product/B08HNBHSQV they mount very solidly into the vent and I have run a wire to it so it always charges. I am sure you could do a better job of hiding the wire. Obviously make sure that vent is closed for airflow so you don't cook the phone
Thanks for the phone mount recommendation, I am tempted to upgrade it to a wireless charger but the bane of my life is the constant battle with where to put the cable as I like my cabin clean and tidy. I may have a think. For now, the mount I have is positioned so the phone does not obscure the vents which I like.
Jase
Z4 E85 3.0SI 2006, Sapphire Black.
Previously:
Z4 E85 3.0i 2003, Sterling Grey.
Z4 E85 3.0SI 2006, Sapphire Black.
Previously:
Z4 E85 3.0i 2003, Sterling Grey.
-
JPB
- Member
- Posts: 154
- Joined: Tue Sep 12, 2017 4:41 pm
- Contact:
E85 3.0SI - new project thread
Today's upgrades: New windscreen and seat belt covers.
First time I've had a new windscreen and let me tell you, it's so clean, shiny and clear that it's like I have HD eyes. I love it! Tempted to do this on every new, used car I buy.
M badge seat belt covers. I like seat belt covers because I am quite tall and when setting the electric heated seats down as low as they go I find the belt rides up my neck. Nice and comfy now, and I like the m badge nodding to the ZHP gear knob and M steering wheel. Yes, I know, it is not a Z4M! 
First time I've had a new windscreen and let me tell you, it's so clean, shiny and clear that it's like I have HD eyes. I love it! Tempted to do this on every new, used car I buy.
- PXL_20240429_124106047.jpg (147.05 KiB) Viewed 46 times
- PXL_20240429_112417554.jpg (126.62 KiB) Viewed 46 times
- Seat belt cover
- PXL_20240429_124134835.jpg (116.68 KiB) Viewed 46 times
Jase
Z4 E85 3.0SI 2006, Sapphire Black.
Previously:
Z4 E85 3.0i 2003, Sterling Grey.
Z4 E85 3.0SI 2006, Sapphire Black.
Previously:
Z4 E85 3.0i 2003, Sterling Grey.