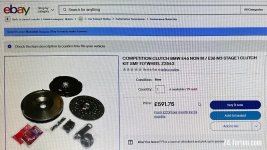
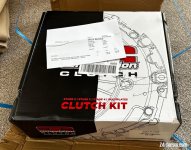
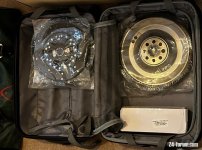
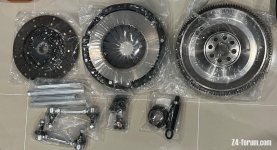
As promised here is my full write-up on how the clutch install went!
I had help from my girlfriend's dad (an ex-mechanic). I like to tinker but this was my first clutch replacement!
We started out in high spirits getting the car up onto jacks and started removing the centre supporting plate with the centre exhaust mounts.
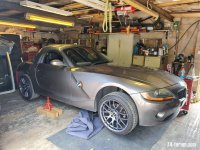
The next step was to remove the exhaust. This was no easy task, my exhaust studs were completely corroded and I definitely had an exhaust leak! As the studs were so far gone we used an angle grinder to remove the studs and allow us to remove the exhaust on the gearbox side, then undo the remaining 13mm bolts for the muffler hangers. (Was an easy job for me as I did a muffler delete a few months prior so I had a lot of access).
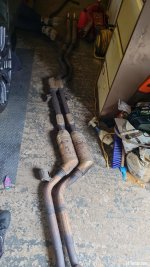
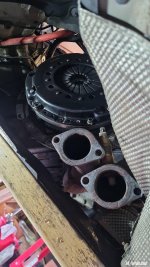
The next step was removing those exhaust studs! They are pressed in from the factory (Don't even bother with a hammer they won't budge). In hindsight, I should have maybe tried a bearing pusher or some sort of pushing tool. Instead, I went straight to the drill. Seemed like a good idea at first, however, 4 hours later and £100 was spent on titanium and cobalt drill bits. Going from 2mm all the way to 8mm~ and snapping plenty of bits on the way, the 4 studs remained and my motivation definitely did not. I took a break did some searching and decided heat would be a much better solution. We heated it up and used an air hammer we borrowed from work and bam! 30 minutes and all 4 studs were out. So if any of you have access to an air hammer, I would definitely suggest not bothering with a drill.
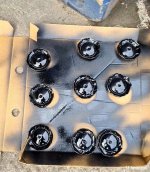
Next, we ripped out all of the heatshields which had all corroded around where they fix to the chassis. This is due to galvanic corrosion (caused by aluminium to stainless steel). A good fix for this is cutting the bottoms off Coke cans and drilling a small hole underneath, you can use these as a washer. I even painted them black, as they are aluminium they will not continue to corrode the heatshield and will allow you to keep using them.
Next was the prop shaft. This was a piece of cake. 3 bolts on the gearbox side and 4 torx bolts on the diff side. Make sure to mark the prop when removing it with a paint pen across both in case you separate the shaft. This is important as it is balanced and you don't want your car making funny vibration noises once everything is back together!
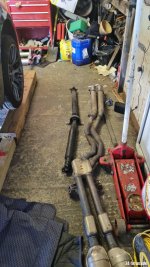
Once the propshaft is removed it's onto the gearbox! All of the gearbox bolts were torx bits. When removing the box there should be little to no resistance so if you have it separated but it's not coming out. There is a good chance you haven't removed all the bolts. In our case, this was a small bolt that holds the clip for the gearbox cables located on the middle right side of the gearbox.
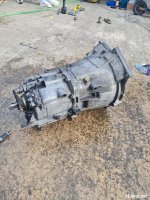
Now time to remove the old clutch and flywheel! However, to my horror, the gearbox I removed was 26 spline and the clutch I had was 10! So I did what any logical person would do in that situation... and drive 4 hours to London and buy a new gearbox with the correct splines (It was only £100 to be fair). Hear me out first, there are little to no options available for the 26-spline box and even though they are the same just different splines it made so much more sense to change the box as it meant I had much more after-market support from 3 series and 5 series models of the generation! This is also a great time to do a 5 to 6-speed upgrade! Unfortunately, I was unable to source one in time (It's my daily).
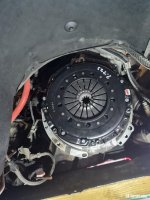
Now repeat everything in reverse order installing all your new parts and you're done! When you know what you're doing it should only take 2 days, but in our case, with all the issues we came across and us both working in between this it took 5 plus an additional day and a half to fix some mistakes (I'll discuss that in a second).
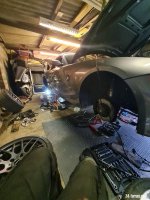
The mistakes -
Starting with the first mistake bleeding the clutch, I wanted to do a flush as well as do the famous CDV delete (Clutch delay valve). The way the bleed nipple is positioned in the slave cylinder means air gets trapped in the line if it is mounted in the gearbox. The easiest method to resolve this is to remove the slave cylinder point the bleed nipple to the sky and push the push rod all the way in with your hand. Once compressed open the bleed nipple, close the nipple and release the push rod. Repeat this a few times and you will feel it get much harder to compress.
My next mistake was the friction disc installation, the instructions didn't give a clear indication as to which way to install the disc. And honestly, I didn't think it mattered (It did!). This caused clutch disengagement issues which at first I believed to be me not bleeding the slave cylinder fully. Point the sticker to the gearbox side (It must still be visible after installation).
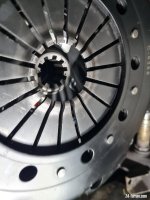
The throwout bearing was my next mistake. I installed this wrong, the flanges are there to make contact with the clutch fork and there are flat parts that stop the bearing from rotating inside the clutch fork. I installed this sideways with the flanges pointing horizontally rather than vertically. This may have also contributed to my clutch disengagement issues.
And last but definitely not least. I chose to not replace the gearbox seals despite having them as they seemed to be in good condition. I could not have been more wrong, the bell housing filled with fresh gearbox oil and poured out onto the floor only after getting to temperature. Luckily BMW designed holes in the bell housing to funnel an input shaft seal leak straight out onto the floor avoiding the friction disc!
Many mistakes were made, I just hope you can all learn from me in the future!
Recommendations -
Use an air hammer and heat if you can for the exhaust studs!
Replace the input and output seals as well as the shifter selector seal. This is a thin wall 30mm I saw an American on youtube say 1-3/16 sockets were better as they fit standard. However, they are impossible to find in the UK so I gave up and paid extra for a set of thin-wall deep sockets. Use a wood screw and screw it into the seal to remove it.
Definitely replace your gearbox oil! My box only had 600ml left! (It should be 1.1L)
While the flywheel is out, it's a good idea to replace your rear main seal (mine was leaking).
While removing the exhaust I found leaving the two nuts holding the centre exhaust mount connected to the centre plate on helped a lot with reinstallation of the exhaust.
Coke cans for washers to repair my heatshields were a lifesaver and completely stopped the rattle coming from under the car!
The conversion to single mass will introduce more vibration to the gearbox and clutch components make sure you loctite everything! Also, consider upgrading your gearbox mounts to Powerflex ones. While I was doing that I upgraded my shifter linkage bushes to Powerflex also. A huge difference!
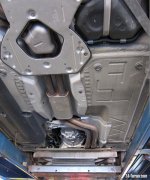
Here is an image I found on the forum to help with the reinstallation of the heatshields in case you forget where they go like me :headbang:
Review -
Despite my silly beginner mistakes, the clutch is great! It shifts lovely and feels much more responsive than my old clutch. Now being single mass and a higher bite friction disc it takes a bit of learning to drive it well. But after 30 minutes of driving and I can say I'm very happy I made the swap to single mass.
The chatter really isn't that bad especially as I upgraded the gearbox mounts to Powerflex fast road mounts!
I will be going back underneath the car to finish off a few things for peace of mind, these are the output seal (waiting on my thin-wall 30mm), shifter output seal, slave and master cylinder, braided clutch flexi hose and a CDV delete (I reinstalled while bleeding as I thought this may have been causing issues, it didn't).
I'm roughly 150 miles into the 500-mile break-in and every time I get in the car the shifts get smoother and smoother. Very happy with this upgrade!

