>
You are using an out of date browser. It may not display this or other websites correctly.
You should upgrade or use an alternative browser.
You should upgrade or use an alternative browser.
What have you done to your car today?
- Thread starter Buckz
- Start date
1000rr said:Scosche wireless magnetic mount fitted, I hate wires so this does the job great.
Bit of engineering to make a bracket to go on underside if the dash and some plumbing in with wires, but all neat and tidy...
881A32D0-E511-46C4-8574-DB32BFE5ADFB.jpeg
1B276FAF-FD74-43E1-8A8E-A9FFC99E78EA.jpeg
35EC68B2-43BD-448C-8AB4-C23C8351B068.jpeg
That looks great. I'm not a fan of wires as well, but that looks properly tidy, any more info on what you did? And a link to the mount? Thanks in advance.
CryptoWhale
Member
True-Blue said:Collected a minty-mint set of original 437M’s in Ferric Grey for my E89 last night...
Spent around 3hrs this morning washing, treating with fallout remover, alcohol clean to remove any residue followed by a coating of Gtechniq C5..... currently curing 8)
EB05EA3B-4736-42D0-B425-B3B2F7E77C58.jpeg
No evidence anything ever happened on the kitchen table,,,,, :rofl:
F8A7526E-7153-40EB-9637-ED6BF84D4B2D.jpeg
Looking good, I love the colour. Not so keen on the dual tones ones I posted
Argyll Andy said:True-Blue said:Collected a minty-mint set of original 437M’s in Ferric Grey for my E89 last night...
Spent around 3hrs this morning washing, treating with fallout remover, alcohol clean to remove any residue followed by a coating of Gtechniq C5..... currently curing 8)
EB05EA3B-4736-42D0-B425-B3B2F7E77C58.jpeg
No evidence anything ever happened on the kitchen table,,,,, :rofl:
F8A7526E-7153-40EB-9637-ED6BF84D4B2D.jpeg
Looking good, I love the colour. Not so keen on the dual tones ones I posted
Cheers, yes thanks for posting that photo, I prefer this finish too... nice contrast between the diamond cut and ferric gray, but still a relatively light coloured wheel overall
idej_z4 said:1000rr said:Scosche wireless magnetic mount fitted, I hate wires so this does the job great.
Bit of engineering to make a bracket to go on underside if the dash and some plumbing in with wires, but all neat and tidy...
881A32D0-E511-46C4-8574-DB32BFE5ADFB.jpeg
1B276FAF-FD74-43E1-8A8E-A9FFC99E78EA.jpeg
35EC68B2-43BD-448C-8AB4-C23C8351B068.jpeg
That looks great. I'm not a fan of wires as well, but that looks properly tidy, any more info on what you did? And a link to the mount? Thanks in advance.
No problem. Bought an L angled bracket from B&Q, and bent it over a bit more to have the charger face straight again, superglued it to the panel ( panel removed first)
Drilled a few holes in the panel to thread the usb cable through to a charger that was wired in and tucked inside the panel.
Then, a spare scosche adhesive metal plate was glued to the front of the bracket.
3m tape on top of that to affix the charger.
Job done, and everything out of sight. The Scosche wireless charger is magnetic, so just place phone on and it snaps on, the magnets are super strong ( as long as you fix the metal plates in the right place (there is a template in the box) and it charges through the case too...wire free!. Great for charging as Sat nav on the phone saps the battery, especially on a longer journey, you won’t need the suction part of it, only the charger and lead.
Bracket : https://www.diy.com/departments/abru-brown-powder-coated-steel-light-duty-angle-bracket-l-30mm/251055_BQ.prd
3m tape: https://www.diy.com/departments/skip19b-no-more-nails-on-a-roll-exterior/181965_BQ.prd?rrec=true
Scosche charger: https://www.halfords.com/technology/mobile-phone-accessories/car-phone-holders/scosche-wireless-charging-magnetic-mount-713390.html
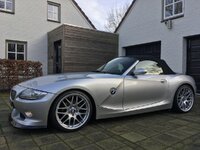
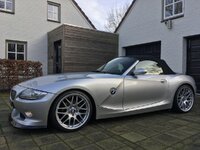
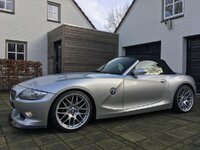
Washed, machine polished and silicone/ ceramic coating applied.
Gaptech fitted. Was a bit fiddly, but have to say it is a fantastic addition!
Gaptech fitted. Was a bit fiddly, but have to say it is a fantastic addition!
1000rr said:idej_z4 said:1000rr said:Scosche wireless magnetic mount fitted, I hate wires so this does the job great.
Bit of engineering to make a bracket to go on underside if the dash and some plumbing in with wires, but all neat and tidy...
881A32D0-E511-46C4-8574-DB32BFE5ADFB.jpeg
1B276FAF-FD74-43E1-8A8E-A9FFC99E78EA.jpeg
35EC68B2-43BD-448C-8AB4-C23C8351B068.jpeg
That looks great. I'm not a fan of wires as well, but that looks properly tidy, any more info on what you did? And a link to the mount? Thanks in advance.
No problem. Bought an L angled bracket from B&Q, and bent it over a bit more to have the charger face straight again, superglued it to the panel ( panel removed first)
Drilled a few holes in the panel to thread the usb cable through to a charger that was wired in and tucked inside the panel.
Then, a spare scosche adhesive metal plate was glued to the front of the bracket.
3m tape on top of that to affix the charger.
Job done, and everything out of sight. The Scosche wireless charger is magnetic, so just place phone on and it snaps on, the magnets are super strong ( as long as you fix the metal plates in the right place (there is a template in the box) and it charges through the case too...wire free!. Great for charging as Sat nav on the phone saps the battery, especially on a longer journey, you won’t need the suction part of it, only the charger and lead.
Bracket : https://www.diy.com/departments/abru-brown-powder-coated-steel-light-duty-angle-bracket-l-30mm/251055_BQ.prd
3m tape: https://www.diy.com/departments/skip19b-no-more-nails-on-a-roll-exterior/181965_BQ.prd?rrec=true
Scosche charger: https://www.halfords.com/technology/mobile-phone-accessories/car-phone-holders/scosche-wireless-charging-magnetic-mount-713390.html
Thanks for the write-up, much appreciated!
JamieIsf said:sjj84 said:JamieIsf said:Not 100% sure as my screen wasn’t going up or down, but still working. Here’s the casing where it sits, actually two pieces.
Interesting, thanks. So the raise lower motor and mechanism is in the screen unit rather than the housing?
Sort of, the motor is bolted to the side of the piece.
The only issue is getting the cable off the piece as the wire is put through the hole on the side. I had to make a slight cut to pull it through. If you don’t need the display, you could cut the cables, but I thought better of it this time.
Do you reckon there'd be enough room to remove the screen and fit something else into the moving housing to keep the oem look?
Do any other models have a folding screen like the z4? I'd like to find a non working one to take apart but z4 parts aren't exactly common.
sjj84 said:JamieIsf said:sjj84 said:Interesting, thanks. So the raise lower motor and mechanism is in the screen unit rather than the housing?
Sort of, the motor is bolted to the side of the piece.
The only issue is getting the cable off the piece as the wire is put through the hole on the side. I had to make a slight cut to pull it through. If you don’t need the display, you could cut the cables, but I thought better of it this time.
Do you reckon there'd be enough room to remove the screen and fit something else into the moving housing to keep the oem look?
Do any other models have a folding screen like the z4? I'd like to find a non working one to take apart but z4 parts aren't exactly common.
My plan is to fit a charging deck for two phones using the existing housing, so i dont need to use a phone holder. Will then hard wire the powe in from the fuse box. I'm planning to use the existing housing for this, so yes, I'd imagine you'd have room for what you'd like to do. Drop me a PM if you have any questions, I may miss on this large thread.
Can you send a link, I'm a tad interested in this...Mau said:
HU51A_FU said:Can you send a link, I'm a tad interested in this...Mau said:
Ditto, presuming will fit standard bumper.
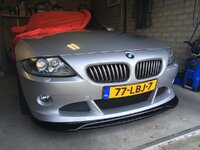
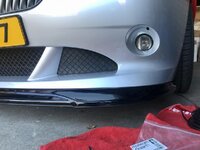
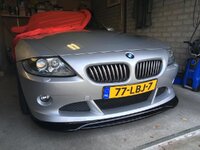
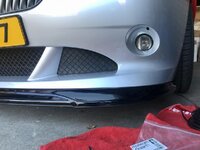
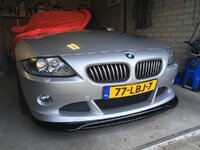
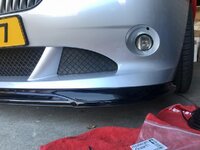
Sure, but do you mean for the cup spoiler or for the rubber stripping? (I can do for both of course) For the splitter / cup spoiler: that will ONLY fit Aero bumpers. That is because Aero bumpers have two additional pieces of plastic at the corners and this splitter is shaped around these.
For the Cup Spoiler.Mau said:Sure, but do you mean for the cup spoiler or for the rubber stripping? (I can do for both of course)
Sure, no problem: here: https://www.ebay.co.uk/itm/Cup-Spoi...e=STRK:MEBIDX:IT&_trksid=p2057872.m2749.l2649 it is.
However, as per the above, will ONLY fit Aero bumpers.
CSR does offer splitters for other bumper varieties however, such as this one: https://www.ebay.co.uk/itm/CSR-Cups...885422?hash=item41c939d7ae:g:t34AAOSwzrBap5B9.
However, as per the above, will ONLY fit Aero bumpers.
CSR does offer splitters for other bumper varieties however, such as this one: https://www.ebay.co.uk/itm/CSR-Cups...885422?hash=item41c939d7ae:g:t34AAOSwzrBap5B9.


